
Landscaping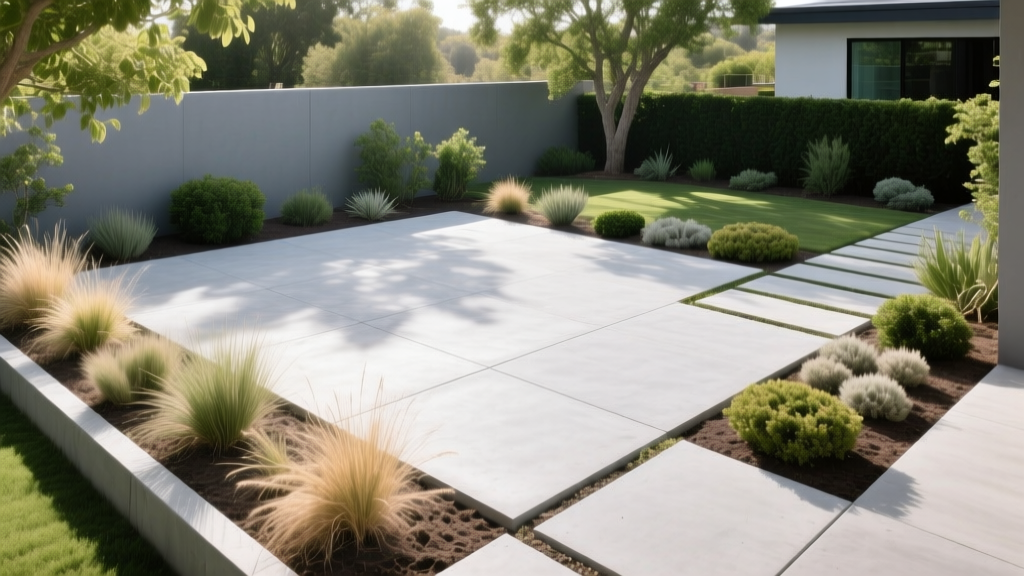
Concrete Patio Installation: Establishing Perimeter Plantings
When homeowners plan a concrete patio installation, the focus is almost entirely on the hardscape: the stamping patterns, the aggregate finishes, and the structural integrity of the pour. However, the true test of a landscape's longevity lies in what happens at the seam where the concrete meets the soil. Heavy machinery, altered drainage patterns, and the unique microclimate created by a concrete slab can devastate adjacent planting beds if not properly managed. This guide bridges the gap between hardscape construction and horticultural science, providing a definitive protocol for remediating soil and establishing resilient perimeter plantings around your new patio.
The Hidden Soil Toll of Heavy Machinery
During a standard concrete patio installation, skid-steer loaders, concrete trucks, and relentless foot traffic compress the surrounding topsoil. According to soil science research from the University of Minnesota Extension, heavy equipment can exert ground pressures exceeding 20 PSI. By contrast, most fine feeder roots require soil penetration resistance to remain below 8 PSI to expand and access oxygen.
When pore space is reduced by 50% or more, the soil becomes anaerobic. If you plant directly into this compacted zone without remediation, the plants will slowly suffocate, exhibiting stunted growth and chlorotic leaves within the first season.
Soil Remediation Protocol
- Broadforking: Do not use a rototiller on compacted clay near a new slab, as it can create a hardpan layer just below the tines. Instead, use a manual broadfork to fracture the soil down to 12 inches without inverting the soil profile.
- Amendment Integration: Top-dress the fractured soil with 2 inches of expanded shale or pumice, combined with 1 inch of high-quality compost. Expanded shale permanently increases macroporosity, preventing future compaction from settling.
- Gypsum Application: If the soil is heavy clay, apply calcium sulfate (gypsum) at a rate of 40 pounds per 1,000 square feet to help flocculate clay particles and improve water infiltration.
The Alkaline Leaching Problem
One of the most overlooked horticultural hazards of a concrete patio installation is the chemical runoff from curing concrete. Fresh concrete contains calcium hydroxide, giving it a highly alkaline pH between 12 and 13. As rain washes over the new patio during the first 6 to 12 months, this alkaline runoff leaches into the adjacent perimeter beds, drastically spiking the soil pH.
⚠️ Critical Warning for Acid-Loving Plants:
Do not plant Azaleas, Rhododendrons, Hydrangeas, or Japanese Maples within 5 feet of a newly poured concrete patio. The alkaline runoff will lock up iron and manganese in the soil, causing severe interveinal chlorosis and eventual plant death. Wait at least two full seasons for the concrete to fully carbonate and neutralize before introducing acid-loving species.
Instead, utilize the first two years to establish alkaline-tolerant perimeter plants. Excellent choices include Lavandula angustifolia (English Lavender), Perovskia atriplicifolia (Russian Sage), and Achillea millefolium (Yarrow), which thrive in higher pH environments.
Hardscape Microclimates: Heat and Drainage
Concrete is a massive thermal sink. During the summer, a standard gray concrete patio can reach surface temperatures 30°F to 40°F higher than the ambient air temperature. This radiant heat bakes the soil in the adjacent 24-inch zone, accelerating moisture evaporation and stressing shallow-rooted perennials.
| Measurement Zone | Peak Summer Temp (Ambient 90°F) | Soil Moisture Evaporation Rate |
|---|---|---|
| Patio Surface | 125°F - 135°F | N/A |
| Bed Soil (0-12 inches from edge) | 95°F - 105°F | High (Requires daily watering) |
| Bed Soil (24-36 inches from edge) | 80°F - 85°F | Moderate (Standard schedule) |
Managing Patio Runoff
Building codes require a concrete patio installation to have a minimum slope of 1/4 inch per foot to prevent water pooling. You must know exactly where that water is being directed. If the patio slopes toward your planting beds, you will create a localized bog. In these scenarios, integrate a shallow French drain or a dry creek bed lined with river rock at the patio's edge to disperse the kinetic energy of the runoff and prevent soil erosion around your newly established root balls.
Selecting and Establishing Perimeter Plants
When selecting plants for the 'hot zone' (the first 24 inches adjacent to the concrete), prioritize species with deep taproots, silver or pubescent (hairy) foliage that reflects sunlight, and high drought tolerance. The Missouri Botanical Garden Plant Finder is an excellent resource for filtering species by these specific cultural requirements.
Top Cultivars for the Concrete Hot Zone
- Agastache 'Blue Fortune': Highly tolerant of radiant heat and alkaline soils. Its deep root system anchors it well against patio wind-tunnel effects.
- Sedum 'Autumn Joy': A succulent perennial that stores water in its leaves, making it virtually immune to the rapid evaporation rates found near concrete edges.
- Muhlenbergia capillaris (Pink Muhly Grass): Provides a soft visual contrast to the hard concrete lines while withstanding severe heat and poor soil conditions.
90-Day Establishment Watering Protocol
Establishing plants next to a heat-radiating slab requires a modified watering schedule compared to plants in the open yard. Follow this strict 90-day protocol to ensure root survival:
- Days 1-14: Water deeply every 48 hours. Apply 1.5 gallons of water per square foot of root zone. Do not rely on sprinkler systems; hand-water or use drip emitters to ensure the water penetrates the compacted subsoil.
- Days 15-45: Reduce frequency to twice a week, but increase volume to encourage deep root growth away from the hot surface soil.
- Days 46-90: Transition to a standard 1-inch per week schedule, monitoring the soil moisture 4 inches below the surface with a digital soil probe before watering.
Mulching Rules and Protecting the Slab
Mulch is critical for insulating the soil from the concrete's radiant heat, but improper application can destroy your patio. Never pile mulch against the concrete edge. Moisture trapped between organic mulch and the concrete slab can lead to spalling (surface flaking) and provide a hidden highway for subterranean termites to bypass your home's chemical termite barrier.
The 2-Inch Rule: Maintain a strict 2-inch gap between your mulch bed and the concrete patio edge. Fill this gap with 3/4-inch crushed gravel, which allows water to pass through while preventing organic matter from trapping moisture against the hardscape.
Integrating Root Barriers
If your landscape design includes planting trees or large shrubs within 10 feet of the patio, you must install a physical root barrier during the planting phase. Tree roots seek the path of least resistance and the moisture that naturally accumulates beneath the patio base, which can lead to catastrophic slab heaving. Install DeepRoot UB 24-2 panels (24 inches deep, 2mm thick HDPE) vertically between the planting hole and the patio foundation. This specific model features patented guiding ribs that deflect roots downward rather than allowing them to wrap around the barrier, ensuring long-term structural integrity for both the tree and the concrete.
By treating the perimeter of your concrete patio installation as a specialized microclimate rather than an afterthought, you ensure that both the hardscape and the softscape thrive in harmony for decades to come.

