
Landscaping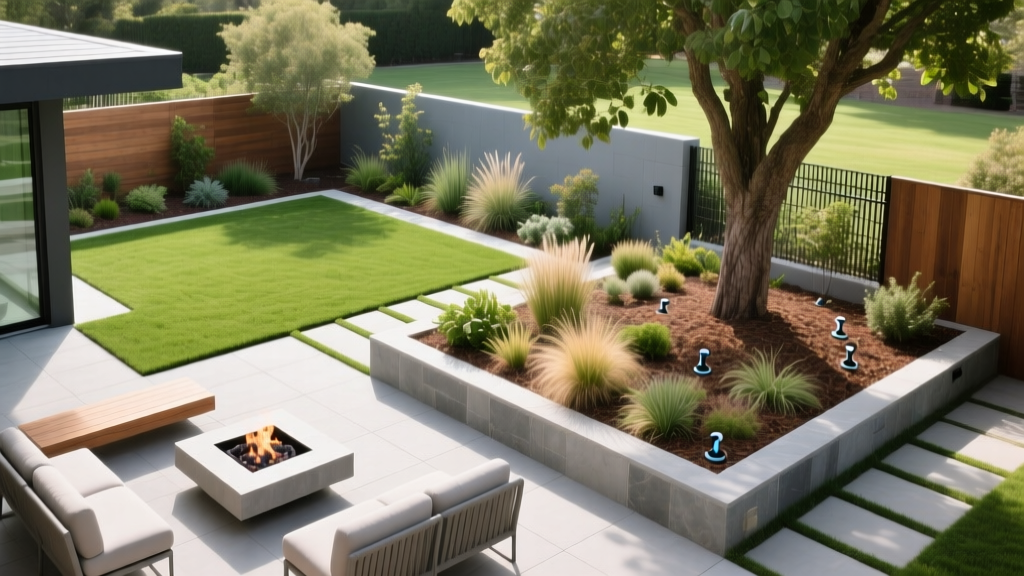
How to Define Landscaping Zones for a Functional Yard Layout
Defining landscaping zones is the foundational step in transforming a chaotic yard into a highly functional, aesthetically cohesive outdoor living space. Rather than placing plants and hardscapes randomly, professional landscape architects divide properties into distinct operational zones. This strategic approach dictates traffic flow, optimizes microclimates for plant health, and reduces long-term maintenance costs by grouping plants with similar water and light requirements together.
According to the University of Florida IFAS Extension, proper spatial organization through zoning can increase a property's usable outdoor square footage by up to 30% while simultaneously reducing irrigation waste. Below is a comprehensive, step-by-step framework to map, define, and physically edge your landscape zones.
The Core Framework: 4 Essential Yard Zones
Every residential property, regardless of size, can be categorized into four primary functional zones. Understanding the purpose of each is critical before you break ground.
1. The Public Zone (Curb Appeal & Access)
Typically comprising the front yard and the path to the primary entrance. This zone requires high-visibility, low-maintenance plantings and durable hardscaping. It should occupy roughly 15-20% of your total landscape design effort but delivers the highest impact on property valuation.
2. The Private Zone (Outdoor Living)
The backyard or enclosed side yards designed for recreation, dining, and relaxation. This zone demands privacy screening (such as 6-foot arborvitae fences or lattice panels), comfortable hardscape surfaces (like flagstone or composite decking), and integration with the home's interior sightlines.
3. The Service Zone (Utilities & Storage)
The utilitarian area housing HVAC units, trash receptacles, compost bins, and tool sheds. This zone must be screened from the Private and Public zones using dense evergreen hedges or slatted wood screens, while maintaining a minimum 3-foot clearance around mechanical units for proper airflow and servicing.
4. The Transition Zone (Circulation & Edges)
The connective tissue of the landscape. This includes walkways, driveways, mowing strips, and the physical boundaries that separate the other three zones. Properly defining these transitions prevents turfgrass from invading garden beds and guides foot traffic naturally.
Step-by-Step: How to Map and Define Your Zones
Do not purchase materials until you have completed a base map and bubble diagram. This prevents costly grading and layout errors.
- Create a Base Map: Use a 100-foot fiberglass measuring tape and a laser distance measurer (like the Bosch GLM 20) to record all property lines, existing structures, and utility boxes. Draw this to a 1/8-inch = 1-foot scale on architectural graph paper.
- Conduct a Microclimate Analysis: Track sun exposure and wind patterns. South-facing walls absorb and radiate heat, creating a microclimate that is effectively one USDA Hardiness Zone warmer than the rest of the yard. Note these areas on your map.
- Draft Bubble Diagrams: Use tracing paper over your base map to draw overlapping 'bubbles' representing the four zones. Ensure the Service Zone does not intersect with the primary sightlines from the kitchen or living room windows.
- Establish Hydro-Zones: Within your bubbles, group plants by water needs. The EPA WaterSense program recommends grouping high-water-use plants near the house or in natural drainage swales, and placing drought-tolerant species at the periphery to reduce irrigation demands by up to 50%.
Material Selection for Defining Boundaries
Once your zones are mapped on paper, you must physically define them in the soil. The transition between a turfgrass zone and a mulched planting bed requires a physical barrier to prevent rhizome invasion and mulch spillage. Below is a comparison of the most effective commercial-grade edging materials.
| Edging Material | Cost per Linear Foot | Lifespan | Installation Depth | Best Application |
|---|---|---|---|---|
| 14-Gauge Corten Steel | $4.50 - $6.00 | 40+ Years | 4 inches (leaving 1-2" above grade) | Curved beds, separating gravel from turf, modern designs |
| Heavy-Duty Polyethylene | $1.50 - $2.50 | 10-15 Years | 6 inches (flush with soil line) | Budget-friendly residential beds, tight radius curves |
| Poured Concrete Curb | $8.00 - $12.00 | 30+ Years | 4 inches below grade, 4" above | Driveway borders, high-traffic public zones |
| Natural Stone Trench | $3.00 - $5.00 (labor heavy) | Indefinite | 6 inches deep, 8 inches wide | Woodland gardens, informal cottage landscapes |
Pro Tip for Steel Edging: When installing 14-gauge Corten steel, overlap the joints by 4 inches and secure them with 18-inch steel stakes driven every 4 feet. Allow the steel to oxidize naturally for 3-4 weeks to develop its protective rust patina, which prevents structural degradation.
Hardscape vs. Softscape Transition Techniques
Defining landscaping zones isn't just about edging garden beds; it is also about managing the transition between hardscapes (patios, walkways) and softscapes (lawn, soil).
The Mowing Strip Solution
When a turfgrass zone meets a fence, wall, or garden bed, weed-whacking becomes a tedious, damaging chore. Install a mowing strip to eliminate this edge case.
- Dimensions: Lay pavers or flat stones exactly 6 to 8 inches wide.
- Base Preparation: Excavate 3 inches of soil. Lay down a 1-inch bed of coarse crushed gravel (3/4-inch minus) and tamp it level.
- Placement: Set the pavers so their top surface is exactly 1/2 inch below the final soil/mulch grade, but flush with the turfgrass canopy. This allows your lawnmower wheel to ride smoothly on the stone while the blade cuts the grass cleanly without hitting the barrier.
Grade Changes and Retaining Walls
If your Private Zone sits on a slope, you must define the boundary with a retaining wall to create usable flat space. For walls under 3 feet in height, segmental retaining wall (SRW) blocks with a built-in lip are the most efficient DIY option. Always excavate a trench equal to 10% of the wall's exposed height plus 6 inches for a compacted crushed stone base to prevent frost heave in freezing climates.
Common Zoning Mistakes and Troubleshooting
Warning: The Snow Storage Oversight
When defining the Transition Zone (driveways and walkways) in northern climates, homeowners frequently fail to allocate a 'snow storage' sub-zone. If you plant dense shrubs within 3 feet of a driveway edge, winter snow plowing and shoveling will crush and salt-burn the plants. Always leave a 4-foot clear hardscape or dormant gravel margin in snowy regions.
When defining the Transition Zone (driveways and walkways) in northern climates, homeowners frequently fail to allocate a 'snow storage' sub-zone. If you plant dense shrubs within 3 feet of a driveway edge, winter snow plowing and shoveling will crush and salt-burn the plants. Always leave a 4-foot clear hardscape or dormant gravel margin in snowy regions.
Fixing the Service Zone Sightline Error
If your HVAC unit or compost bin is visible from your patio, do not rely on a single row of fast-growing arborvitae, which can thin out at the base over time. Instead, build a 3-sided slatted cedar screen (using 1x3 boards spaced 1 inch apart for airflow) and plant a staggered double row of Boxwood 'Green Velvet' in front of it for year-round, dense visual blocking.
If your HVAC unit or compost bin is visible from your patio, do not rely on a single row of fast-growing arborvitae, which can thin out at the base over time. Instead, build a 3-sided slatted cedar screen (using 1x3 boards spaced 1 inch apart for airflow) and plant a staggered double row of Boxwood 'Green Velvet' in front of it for year-round, dense visual blocking.
Frequently Asked Questions
How deep should landscape edging be installed?
Most flexible and steel edgings should be buried at least 4 to 6 inches deep. This depth is critical because it sits below the active rhizome growth zone of aggressive turfgrasses like Bermuda and Zoysia, preventing the grass from tunneling under the barrier and invading your mulched zones.
Can I define zones without using physical edging?
Yes, through a technique called 'trench edging.' Using a half-moon edger or a motorized trencher, cut a 6-inch deep, V-shaped trench between the lawn and the garden bed. The air gap acts as a physical barrier to grass roots. However, this requires re-cutting the trench every spring as soil erosion and foot traffic gradually collapse the edges.

