
Landscaping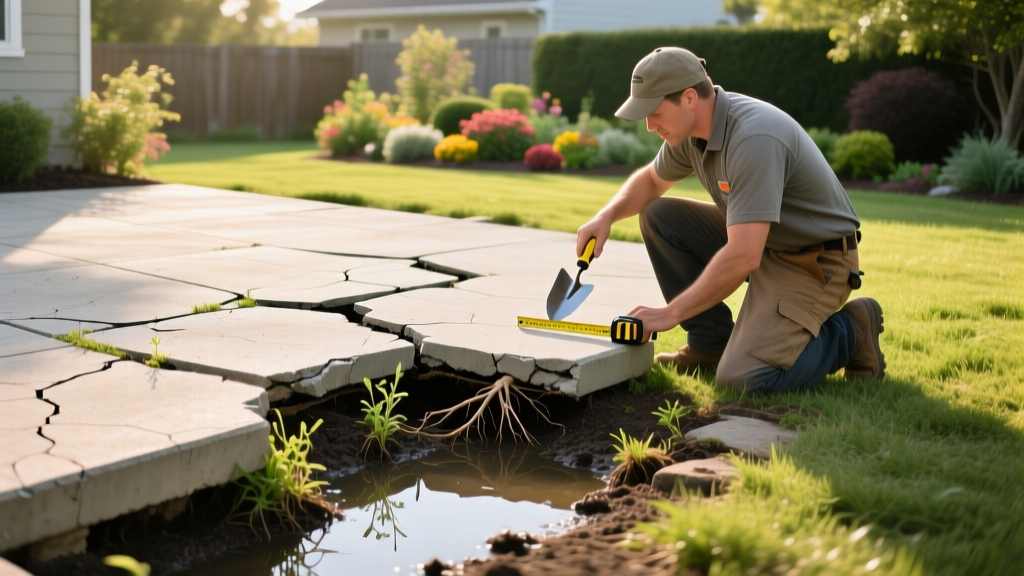
Concrete Patio Extension Problems: Diagnosis and Fixes
The Anatomy of a Failed Concrete Patio Extension
Tying a new concrete pour to an existing slab introduces immediate structural vulnerabilities. The intersection where old meets new is known as a cold joint, and it is the primary failure point for concrete cracking and differential movement. When a concrete patio extension sinks, cracks, or pulls away from the house, the root cause almost always traces back to subbase compaction failures, improper load transfer across the cold joint, or inadequate isolation detailing. Diagnosing these issues requires moving beyond surface-level patching to address the structural mechanics of the slab.
Diagnosing Cold Joint Cracking (The Seam Failure)
A cold joint occurs when the new concrete extension is poured against the cured edge of the original patio. Because the two masses cure at different rates and possess different moisture contents, they shrink independently. Without mechanical load transfer, this shrinkage tears the seam apart.
Symptom Identification
- Hairline Vertical Separation (Under 1/8 inch): Normal shrinkage behavior. The slabs are separating but remain at the same elevation. This is a cosmetic and water-intrusion issue, not a structural failure.
- Vertical Shear Cracking (Uneven Elevation): One side of the seam has dropped relative to the other. This indicates a failure of load transfer and subbase support on the new extension side.
- Diagonal Tension Cracks Radiating from Corners: Indicates the new slab is experiencing rotational settling, often due to poorly compacted fill soil near the house foundation.
Structural Repair Solutions
For hairline separations, routing and sealing is the definitive fix. Use a diamond V-groove blade on an angle grinder to rout the crack to a depth of 1/4 inch and a width of 1/4 inch. Vacuum the dust thoroughly, apply a concrete bonding primer, and fill the groove with a high-quality polyurethane sealant like Sikaflex Self-Leveling Sealant or NP1. These elastomeric sealants accommodate up to 35% joint movement without tearing.
If the extension has dropped, creating a vertical shear lip, you must retrofit load transfer. This involves drilling 3/4-inch holes horizontally into the old slab edge every 18 inches, injecting a two-part structural epoxy (such as Simpson SET-3G), and driving 1/2-inch smooth epoxy-coated dowel bars into the old slab. The new slab side is then supported via foam jacking to bring it flush, locking the dowels into place to distribute future live loads across the joint.
Warning: Do Not Use Rigid Fillers on Cold Joints
Never fill a concrete patio extension seam with rigid mortar, standard concrete patch, or non-flexible epoxy. The joint must remain an active isolation plane. Rigid fillers will transfer stress and cause the new slab to crack randomly across its center to relieve the tension.
Differential Settling and Slab Voids
New patio extensions are frequently poured over backfill soil that was disturbed during the original home construction or previous landscaping. If this subbase was not mechanically compacted in 6-inch lifts, it will consolidate under the 145-pound-per-cubic-foot weight of the new concrete, leaving voids beneath the slab.
Diagnosing a void requires a simple acoustic test: tap the slab with a heavy rubber mallet or a steel crowbar. A sharp, high-pitch 'ping' indicates solid support. A dull, hollow 'thud' confirms a subgrade void. If left unaddressed, the unsupported span will snap under the weight of heavy patio furniture or snow loads.
Polyurethane Foam Jacking vs. Traditional Mudjacking
When an extension settles, replacing the entire slab is rarely necessary. Slab jacking lifts the concrete back to its original grade. However, the material used dictates the longevity of the repair.
| Feature | Traditional Mudjacking (Cement Slurry) | Polyurethane Foam Jacking |
|---|---|---|
| Injection Hole Size | 1.5 to 2 inches (highly visible) | 5/8 inch (easily concealed) |
| Material Weight (Added Load) | 100+ lbs per cubic foot | 2.5 to 4.0 lbs per cubic foot |
| Cure Time | 24 to 48 hours | 15 to 30 minutes |
| Water Resistance | Poor (slurry washes out over time) | Excellent (closed-cell, impermeable) |
| 2026 Average Cost | $5 - $8 per sq. ft. | $9 - $16 per sq. ft. |
For patio extensions adjacent to the home foundation, polyurethane foam jacking is the superior choice. The lightweight nature of the foam prevents further subgrade consolidation, and its hydrophobic properties ensure that poor drainage won't wash the support material away, a common failure mode with cement slurry.
Color, Texture, and Curing Mismatches
Even if the structural integrity of the extension is sound, a severe aesthetic mismatch can ruin the landscape design. New concrete cures to a light, chalky gray, while a five-year-old patio has darkened from UV exposure, oxidation, and dirt accumulation. Furthermore, the aggregate exposure from the original broom or stamped finish will not perfectly align with a fresh pour.
Solution Framework for Aesthetic Integration:
- Acid Staining: For standard gray broom-finished concrete, apply a water-based or acid stain (e.g., Kemiko Stone Tone) to the entire surface—both old and new. This unifies the color palette. Use a semi-transparent sealant to lock in the pigment.
- Micro-topping Overlay: If the old patio has surface spalling or heavy staining, apply a polymer-modified micro-topping (1/8 inch thick) over both slabs. This creates a completely new, uniform canvas that can be stamped or stained identically.
- Saw-Cut Scoring: If the cold joint is visually jarring, use a concrete saw to cut a geometric grid pattern across both the old and new slabs. By making the cold joint part of a deliberate, symmetrical scoring pattern, the eye registers it as an intentional design element rather than a repair seam.
Diagnostic Matrix: Problem to Solution Framework
| Observed Symptom | Diagnostic Tool / Method | Root Cause | Definitive Repair |
|---|---|---|---|
| Water pooling at the house foundation wall | Digital level (measure slope over 4 ft) | Negative grading; slab pitched toward house | Mudjacking to restore 1/4-inch per foot positive slope |
| Random map cracking on new extension only | Visual inspection of crack depth and pattern | Plastic shrinkage; excessive water in mix; rapid drying | Chase cracks, fill with low-viscosity epoxy; apply penetrating sealer |
| Slab lifting in winter, dropping in summer | Seasonal elevation tracking; soil moisture test | Frost heave; inadequate subbase drainage | Install perimeter French drain; replace subbase with non-frost-susceptible gravel |
| Spalling and flaking surface on new pour | Scratch test with masonry nail | Overworking surface; adding water during finishing | Grind surface; apply concrete resurfacer overlay |
Preventative Subbase and Joint Engineering
If you are planning a concrete patio extension and want to avoid the diagnostic headaches outlined above, the preventative engineering must occur before the ready-mix truck arrives. The strategic placement of control joints and rigorous subbase preparation are non-negotiable.
The Standard for Extension Subbases
Excavate the extension area to a depth of 8 to 10 inches below the desired finish grade. Install a 4-inch to 6-inch base of 3/4-inch minus crushed aggregate (ABC gravel). This material contains stone dust that locks together when compacted. Use a vibratory plate compactor, making at least three passes, and misting the gravel with water to achieve 95% Proctor density. Lay a 10-mil polyethylene vapor barrier over the compacted base before setting forms. This prevents the dry subbase from sucking moisture out of the wet concrete, which causes premature plastic shrinkage cracking.
Control Joint Spacing Rules
Control joints force the concrete to crack in straight, hidden lines. For a standard 4-inch thick patio slab, control joints must be cut to a depth of exactly 1 inch (25% of slab depth). The spacing of these joints should never exceed 24 times the slab thickness—in this case, 8 feet apart in both directions. Crucially, you must saw-cut these joints within 6 to 12 hours of the pour, as soon as the concrete can support the saw weight without raveling the edges. Waiting 24 hours often results in uncontrolled, random cracking as internal tensile stresses exceed the concrete's early strength.

