
Landscaping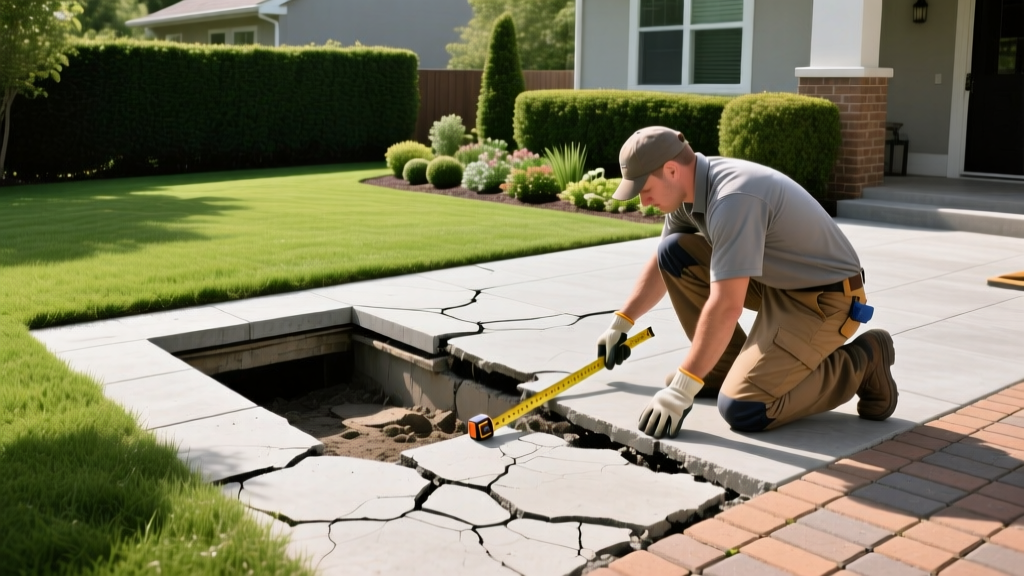
Sinking Patio Slab Repair: Diagnosing and Fixing Concrete Settling
A sinking patio slab is rarely an isolated cosmetic issue; it is a symptom of underlying soil failure, hydrostatic pressure, or improper initial construction. When a concrete patio begins to settle, pitch toward the foundation, or develop severe differential cracking, ignoring the problem accelerates structural damage to the adjacent home. Diagnosing the exact failure mode is the mandatory first step before selecting a repair methodology.
The Geotechnical Reality: Why Patio Slabs Settle
Concrete itself does not compress under normal residential loads. When a patio slab sinks, the material beneath it—the subgrade and subbase—has failed. Understanding the specific mechanism of this failure dictates whether the slab can be salvaged or must be demolished.
Subgrade Washout and Erosion
The most common cause of localized settling is the physical removal of the soil supporting the slab. This occurs when surface water or leaking irrigation lines create a subsurface channel, washing away fine silts and clays. If your patio slab is sinking specifically near a downspout, gutter extension, or pool deck drain, subgrade washout is the primary suspect. The void left behind removes lateral support, causing the concrete to fracture and drop under its own weight or applied loads.
Expansive Soils and Moisture Fluctuations
In regions with high clay content, the soil acts like a sponge. Expansive clays swell significantly when saturated and shrink drastically during droughts. This cyclical heaving and settling creates uneven stress points across the patio slab. According to the Portland Cement Association, freeze-thaw cycles exacerbate this issue when water trapped in the subgrade freezes, expanding by 9% in volume and lifting the slab, only for it to drop when the ice thaws and the water drains away.
⚠️ Warning: Tree Root Intrusion
If the uplift or settling is concentrated within 10 feet of a mature tree, root growth may be the culprit. Roots do not typically grow under deep, dry concrete; they seek moisture. If a slab is already cracked or poorly sealed, roots will exploit the moisture gradient beneath it, eventually thickening and lifting the concrete. Cutting the roots without consulting an arborist can kill the tree and create massive new voids in the soil.
If the uplift or settling is concentrated within 10 feet of a mature tree, root growth may be the culprit. Roots do not typically grow under deep, dry concrete; they seek moisture. If a slab is already cracked or poorly sealed, roots will exploit the moisture gradient beneath it, eventually thickening and lifting the concrete. Cutting the roots without consulting an arborist can kill the tree and create massive new voids in the soil.
Diagnostic Matrix: Assessing Slab Viability
Before committing to a repair method, evaluate the physical condition of the concrete. Not every sinking patio slab is a candidate for lifting; severely degraded concrete will shatter under the pressure of jacking equipment.
| Condition Indicator | Salvageable (Candidate for Lifting) | Unsalvageable (Requires Replacement) |
|---|---|---|
| Crack Width | Less than 1/4 inch; isolated to control joints | Greater than 1/2 inch; multiple intersecting structural cracks |
| Surface Spalling | Minor surface scaling; aggregate remains firmly embedded | Deep spalling exposing rebar; severe freeze-thaw degradation |
| Slab Thickness | Minimum 4 inches (standard residential pour) | Less than 3 inches (substandard "mud" pour) |
| Differential Settlement | Less than 4 inches of total drop | Greater than 6 inches; slab has tilted beyond 15 degrees |
Repair Methodologies: Mudjacking vs. Polyjacking vs. Replacement
If your diagnostic matrix indicates the slab is salvageable, you must choose a lifting technique. The industry has shifted significantly over the last decade, moving away from traditional cementitious slurry in favor of advanced polymers.
Traditional Mudjacking (Slabjacking)
Mudjacking involves pumping a heavy slurry of topsoil, sand, water, and Portland cement (often weighing 100+ lbs per cubic foot) through 1.5-inch to 2-inch drill holes.
Pros: Lower upfront material cost ($3 to $6 per square foot). Uses natural, biodegradable materials.
Cons: The heavy slurry adds massive weight to an already failing subgrade, often causing secondary settling. The large drill holes are highly visible and prone to water infiltration. The slurry can wash away if the drainage issue is not corrected.
Polyurethane Foam Jacking (Polyjacking)
Polyjacking utilizes a two-part, closed-cell polyurethane foam injected through tiny 5/8-inch holes. When the liquid resin and isocyanate mix beneath the slab, they expand up to 20 times their liquid volume, curing in roughly 15 minutes.
Pros: The cured foam is incredibly lightweight (2.5 to 6 lbs per cubic foot), adding negligible stress to the subgrade. It is completely impervious to water, meaning it will never wash away or degrade from moisture. The 5/8-inch holes are virtually invisible after patching.
Cons: Higher initial cost ($5 to $15 per square foot). Requires specialized, calibrated reactor equipment and certified technicians.
Full Demolition and Replacement
When the concrete is structurally compromised, removal is the only option. Expect to pay between $12 and $25 per square foot for demolition, hauling, subgrade re-compaction, and a new 4,000 PSI concrete pour with fiber mesh reinforcement. This process requires 28 days for full curing before heavy furniture can be placed.
Correcting the Root Cause: Grading and Drainage
Lifting a patio slab without fixing the water management system guarantees a repeat failure. Water is the universal enemy of concrete subgrades. To protect your investment, implement the following drainage corrections immediately after the slab is leveled.
- Establish Positive Slope: The patio surface must pitch away from the home's foundation at a minimum grade of 1/4 inch per foot (2% slope). Use a digital angle finder or a 4-foot spirit level with a shim to verify this gradient.
- Install Channel Drains: If the patio sits at the bottom of a hill or captures massive runoff, cut a trench across the lowest edge and install a 4-inch or 6-inch PVC channel drain (such as the NDS Pro Series). Route the discharge to a daylight exit or a dry well at least 15 feet from the foundation.
- Seal Control Joints: Concrete shrinks as it cures, which is why contractors cut control joints. These joints are direct pipelines to the subgrade. Clean them thoroughly with a wire brush and air compressor, then fill them with a high-quality, self-leveling polyurethane sealant like Sikaflex Self-Leveling Sealant. This prevents surface water from eroding the base material.
💡 Pro Tip: The French Drain Alternative
If your patio slab is sinking due to a high water table or persistent subsurface saturation, surface grading won't solve the problem. You will need to install a perimeter French drain. Dig a trench 18 inches deep and 12 inches wide along the affected edge, lay a bed of washed drain rock (ASTM C33 standard), and install a perforated corrugated pipe wrapped in geotextile fabric to prevent soil infiltration.
If your patio slab is sinking due to a high water table or persistent subsurface saturation, surface grading won't solve the problem. You will need to install a perimeter French drain. Dig a trench 18 inches deep and 12 inches wide along the affected edge, lay a bed of washed drain rock (ASTM C33 standard), and install a perforated corrugated pipe wrapped in geotextile fabric to prevent soil infiltration.
Troubleshooting Common Edge Cases
Can I use self-leveling concrete to fix a sunken patio slab?
No. Self-leveling underlayment (SLU) is designed for interior floors or shallow surface imperfections (usually less than 1 inch thick). Applying SLU outdoors to fix a structural slope issue will result in rapid delamination and freeze-thaw destruction. Furthermore, it adds dead weight to the slab without addressing the void beneath it.
Will polyjacking foam damage my home's foundation?
When applied correctly, no. Professional technicians use precision pressure gauges and laser levels to monitor the lift in real-time. The expansion pressure of structural polyurethane foam is carefully controlled to lift the slab without transferring destructive lateral force against the adjacent foundation wall. However, DIY foam kits lack this pressure regulation and should never be used near foundation boundaries.
How do I maintain a repaired patio slab through the winter?
Avoid using calcium chloride or rock salt (sodium chloride) for ice melt on newly repaired or poured concrete. These chemicals cause rapid surface scaling and spalling by forcing the concrete to absorb excess water, which then freezes and expands. Instead, use calcium magnesium acetate (CMA), which is significantly less corrosive and safer for concrete integrity, or rely on mechanical traction agents like coarse sand.

