
Landscaping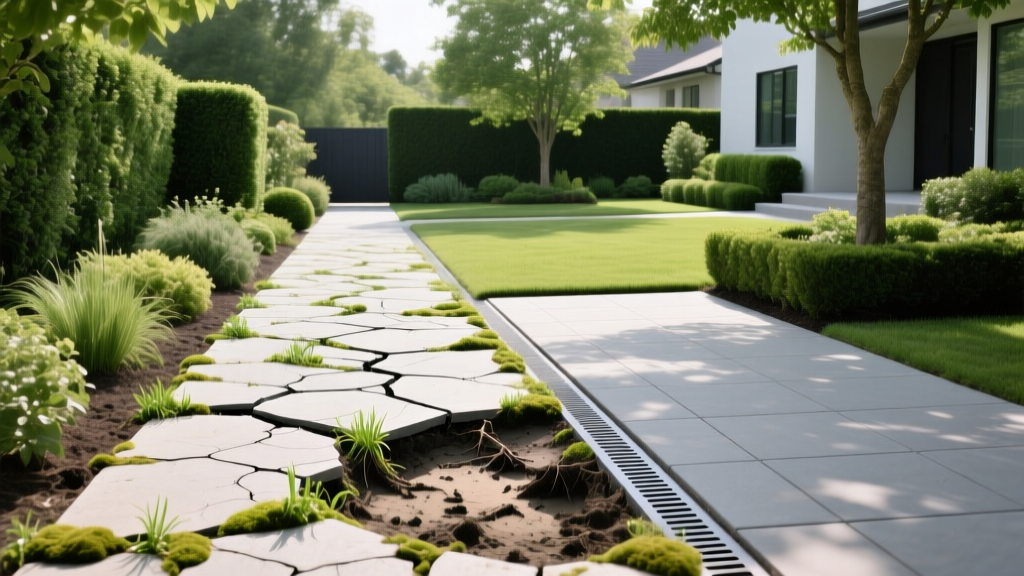
Walkway Landscaping: How to Diagnose and Fix Pathway Failures
The Anatomy of a Walkway Failure
A poorly constructed pathway rarely fails overnight. Walkway landscaping degradation is typically the result of compounding subsurface errors: inadequate soil compaction, missing separation fabrics, or improper jointing materials. When a walkway settles, heaves, or spalls, the surface damage is merely a symptom of a compromised base. Diagnosing the exact point of failure requires understanding the interaction between hydrostatic pressure, freeze-thaw cycles, and material porosity. This guide provides a structural diagnostic framework to identify root causes and execute permanent repairs.
Critical Warning: The "Top-Down" Repair Trap
Adding a new layer of sand or mortar over a sinking walkway is a temporary cosmetic fix. If the subgrade has failed, the new surface will mirror the underlying settlement within one to two freeze-thaw cycles. True remediation requires base excavation.
Walkway Symptom and Root Cause Diagnostic Matrix
Use the following matrix to cross-reference your pathway's visual symptoms with their underlying structural causes before purchasing repair materials.
| Visible Symptom | Probable Root Cause | Diagnostic Test | Required Remediation |
|---|---|---|---|
| Localized sinking (birdbaths) | Subgrade washout or organic decomposition | Probe base with a steel rebar; if it sinks past 6 inches easily, the base is compromised. | Full excavation, geotextile installation, and recompaction. |
| Edge pavers shifting outward | Hydrostatic pressure or restraint failure | Check edge restraint spikes; look for missing polymeric sand in perimeter joints. | Reinstall SnapEdge with 10-inch galvanized spikes every 6 inches. |
| White, powdery surface residue | Efflorescence (salt migration) | Apply a drop of water; if it absorbs instantly and leaves a white ring upon drying, salts are present. | Chemical cleaning and application of a penetrating siloxane sealer. |
| Frost heave (upward bulging) | Clay subgrade expansion or round gravel base | Identify base material; round pea gravel cannot lock together and allows water pooling. | Replace base with 3/4-inch minus angular aggregate (ASTM D2940). |
Diagnosing Frost Heave and Subgrade Settlement
Frost heave occurs when water trapped in the subgrade freezes and expands, pushing the hardscape upward. This is exceptionally common in regions with high clay content soils, as clay retains moisture and expands significantly upon freezing. The primary failure point in these scenarios is usually the base aggregate and the lack of a separation layer.
The Aggregate Error: Round vs. Angular
Many DIY walkway landscaping projects fail because they use round river rock or pea gravel for the base layer. Round stones roll and shift under load, creating voids where water pools. According to the National Concrete Masonry Association (NCMA) technical specifications, base materials must consist of crushed, angular aggregate that mechanically interlocks. You must use 3/4-inch minus crushed stone (often called crusher run or graded aggregate base, conforming to ASTM D2940). The "minus" designation means it includes stone dust and smaller particles that fill the voids between the larger rocks, creating a nearly impermeable, concrete-like sub-base when compacted.
Geotextile Separation and Compaction Standards
If your soil test reveals more than 20% clay content, a geotextile separation fabric is non-negotiable. Without it, the angular base aggregate will gradually sink into the soft clay subgrade over time, creating voids. Lay a non-woven geotextile fabric (such as Mirafi 500X or Typar Pro) directly over the compacted subgrade before adding your gravel base. Furthermore, the subgrade must be compacted to a 95% Standard Proctor density (ASTM D698) using a vibrating plate compactor, not a manual hand tamper.
Hydrostatic Pressure and Edge Restraint Blowout
When water infiltrates a walkway but cannot escape laterally, it builds hydrostatic pressure against the edge restraints. Over time, this pressure pushes the perimeter pavers outward, causing the polymeric sand to crack and the joints to fail. This is frequently misdiagnosed as poor sand adhesion, when the actual culprit is inadequate drainage and weak mechanical restraint.
Upgrading Edge Restraints
Plastic or aluminum L-shaped edging relies entirely on the spikes holding it to the base. If the spikes are too short or spaced too far apart, the edge will bow. For a permanent fix, utilize heavy-duty composite restraints like SnapEdge or PermaEdge. Secure the restraint using 10-inch galvanized steel spikes, driven vertically through the pre-drilled holes into the compacted base. Spikes must be placed every 6 inches along straight runs and every 4 inches on curves. Never rely on concrete haunching (pouring concrete against the edge) for residential walkways, as the concrete will crack independently from the flexible paver system during frost cycles.
Permeable Jointing Solutions
To alleviate hydrostatic pressure, the joints must allow water to pass through or be properly sealed. If you are rebuilding a walkway in a high-rainfall area, consider adopting the EPA's Green Infrastructure guidelines on permeable pavement. Instead of standard polymeric sand, which forms a rigid, impermeable crust, use an open-graded permeable jointing stone (like 1/8-inch clear chipped stone) or a specialized permeable polymeric sand (such as Alliance Gator Base or permeable Gator Dust). This allows surface water to infiltrate the base and dissipate into the subgrade, eliminating the lateral pressure that blows out edge restraints.
Efflorescence and Surface Spalling
Efflorescence is the migration of water-soluble salts to the surface of concrete pavers or natural stone. When the water evaporates, it leaves behind a white, crystalline deposit. While efflorescence itself is largely cosmetic, the moisture movement that causes it can lead to surface spalling (flaking and chipping) during freeze-thaw cycles if the surface is improperly sealed.
The Sealing Mistake: Film-Forming vs. Penetrating
A major cause of severe spalling is the application of film-forming acrylic sealers on damp pavers or before the efflorescence has fully bloomed and been cleaned. Acrylic sealers trap moisture inside the paver. When the trapped water freezes, it expands and blows the face off the stone.
The Solution: Wait a minimum of 60 days after installation before sealing to allow initial efflorescence to bloom and wash away. Clean the surface with a specialized efflorescence remover (such as SRW X-TREME or Prosoco SureKlean Weather Seal). Always use a penetrating silane/siloxane sealer (like SureCrete XS-327). These sealers do not form a surface film; instead, they react chemically within the pores of the concrete to repel liquid water while allowing water vapor to escape.
2026 Material and Cost Comparison Matrix
When deciding whether to repair a failing section or completely rebuild your walkway landscaping, factor in the material-specific base requirements and current installed costs.
| Material Type | Minimum Base Depth | Avg. Installed Cost (per sq. ft.) | Expected Lifespan | Primary Vulnerability |
|---|---|---|---|---|
| Concrete Pavers | 6-8 inches (Crushed Angular) | $18 - $26 | 25 - 40 years | Joint washout, efflorescence |
| Natural Flagstone | 4-6 inches (Gravel + Mortar bed) | $28 - $42 | 50+ years | Mortar cracking, stone flaking |
| Poured Concrete | 4 inches (Gravel base) | $12 - $19 | 20 - 30 years | Surface cracking, frost heave |
| Permeable Pavers | 10-14 inches (Open-graded stone) | $22 - $32 | 30 - 50 years | Joint clogging (requires vacuuming) |
Actionable Prevention and Maintenance Protocol
To prevent the recurrence of these failures, implement this strict annual maintenance schedule:
- Spring Joint Inspection: After the final frost, inspect all paver joints. If polymeric sand has cracked or washed out to a depth greater than 1/4 inch, rake it out and reapply. Exposed joints allow water to undermine the bedding sand layer.
- Bi-Annual Drainage Clearing: Ensure that the terminal edges of your walkway are clear of soil and mulch buildup. If soil touches the edge of the pavers, water will wick laterally into the base via capillary action.
- De-icing Chemical Ban: Never use rock salt (sodium chloride) or calcium chloride on concrete pavers or natural stone. These chemicals aggressively accelerate spalling and efflorescence. Use magnesium chloride or sand for winter traction.
- Sealer Reapplication: Penetrating siloxane sealers degrade under UV exposure. Perform a water-drop test annually; if water no longer beads on the surface but soaks in within 30 seconds, it is time to reapply the sealer.

