
Landscaping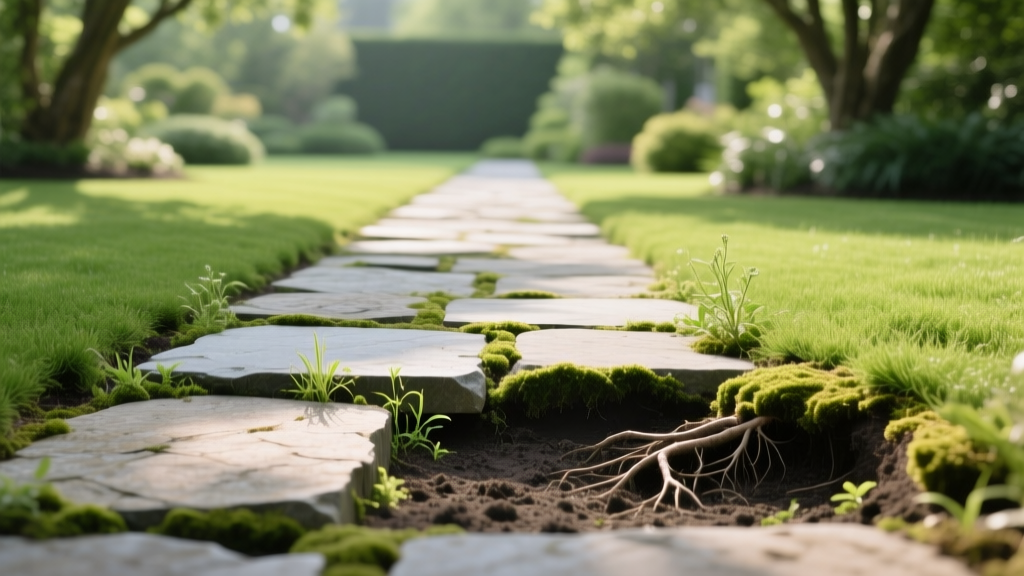
Stones for Pathway Failures: Diagnosing Sinking, Heaving & Weeds
The Root Cause of Pathway Stone Failures
Homeowners frequently invest heavily in premium natural flagstone, bluestone, or manufactured concrete pavers, only to find their walkways sinking, heaving, or sprouting weeds within two seasons. The stones themselves rarely fail. In almost every case of hardscape degradation, the failure originates beneath the surface. Improper sub-base preparation, inadequate drainage, and outdated jointing materials are the primary culprits. Diagnosing the exact point of failure is the first step toward implementing a permanent structural solution for your stones for pathway.
Before tearing up your entire walkway, use the diagnostic matrix below to identify your specific symptoms and isolate the underlying structural flaw.
| Symptom | Visual Cue | Primary Cause | Targeted Solution |
|---|---|---|---|
| Sinking & Rutting | Localized depressions, water pooling in low spots | Inadequate base depth or poor soil compaction | Excavate to 8-10 inches; install DOT Class II road base |
| Frost Heave | Stones pushing upward unevenly in early spring | Water trapped in base freezing and expanding | Install non-woven geotextile fabric and open-graded drainage gravel |
| Weed Intrusion | Organic growth between joints, sand washing out | Use of standard masonry sand or organic debris buildup | Replace joints with high-performance polymeric sand or resin |
| Surface Slipping | Algae growth, hazardous slickness when wet | Zero surface slope, overly smooth stone finish | Re-grade base to 1/8 inch per foot slope; select thermal-finished stone |
Symptom 1: Sinking, Rutting, and Uneven Settling
The Diagnosis
If your stones for pathway are tilting or creating trip hazards, the sub-grade has failed to support the dynamic load. This is especially common in regions with expansive clay soils. Clay retains water and shifts dramatically under weight. Many DIY installations fail because they only excavate 2 to 4 inches, laying stones directly over a thin bed of sand placed on native topsoil. According to This Old House's master guide on laying hardscape bases, a pedestrian pathway requires a minimum of 8 inches of excavated depth to accommodate a proper structural base.
The Structural Solution
To permanently fix sinking stones, you must rebuild the foundation. Excavate the affected area to a depth of 8 to 10 inches below the final desired grade. Line the trench with a non-woven geotextile fabric (such as Mirafi 500X) to separate the native soil from the aggregate base. Fill the trench with DOT Class II road base or 3/4-inch minus crushed gravel. Crucially, this base must be compacted in 2-inch lifts (layers) using a vibratory plate compactor that delivers a minimum of 3,000 pounds of centrifugal compaction force. Hand tampers are entirely insufficient for achieving the 95% Proctor density required to prevent future settling. Once the base is fully compacted, apply a 1-inch layer of ASTM C33 concrete sand as a bedding layer before resetting your stones.
Symptom 2: Frost Heave and Winter Shifting
The Diagnosis
In climates with freezing winter temperatures, water that becomes trapped beneath or between pathway stones will freeze and expand by approximately 9%. This expansion exerts immense upward pressure, causing stones to heave, crack, or shift laterally. If your pathway looks perfectly level in October but resembles a roller coaster by April, you have a frost heave problem caused by a dense-graded base that traps water rather than allowing it to percolate away.
The Structural Solution
The fix requires transitioning to a permeable, open-graded base system. The Environmental Protection Agency's permeable pavement standards recommend using clean, washed, open-graded aggregate (like 3/4-inch crushed stone with no fine dust) for the base layer. Because this stone lacks fine particles, water flows directly through it rather than pooling.
Warning: Never use limestone screenings or stone dust as a bedding layer in freeze-thaw climates. These materials act like a sponge, retaining moisture directly beneath the stones and guaranteeing severe frost heave during winter.
Additionally, ensure the sub-grade is pitched away from structures at a minimum 1/8-inch per foot gradient to encourage subsurface runoff.
Symptom 3: Weed Intrusion and Joint Washout
Why Regular Sand Fails
Traditional masonry sand or stone dust used in pathway joints is highly susceptible to erosion from heavy rain and wind. Once the sand washes out, it creates voids where wind-blown weed seeds settle, germinate, and root deeply. Furthermore, regular sand provides zero lateral stability, allowing the stones for pathway to shift and grind against one another when walked upon.
The Polymeric Upgrade
The definitive solution is upgrading to polymeric sand, which contains water-activated binding agents that harden into a flexible, weed-resistant matrix. Select your product based on joint width:
- Tight Joints (1/8 to 2 inches): Use standard polymeric sand like Techniseal Polymeric Sand or Alliance Gator Maxx G2.
- Wide Joints (1/2 to 4 inches): Use a specialized binding aggregate like Gator Dust or Techniseal Sand+Stone, which is formulated to bind larger gaps without cracking.
Proper activation is critical. After sweeping the polymeric sand into the joints and compacting it with a plate compactor to vibrate the material deep into the crevices, mist the surface with a gentle shower nozzle. High-pressure water will wash the polymers out of the joints and leave a hazy, unremovable film on the surface of your stones. Allow 24 to 48 hours of dry weather for the chemical binders to fully cure.
Symptom 4: Surface Pooling and Slip Hazards
The Diagnosis
Standing water on a pathway is not just a nuisance; it accelerates stone degradation, promotes slippery algae growth, and creates dangerous ice patches in winter. Pooling occurs when the pathway lacks a positive slope or when the chosen stone features an overly polished or naturally smooth finish that encourages water surface tension.
The Structural Solution
During the base preparation phase, use a laser level to establish a strict cross-slope of 1/8 inch to 1/4 inch per linear foot. This subtle gradient is imperceptible to the eye but sufficient to shed surface water.
If your existing stones are inherently slick and cannot be replaced, apply a penetrating, silane-based anti-slip sealer (such as SureStep or InvisaTread) which chemically alters the surface tension of the stone to increase traction when wet.'When selecting natural stone for high-moisture or shaded environments, always specify a thermal or flamed finish rather than a natural cleft or honed finish. The thermal process melts the surface silica, creating a permanent, micro-textured grip that drastically reduces slip hazards without compromising the stone's structural integrity.' — Hardscape Materials Specification Guide
Cost Analysis: Targeted Repair vs. Full Rebuild
Understanding the financial scope of pathway repairs helps homeowners decide between spot-fixing and total reconstruction. Below are the average 2026 market rates for professional hardscape restoration:
- Polymeric Sand Re-application: $1.50 to $2.50 per square foot. (Highly cost-effective for solving weed and washout issues without disturbing the base).
- Localized Base Repair (Spot Fixing): $12.00 to $18.00 per square foot. (Involves removing stones, excavating failed base, re-compacting gravel, and resetting).
- Full Pathway Demolition and Rebuild: $22.00 to $35.00+ per square foot. (Required when over 40% of the pathway is suffering from severe frost heave or sub-grade failure).
Addressing pathway failures early—specifically by re-sanding joints and correcting minor drainage gradients—prevents the catastrophic base failures that necessitate a full, expensive teardown. Proper diagnosis ensures you invest in the exact structural remedy your landscape requires.

