
Landscaping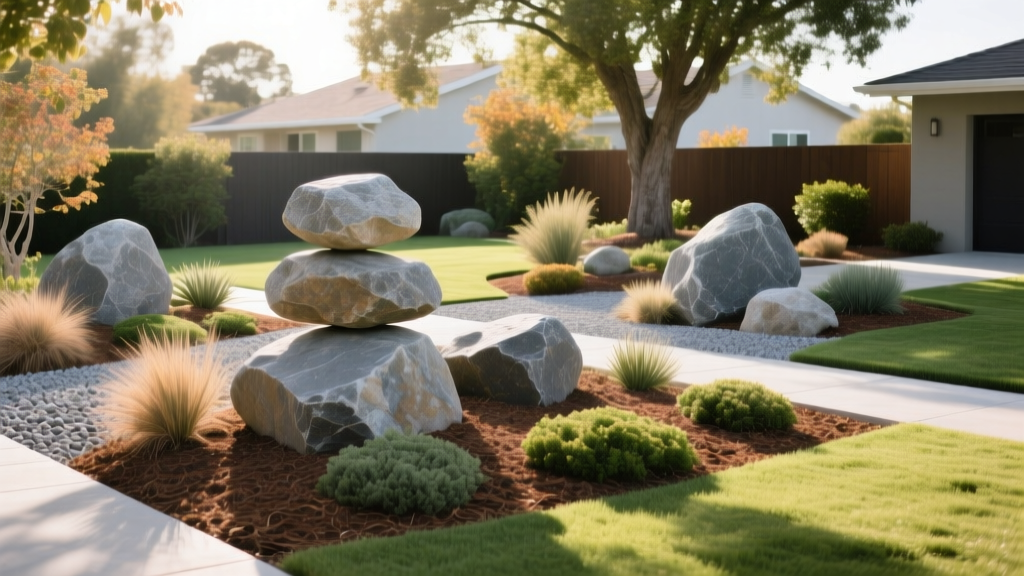
Practical Boulder Landscaping Ideas: Step-by-Step Placement Guide
Integrating heavy stone into your yard transforms a flat, featureless lawn into a dynamic, multi-dimensional landscape. However, executing professional-grade boulder landscaping ideas requires more than just dropping rocks on the grass. Moving and securing stones that weigh anywhere from 500 to 3,000 pounds demands an understanding of physics, soil mechanics, and proper drainage. This guide provides the exact measurements, tool specifications, and placement techniques used by landscape architects to permanently and safely anchor boulders in residential environments.
Sizing and Selecting the Right Boulders
Before purchasing, you must match the rock type to your specific climate and soil conditions. According to the University of Minnesota Extension, selecting locally sourced stone not only reduces transportation costs but also ensures the rock is acclimated to local freeze-thaw cycles, preventing premature cracking.
| Rock Type | Avg. Density (lbs/cu ft) | Estimated Cost per Ton (2026) | Best Landscape Application |
|---|---|---|---|
| Granite | 165 - 175 | $150 - $280 | Focal points, retaining walls, water features |
| Basalt | 180 - 190 | $180 - $320 | Modern designs, dry creek beds, high-contrast borders |
| Sandstone | 130 - 145 | $120 - $200 | Desert landscapes, rustic garden accents |
| Limestone | 140 - 155 | $110 - $190 | Alkaline-tolerant plant beds, traditional English gardens |
Warning: Limestone and Soil pH
Limestone is highly alkaline. As it weathers, it leaches calcium carbonate into the surrounding soil, raising the pH. Do not use limestone boulders as borders for acid-loving plants like azaleas, rhododendrons, or blueberries. Opt for inert granite or basalt instead.
Limestone is highly alkaline. As it weathers, it leaches calcium carbonate into the surrounding soil, raising the pH. Do not use limestone boulders as borders for acid-loving plants like azaleas, rhododendrons, or blueberries. Opt for inert granite or basalt instead.
Essential Tools for Heavy Rock Placement
Attempting to move a 1,000-pound boulder with standard garden equipment will result in property damage or severe injury. The National Association of Landscape Professionals emphasizes the use of mechanical advantage tools for hardscape installation. Assemble the following gear before delivery day:
- Steel Digging Bar (San Angelo Bar): A 6-foot, 18-pound solid steel bar with a chisel tip for trenching and a wedge tip for prying. (Approx. $85)
- Heavy-Duty Rock Sled: A reinforced PVC or canvas sled rated for at least 800 lbs (e.g., Tractor Supply Co. heavy-duty poly sled) to drag rocks over soil without tearing the turf.
- 5-Ton Chain Hoist or Come-Along: For precise, inch-by-inch lowering into trenches. Anchor to a mature tree trunk using a wide tree-saver strap to prevent bark girdling.
- Pressure-Treated 4x4 Timbers: Cut into 3-foot lengths to use as rollers. Never use PVC pipes as rollers; they will shatter under the point-load of a granite boulder.
- Plate Compactor: A walk-behind vibratory plate compactor (minimum 3,000 lbs of centrifugal force) to lock the gravel base.
Step-by-Step Boulder Placement Guide
Proper installation ensures your boulders look like natural geological outcroppings rather than dropped afterthoughts. Follow this sequence to guarantee structural stability.
Step 1: Site Mapping and Utility Clearance
Call 811 at least three business days before digging to mark underground utilities. Boulders exert immense downward pressure; placing a 2,000-pound rock over a shallow gas line or fiber-optic cable can cause catastrophic fractures.
Step 2: Excavation and the 1/3 Bury Rule
A common amateur mistake is leaving boulders 'floating' on the surface. To achieve a natural look and prevent frost heave in northern climates, you must bury at least one-third of the boulder's total height. For a boulder measuring 3 feet tall, dig a trench 12 inches deep and 6 inches wider than the rock's base on all sides.
Step 3: Base Preparation and Compaction
Never place a boulder directly on topsoil, which compresses unevenly when wet. Fill the excavated trench with 4 inches of 3/4-inch crushed angular gravel.
Critical Note: Do not use round pea gravel. Round stones act like ball bearings and will cause the boulder to shift or roll over time. Angular gravel locks together when compacted. Run your plate compactor over the gravel base until it is completely rigid.
Step 4: Levering and Final Positioning
Slide the boulder onto your 4x4 timber rollers. Use the San Angelo bar as a lever, placing a small wooden block under the bar to increase your fulcrum height. Push the boulder into position. Once aligned over the trench, use your 5-ton chain hoist to slowly lower the rock into the bed, removing the rollers one by one.
Step 5: Backfilling and Drainage Integration
Backfill the gap around the buried portion of the boulder with a mix of native soil and coarse sand. Tamp the soil every 3 inches. If the boulder is situated on a slope, dig a shallow swale on the uphill side and fill it with gravel to divert runoff away from the rock's base, preventing soil erosion that could undermine the foundation.
Integrating Boulders into Specific Landscape Features
Boulders serve different functional roles depending on the hardscape feature you are constructing. Use these frameworks to integrate them effectively.
Framework: Dry Creek Beds
Use large (2-3 ft diameter) boulders as 'anchor stones' on the outside curves of the creek bed to mimic natural water erosion patterns. Fill the interior with 3-5 inch river cobbles. The EPA WaterSense program notes that properly graded dry creek beds lined with heavy stone can effectively manage stormwater runoff, reducing yard erosion by up to 60% during heavy rain events. Reference the EPA WaterSense landscaping guidelines for precise grading slopes (minimum 1% drop per 10 feet).
Use large (2-3 ft diameter) boulders as 'anchor stones' on the outside curves of the creek bed to mimic natural water erosion patterns. Fill the interior with 3-5 inch river cobbles. The EPA WaterSense program notes that properly graded dry creek beds lined with heavy stone can effectively manage stormwater runoff, reducing yard erosion by up to 60% during heavy rain events. Reference the EPA WaterSense landscaping guidelines for precise grading slopes (minimum 1% drop per 10 feet).
Framework: Boulder Retaining Walls
When stacking boulders to retain soil, you must incorporate a 'batter' (a backward lean). Step the boulders back 1 inch for every 12 inches of height. Pin the stones together using 1/2-inch galvanized rebar driven through pre-drilled holes in the rocks to prevent lateral sliding under the hydrostatic pressure of wet soil.
When stacking boulders to retain soil, you must incorporate a 'batter' (a backward lean). Step the boulders back 1 inch for every 12 inches of height. Pin the stones together using 1/2-inch galvanized rebar driven through pre-drilled holes in the rocks to prevent lateral sliding under the hydrostatic pressure of wet soil.
Common Mistakes and Troubleshooting
The 'Frost Heave' Failure: In USDA Zones 3-6, water freezes and expands in the soil beneath the rock. If you skipped the 4-inch angular gravel base, the expanding ice will push the boulder upward. When it thaws, the rock settles at a new, tilted angle. Fix: You must jack the rock up, re-excavate, and install a proper compacted gravel base.
The Scale Mismatch: Homeowners frequently buy boulders that are too small for the yard, resulting in rocks that look like decorative pebbles. Fix: For a standard 5,000 sq ft suburban lot, your primary focal boulder should be at least 3 feet in its longest dimension and weigh over 1,500 lbs. Group smaller stones (under 500 lbs) in odd-numbered clusters of 3 or 5 to create a cohesive outcropping.
Frequently Asked Questions
How do I calculate the weight of a boulder before buying?
Measure the length, width, and height in feet, multiply them together to get the cubic footage, and multiply by the rock's density. For example, a granite boulder measuring 3x2x2 feet equals 12 cubic feet. Multiply by 165 lbs/cu ft to estimate 1,980 pounds. Always round up by 15% to account for irregular densities.
Can I place boulders on top of an existing concrete patio?
Only if the concrete is at least 4 inches thick and reinforced with rebar. A 1,500-pound boulder resting on a 2-square-foot footprint exerts 750 pounds per square foot of point load, which will crack standard 3-inch unreinforced sidewalk concrete. Use structural engineering adhesive (like Simpson Strong-Tie epoxy) to secure the base if placing on hardscapes.

