
Landscaping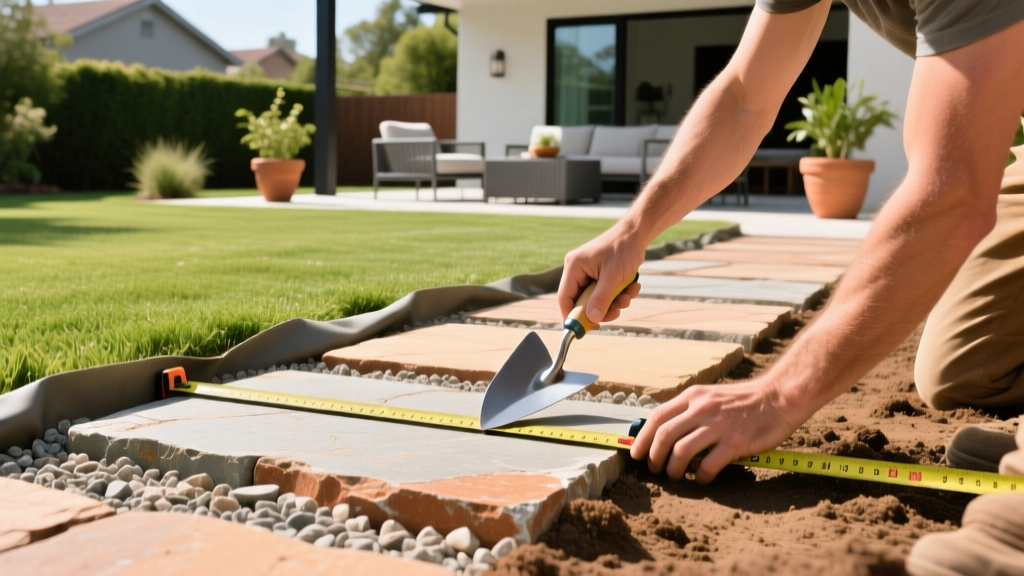
DIY Flagstone Pathway Installation: A Beginner's Guide
Why Choose a Dry-Laid Flagstone Pathway?
When designing a landscape walkway, homeowners typically face a choice between mortared and dry-laid installations. For beginners, a dry-laid flagstone pathway is the superior choice. Mortared walkways require precise mixing ratios, rapid working times before the mortar cures, and a poured concrete sub-base that is prone to cracking in freeze-thaw climates. Dry-laid pathways, conversely, rely on a compacted aggregate base and gravity. They are permeable, allowing rainwater to infiltrate the soil rather than creating runoff, which aligns with modern EPA green infrastructure guidelines for residential stormwater management.
A properly constructed dry-laid pathway will last for decades. If a stone settles unevenly or cracks, you simply lift it, add more base sand, and replace it—a repair that takes five minutes compared to the messy, multi-day demolition and repouring required for concrete or mortared stone.
Material Sizing and 2026 Cost Breakdown
Budgeting for a hardscape project requires understanding both the primary stone and the hidden sub-base materials. The table below outlines current market rates for a standard 100-square-foot pathway.
| Material | Purpose | Estimated Cost (2026) | Pro-Tip for Beginners |
|---|---|---|---|
| Pennsylvania Bluestone | Primary surface stone (dense, durable) | $14.00 - $22.00 / sq ft | Specify 'thermal' or 'cleft' finish for slip resistance. |
| Arizona Flagstone | Primary surface stone (porous sandstone) | $7.00 - $12.00 / sq ft | Seal with a siloxane penetrant to prevent flaking. |
| 3/4-inch Minus Crushed Gravel | Load-bearing sub-base | $45.00 - $65.00 / ton | 'Minus' means it includes stone dust to lock together. |
| Coarse Concrete Sand | Setting bed for leveling stones | $35.00 - $45.00 / ton | Never use masonry sand; it is too fine and washes out. |
| Polymeric Jointing Sand | Locks joints and prevents weeds | $35.00 - $50.00 / 50lb bag | Requires a misting hose activation; do not overwater. |
Step-by-Step Installation Framework
Building a flagstone pathway is a systematic process. Rushing the sub-base preparation is the number one reason DIY walkways fail within the first two years. Follow this exact sequence to ensure structural integrity.
Phase 1: Excavation and Base Preparation
Begin by marking the pathway borders using wooden stakes and mason's line. For a comfortable walking surface, excavate a trench at least 36 inches wide. You must dig down to a total depth of 6 to 7 inches: 4 inches for the gravel base, 1 inch for the sand setting bed, and the thickness of your chosen flagstone (typically 1 to 2 inches).
Drainage Warning: A flat pathway will pool water and heave during winter freezes. Grade the excavated soil so the pathway slopes away from your home's foundation at a minimum rate of 1/4 inch per linear foot. Use a 4-foot bubble level to verify this pitch before adding any gravel.
Fill the trench with 3/4-inch minus crushed gravel. Do not dump all 4 inches in at once. Spread the gravel in 2-inch layers (called 'lifts') and run a rented plate compactor (such as a Wacker Neuson or Mikasa model, typically $75/day from local rental yards) over each lift. Compacting in lifts prevents the deep base from settling later, which causes the dreaded 'wobble' in surface stones.
Phase 2: Stone Layout and Cutting
Once the base is compacted, spread a 1-inch layer of coarse concrete sand over the gravel. Do not compact this sand layer; it needs to remain loose so you can screed and adjust the height of individual stones.
Lay your flagstones directly onto the sand. Aim for uniform joint gaps of 1.5 to 2 inches. Avoid 'H-joints'—a layout mistake where four stone corners meet at a single cross intersection. This creates a weak point in the pathway. Instead, stagger the joints like a brick pattern.
When a stone needs to be cut to fit a curve or edge, score a line across the stone using a carbide-tipped masonry chisel and a 3-pound drilling hammer. Strike the chisel repeatedly along the line until a deep groove forms, then place the stone over a 2x4 piece of lumber and strike the waste side sharply to snap it cleanly.
Phase 3: Leveling and Jointing
As you place each stone, tap it with a rubber mallet. Check for wobble by stepping on the corners. If a stone rocks, lift it and add or remove sand underneath until it sits perfectly flush with its neighbors and the surrounding grade. The finished surface of the stones should sit roughly 1/2 inch above the surrounding soil or turf to prevent lawn clippings and soil from washing into the joints.
For jointing, sweep polymeric sand into the 1.5-inch gaps. Use a leaf blower to remove all excess dust from the stone surfaces—if polymeric sand dust is left on the stone and gets wet, it will cure into a hazy, permanent film. Finally, mist the pathway with a garden hose using a shower nozzle to activate the polymers, which bind the sand together into a flexible, weed-resistant matrix.
Common Beginner Mistakes and How to Avoid Them
- Using the Wrong Sand: Beginners often buy 'play sand' or 'masonry sand' from big-box stores because it is cheap. These sands lack the angular particles required for structural locking and will wash away in heavy rain, causing stones to sink. Always source coarse, angular concrete sand from a local landscape supply yard.
- Skipping Geotextile Fabric: If your native soil is heavy clay, lay a layer of non-woven geotextile fabric at the very bottom of the trench before adding gravel. This prevents the clay from migrating up into the gravel base over time, which would otherwise clog the drainage and turn your base into mud.
- Activating Polymeric Sand in High Humidity: Polymeric sand requires a dry environment to cure. Check the weather forecast and ensure there is zero chance of rain and humidity is below 70% for at least 24 hours after installation.
Maintenance and Longevity
A dry-laid flagstone pathway requires minimal maintenance, but it is not entirely zero-maintenance. Over time, the polymeric sand joints may erode from heavy foot traffic or aggressive pressure washing. According to preservation standards outlined by the National Park Service for historic masonry, using harsh acids or high-psi pressure washers on natural stone will degrade the surface matrix and destroy jointing materials.
'When cleaning natural stone hardscapes, limit pressure washing to a maximum of 800 PSI with a wide 40-degree fan tip, keeping the wand at least 12 inches from the surface to prevent etching and joint displacement.'
Every three to four years, inspect the joints. If the polymeric sand has receded more than 1/4 inch below the stone surface, use a leaf blower to clear the debris, apply a fresh layer of jointing sand, and mist it to reactivate the binders. For pathways in heavily shaded areas where moss or algae becomes slippery, treat the stones annually with a potassium salt of fatty acids (soap-based herbicide) rather than bleach, which can alter the pH of the surrounding soil and harm adjacent lawn grass.
Frequently Asked Questions
Can I lay flagstone directly on dirt or grass?
No. While social media often shows 'quick' pathways laid directly on soil, this will result in severe settling, frost heave, and mud intrusion within a single season. The 4-inch compacted gravel base is non-negotiable for structural stability and drainage.
What is the best ground cover for the joints if I don't want to use sand?
If you prefer a softer, natural look, fill the 2-inch joints with decomposed granite (DG) or plant a low-growing, drought-tolerant ground cover like creeping thyme (Thymus serpyllum) or Irish moss (Sagina subulata). Note that organic jointing requires manual weeding and will not lock the stones together as tightly as polymeric sand.
How thick should the flagstone be for a walkway?
For pedestrian foot traffic, flagstone should be a minimum of 1.25 inches thick. If you plan to occasionally drive a golf cart or heavy wheelbarrow over the pathway, upgrade to 2-inch thick thermal-cut bluestone and increase your gravel sub-base to 6 inches.

