
Landscaping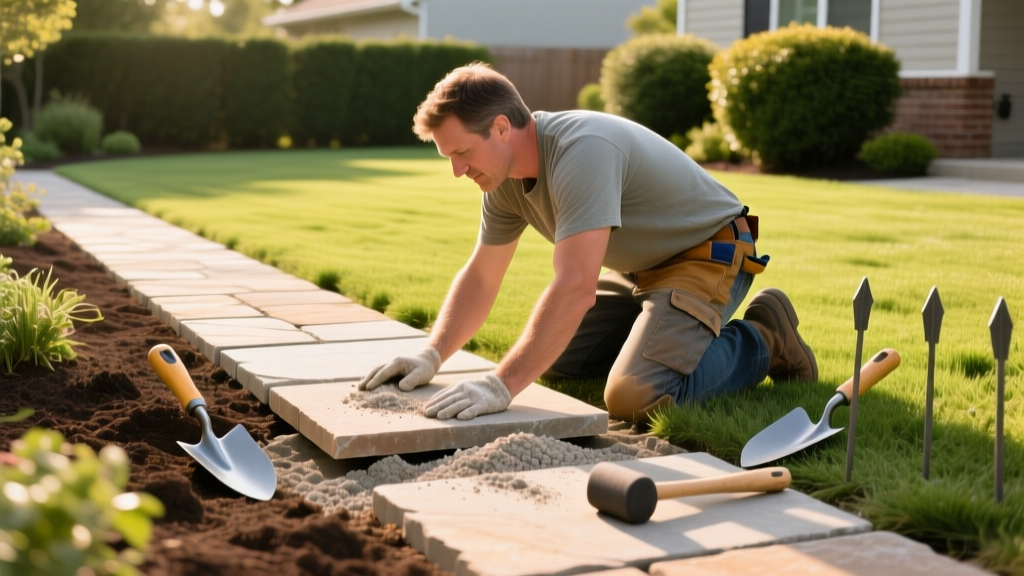
DIY Flagstone Paver Walkway: A Beginner's Step-by-Step Guide
Why Sand-Set Flagstone is the Ideal Beginner Project
A sand-set flagstone paver walkway delivers the high-end, organic look of natural stone without the unforgiving permanence or structural complexity of mortared masonry. For beginners, the dry-laid (sand-set) method is the most forgiving approach. If a stone settles unevenly or shifts after a heavy freeze-thaw cycle, you can simply pry it up, add more bedding sand, and reset it. Mortared walkways, by contrast, require precise concrete mixing, curing times, and will crack catastrophically if the base fails.
However, 'forgiving' does not mean 'easy.' The vast majority of DIY flagstone failures stem from improper base preparation and selecting the wrong stone thickness. This guide provides the exact material specifications, structural layers, and installation framework required to build a walkway that survives decades of weather and foot traffic.
Material Selection: The Thickness Rule
The most common mistake beginners make is purchasing thin 'stepper' flagstone from big-box garden centers and attempting to sand-set it. Steppers are typically 1 inch thick and are designed to be laid directly on existing soil or grass for light, informal foot traffic. When placed on a granular sand base, 1-inch stones will snap under point-loads (like a heel or a heavy wheelbarrow wheel) because the sand shifts slightly beneath them.
⚠️ Critical Sourcing Rule: For a sand-set flagstone paver walkway, you must purchase 'patio grade' or 'stand-on grade' flagstone. The stone must be a minimum of 1.5 inches thick, with 2 inches being the ideal standard for high-traffic areas. Expect to pay a premium for this thickness, but it is non-negotiable for structural integrity.
Popular Flagstone Varieties
- Arizona Flagstone: A durable sandstone with warm rust, peach, and brown tones. Highly slip-resistant and relatively easy to cut with a diamond blade.
- Pennsylvania Bluestone: A dense, slate-like stone in cool blue and gray hues. Extremely durable but heavier and harder to cut.
- Oklahoma Flagstone: Features striking variegated patterns of gold, brown, and gray. A limestone-based stone that is easier to shape but slightly more porous.
The Anatomy of a Permeable Base Architecture
A walkway is only as strong as the dirt beneath it. According to the EPA's Green Infrastructure guidelines, permeable paving systems like sand-set flagstone require a base that facilitates drainage while resisting lateral movement. You cannot simply lay stone over dirt or round gravel.
The Four-Layer System
- Subgrade (Native Soil): The undisturbed or compacted native soil at the bottom of your trench.
- Geotextile Fabric (Optional but Recommended): A non-woven landscape fabric placed over the subgrade. This prevents the crushed stone base from migrating down into clay-heavy soils over time, a phenomenon that causes severe sinking.
- Base Aggregate (4 to 6 inches): You must use 3/4-inch minus angular crushed stone (often called 'crusher run' or 'road base'). The 'minus' means it includes stone dust and smaller particles that lock together like a jigsaw puzzle when compacted. Never use round river rock or pea gravel, which roll like ball bearings under pressure.
- Bedding Layer (1 inch): Coarse, washed concrete sand or stone dust. This provides a smooth, levelable bed for the flagstone.
2026 Cost Breakdown: 100 Square Foot Walkway
Budgeting accurately prevents mid-project stalls. Below is the estimated material cost for a standard 100 sq. ft. DIY flagstone paver walkway (e.g., 3 feet wide by 33 feet long). Prices reflect 2026 regional averages for premium materials.
| Material | Quantity Needed | Unit Cost | Total Cost |
|---|---|---|---|
| 1.5' - 2' Patio Grade Flagstone | 110 sq. ft. (10% waste) | $5.50 / sq. ft. | $605.00 |
| 3/4' Minus Crushed Stone | 2.5 tons | $45.00 / ton | $112.50 |
| Coarse Concrete Sand | 0.5 tons | $40.00 / ton | $20.00 |
| Polymeric Jointing Sand | 2 bags (50lb) | $35.00 / bag | $70.00 |
| Plate Compactor Rental | 1 day | $90.00 / day | $90.00 |
| Estimated Total DIY Cost | $897.50 | ||
Note: Hiring a professional landscape contractor typically adds $12 to $22 per square foot in labor, bringing a 100 sq. ft. project to roughly $2,100 - $3,100.
Step-by-Step Installation Framework
Step 1: Layout, Excavation, and Slope
Use a garden hose to map out the natural curve of your walkway, then mark the edges with landscaping spray paint. Excavate the trench to a depth of 7 to 8 inches (4-6 inches for base, 1 inch for sand, plus the thickness of your stone). Crucially, you must establish a drainage slope. The University of Minnesota Extension recommends a minimum slope of 1/8 inch to 1/4 inch per foot away from any structures or foundations to prevent water pooling and ice damming.
Step 2: Base Compaction (The Make-or-Break Step)
Spread the 3/4-inch minus crushed stone in 2-inch layers (lifts). Do not dump all 6 inches at once. After each 2-inch layer, run a mechanical plate compactor over the stone. The vibration forces the stone dust into the voids between the larger rocks, creating a nearly concrete-like sub-base. If you skip the plate compactor and rely on hand-tamping, your walkway will develop ruts within the first year.
💡 Pro Tip: Lightly mist the crushed stone with a garden hose before compacting. The moisture helps the stone dust bind to the larger aggregate, significantly increasing the density of the base layer.
Step 3: Screeding the Bedding Sand
Lay down 1-inch diameter PVC pipes or aluminum screed rails parallel to each other on top of the compacted base. Dump your coarse concrete sand between the rails and use a straight 2x4 board to drag the sand flush with the top of the pipes. Remove the pipes and fill the voids with sand. This guarantees a perfectly level 1-inch bedding layer.
Step 4: Stone Placement and Jointing
Begin laying your thickest, largest flagstone pieces at the edges or high-traffic centers. Treat the layout like a jigsaw puzzle, aiming for consistent 1.5 to 2-inch gaps between stones. Use a rubber mallet to tap the stones into the bedding sand. Once all stones are set, sweep polymeric sand over the entire surface, forcing it deep into the joints. Use a leaf blower on a low setting to remove excess dust from the stone faces, then mist the walkway with a fine spray nozzle to activate the polymers. Do not use a high-pressure hose, which will wash the sand out of the joints before it cures.
Troubleshooting Common Beginner Failures
Even with careful planning, issues can arise. Here is how to diagnose and fix the most frequent problems encountered by DIYers.
- Symptom: Stones wobble or rock when stepped on.
Cause: The bedding sand was too thick, or the stone bottom is highly irregular, creating a pivot point.
Fix: Lift the stone, remove excess sand, and press a small amount of stone dust directly under the pivot point to stabilize it. - Symptom: White, powdery residue on the stone surface (Efflorescence).
Cause: Using masonry sand with high salt/lime content, or activating polymeric sand with too much water, pushing salts to the surface.
Fix: Scrub the stones with a stiff-bristle brush and a specialized efflorescence cleaner. Always use washed concrete sand to prevent this. - Symptom: Frost heave (stones pushing up unevenly in spring).
Cause: Inadequate base depth for your climate zone, or poor drainage trapping water under the base.
Fix: In northern freeze-thaw climates, increase the crushed stone base depth from 4 inches to 8 inches to get below the frost line, as advised by the National Association of Landscape Professionals.
Long-Term Maintenance
A properly installed sand-set flagstone paver walkway requires minimal upkeep. Sweep debris regularly to prevent organic matter from decomposing in the joints, which can invite weed seeds. If weeds do appear, avoid harsh chemical herbicides that can stain the porous stone; instead, use a targeted thermal weed burner or pour boiling water directly on the weed crown. Every 3 to 5 years, inspect the polymeric joints. If the sand has eroded or cracked, simply scrape out the top half-inch of the old jointing sand and apply a fresh layer of polymeric sand to restore the walkway's structural lock and weed resistance.

