
Landscaping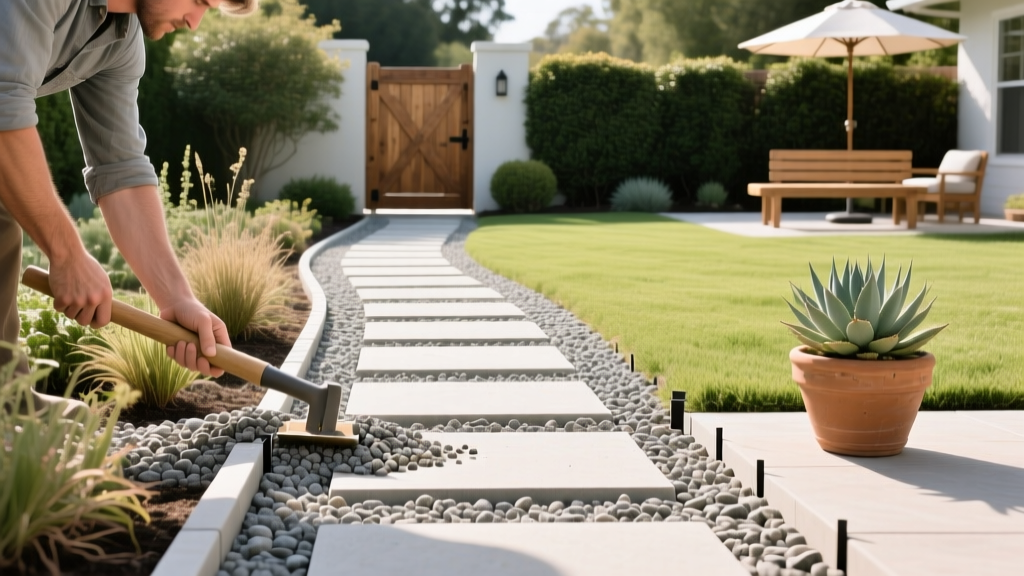
How to Build a DIY Gravel Garden Pathway: Beginner Guide
The Anatomy of a Long-Lasting Garden Pathway
A professional-grade gravel garden pathway relies on a three-layer structural system. Beginners often fail by dumping decorative stone directly onto bare dirt, which leads to sinking, weed infiltration, and muddy shoes within a single season. A properly engineered pathway consists of a compacted native soil subgrade, a stabilizing base layer of crushed angular rock, and a decorative surface layer of smaller gravel. This layered approach distributes foot traffic weight evenly and allows water to permeate the soil, aligning with EPA Green Infrastructure guidelines for reducing residential stormwater runoff.
Material Costs & Requirements (2026 Estimates)
Before breaking ground, calculate your material volumes. Gravel and base rock are sold by the ton or cubic yard. For a standard 3-foot wide by 20-foot long pathway (60 square feet), you will need the following materials. Prices reflect national averages for 2026.
| Material | Specification | Quantity Needed (60 sq ft) | Estimated Cost |
|---|---|---|---|
| Base Rock | 3/4-inch Minus Crushed Stone | 0.75 Tons | $35 - $50 |
| Surface Gravel | 3/8-inch Minus Decomposed Granite | 0.5 Tons | $45 - $70 |
| Landscape Fabric | Non-Woven Geotextile (4 oz) | 80 sq ft (includes overlap) | $25 - $40 |
| Edging | 1/8-inch Aluminum (8ft sections) | 6 Sections | $150 - $180 |
Step-by-Step Excavation and Base Preparation
Precision in the excavation phase dictates the longevity of your pathway. Do not rush these initial steps.
- Mark the Layout and Call 811: Use a garden hose to outline the pathway curves. Once satisfied, mark the edges with landscaping spray paint. By law, you must contact your local utility locating service at least 48 hours before digging. Visit Call 811 to schedule a free utility mark-out to avoid striking buried gas, water, or electrical lines.
- Excavate to the Correct Depth: Dig out the marked area to a uniform depth of 4.5 inches. If you plan to use thicker pavers instead of gravel in the future, excavate 7 inches. Ensure the trench walls are vertical and clean.
- Establish the Drainage Slope: Pathways must shed water. Use a line level and a string tied to wooden stakes to establish a 1% to 2% slope (a 1/8-inch to 1/4-inch drop per linear foot). If the pathway runs parallel to a house foundation, slope it away from the structure at a minimum 5% grade.
- Compact the Subgrade: Tamp the exposed native soil using a manual hand tamper for small areas. For pathways exceeding 50 square feet, rent a vibratory plate compactor from a local equipment rental yard. A solid subgrade prevents the base layer from sinking into soft clay or loam.
CRITICAL WARNING: Never skip the utility mark-out. Hitting a buried fiber-optic or gas line can result in tens of thousands of dollars in fines and severe safety hazards.
Installing Edging and Landscape Fabric
The choice of edging and fabric separates amateur installations from professional landscapes.
The Geotextile Fabric Decision
Hardware stores frequently sell cheap, woven black plastic weed barriers. Avoid these. Woven plastic degrades under UV exposure, tears easily, and traps water, creating a muddy slip-plane beneath your gravel. Instead, purchase non-woven, needle-punched geotextile fabric (typically rated at 4 oz to 6 oz per square yard). This material allows water to pass through vertically while blocking weed seeds and preventing the base rock from mixing with the subgrade soil. Overlap all fabric seams by at least 6 inches and secure them with 6-inch landscape staples driven every 3 feet.
Selecting the Right Edging
Edging contains the gravel and prevents the pathway from spreading into adjacent garden beds.
- Aluminum Edging (1/8-inch thick): Ideal for curved pathways. It bends easily without kinking and will not rust. Secure it with the provided steel stakes driven at a 45-degree angle away from the path.
- Steel Edging (1/4-inch thick): Best for long, straight lines. It is heavier and harder to bend but provides a rigid, indestructible border.
- Plastic/Poly Edging: Not recommended for gravel pathways. Plastic becomes brittle in freezing temperatures and warps under the lateral pressure of compacted gravel.
Laying the Base and Surface Gravel
With the fabric and edging secured, begin adding your stone layers.
Step 1: The Base Layer. Spread 2.5 inches of 3/4-inch minus crushed stone. Rake it level, maintaining your established drainage slope. Run the vibratory plate compactor over the base rock in overlapping passes until the stone is locked tight and no longer shifts underfoot. Lightly mist the rock with a hose during compaction to help the fine dust particles bind together.
Step 2: The Surface Layer. Add 2 inches of your chosen decorative gravel. Rake it smooth, ensuring it sits roughly 1/2 inch below the top of your edging to prevent stones from kicking out onto the lawn when walked on.
Pro-Tip: The 'Minus' Gravel Secret
Always specify 'minus' gravel when ordering from a landscape supply yard. 'Minus' means the gravel contains stone dust and fine particles (fines) ranging from the stated size down to zero. These fines act like cement when compacted, locking the pathway into a hard, semi-solid surface. 'Clean' or 'washed' gravel lacks these fines, meaning the stones will constantly shift under your feet and migrate out of the pathway.
Common Beginner Mistakes to Avoid
- Making the Path Too Narrow: A single-file walking path must be at least 36 inches wide. If two people need to walk side-by-side, or if you are navigating a wheelbarrow, increase the width to 48 or 60 inches.
- Using Rounded River Rock for the Surface: Rounded stones roll underfoot, creating an unstable, ankle-twisting walking surface. Always use angular, crushed stone for pathways.
- Ignoring Tree Roots: If your pathway crosses the drip line of a mature tree, hand-dig around large structural roots rather than severing them with a shovel. Severing roots over 2 inches in diameter can compromise the tree's stability and health.
- Skipping the Plate Compactor: Hand tamping is insufficient for the base layer. Renting a plate compactor for a half-day (typically $60-$80) is the single best investment you can make for pathway longevity.

