
Landscaping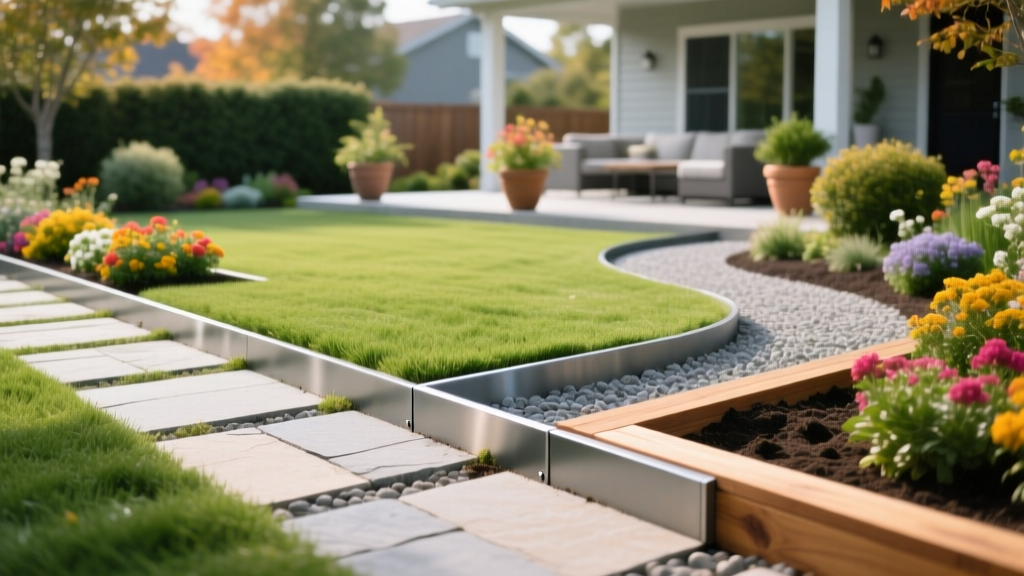
Top Landscaping Edging Ideas: Step-by-Step Installation Guide
Uncontrolled turfgrass rhizomes and sprawling mulch beds can quickly degrade a meticulously designed yard. Implementing the right landscaping edging ideas is not merely an aesthetic choice; it is a fundamental lawn maintenance procedure that establishes physical boundaries, reduces string-trimmer fatigue, and prevents aggressive grasses like Bermuda and Zoysia from invading garden beds. However, the success of any edging project relies entirely on proper subsurface preparation and material-specific installation techniques.
This guide bypasses superficial design inspiration to deliver a rigorous, step-by-step procedural framework for installing and maintaining professional-grade landscape edging.
Material Selection Matrix: Choosing the Right Barrier
Before breaking ground, you must select a material that aligns with your soil type, turfgrass species, and budget. The following matrix compares the most effective edging materials used by landscape professionals in 2026.
| Material Type | Avg. Cost (Per Linear Ft.) | Expected Lifespan | Best Application | Maintenance Level |
|---|---|---|---|---|
| Galvanized Steel (1/8") | $4.50 - $7.00 | 30+ Years | Aggressive grasses, tight radii, commercial | Low |
| Extruded Aluminum | $3.50 - $5.50 | 20+ Years | Curved pathways, coastal/saline soils | Low |
| Polypropylene (Heavy-Duty) | $1.50 - $3.00 | 5 - 8 Years | Budget DIY, straight lines, mild climates | High |
| Spade-Cut (English Trench) | $0.00 (Labor only) | 1 Season | Organic beds, high-labor maintenance | Very High |
Expert Insight: Avoid cheap corrugated plastic edging sold in big-box coils. UV degradation and winter frost heave will cause these materials to warp and surface within 24 months, creating a tripping hazard and failing to block rhizome creep. Always opt for commercial-grade extruded aluminum or cold-rolled steel.
Phase 1: Pre-Installation and Trenching Procedures
The most common failure point in landscape edging is improper trenching. If the subsurface base is not compacted and angled correctly, the edging will heave during freeze-thaw cycles.
CRITICAL SAFETY WARNING: Before digging any trench deeper than 4 inches, you must contact your local utility locating service. In the US and Canada, dialing 811 or visiting call811.com ensures underground gas, water, and fiber-optic lines are marked. Wait the legally mandated 48 to 72 hours for markings before proceeding.
Step 1: Delineation and Marking
Do not rely on spray paint for curved beds, as it results in jagged, unnatural lines. Use a standard 50-foot garden hose to lay out your curves. Walk away and view the line from a second-story window or use a drone to ensure the curve flows naturally with the architecture of the home. Once satisfied, trace the hose line with inverted marking paint.
Step 2: Excavating the Trench
For rigid metal or poly edging, you need a precise trench. Use a manual half-moon edger (such as the Fiskars 39-inch SuperEdger) or a motorized trencher for large perimeters.
- Depth: Excavate to a depth of 4 to 6 inches, depending on the height of your chosen edging material. The goal is to leave the top 1/2 inch of the edging exposed above the soil grade.
- Width: Keep the trench narrow—approximately 2 to 3 inches wide. A trench that is too wide will require excessive backfilling and compromise the lateral soil support needed to hold stakes.
- Angle: Cut the lawn side of the trench at a strict 90-degree angle, but angle the bed side at 45 degrees. This V-shaped profile provides structural resistance against the outward pressure of expanding mulch and soil.
Phase 2: Executing Material-Specific Installations
Once the trench is prepared, the installation procedure diverges based on the material you selected from our landscaping edging ideas matrix.
Installing Steel and Aluminum Edging
Metal edging provides the cleanest, most permanent barrier against invasive turf roots.
- Overlap Technique: When joining two 8-foot sections of metal edging, never butt them end-to-end. Overlap the sections by exactly 6 inches. Slide the connecting bolts through the pre-punched holes and secure with locking nuts.
- Staking Protocol: Insert 18-inch steel stakes through the provided loops. Drive the stakes into the soil at a 45-degree angle pointing away from the lawn. This angled leverage prevents the frost from pushing the stakes upward. Space stakes every 4 feet on straight runs and every 2 feet on curves.
- Backfilling: Shovel the excavated soil back into the trench and tamp it down aggressively with a hand tamper. Water the backfill lightly to help the soil settle and lock the metal in place.
Installing Interlocking Polypropylene Edging
Heavy-duty poly edging (like Dimex EdgePro) is lighter and easier to cut but requires more stakes to maintain rigidity.
- Flexing: To bend poly edging around tight radii without kinking, use a heat gun on a low setting to warm the plastic for 10 seconds before bending.
- Staking Density: Because poly lacks the inherent rigidity of steel, you must place anchoring stakes every 2 feet on straight lines and every 12 inches on curves.
- Cutting: Use a fine-toothed hacksaw rather than heavy tin snips, which can crush and splinter the hollow structural channels of modern poly edging.
The Spade-Cut (English Trench) Method
If you prefer a zero-hardscape approach, the spade-cut method relies on a physical air-gap to stop grass. According to turfgrass management guidelines from the University of Minnesota Turfgrass Science program, maintaining a clean physical trench is highly effective if maintained properly.
- Cut a 4-inch deep, 6-inch wide trench along the bed line.
- Angle the lawn side straight down (90 degrees) and the bed side at a 45-degree slope.
- Remove all loose soil from the trench to prevent grass rhizomes from using the dirt bridge to cross the gap.
Pro-Tip for Mower Clearance: When setting the final grade of your edging, ensure the top lip is exactly 1/4 to 1/2 inch below the height of your turf canopy. This allows your rotary mower deck to glide over the edging without the blade striking the metal or plastic, which dulls blades and damages the edging.
Phase 3: Long-Term Maintenance Procedures
Even the best landscaping edging ideas will fail without a seasonal maintenance protocol. Turfgrass is relentless, and soil dynamics shift over time.
Spring Frost Heave Correction
In regions with deep winter freezes, frost heave can push metal stakes upward by 1 to 2 inches. In early spring, walk your perimeter with a rubber mallet or a heavy dead-blow hammer. Tap any protruding stakes back down until the edging lip is flush with your target sub-grade clearance. Do not use a steel hammer directly on aluminum edging, as it will dent and weaken the structural integrity.
Managing Rhizome Jumpers
Aggressive grasses will eventually attempt to grow over the top of the edging or find microscopic gaps at the joints. Schedule a perimeter audit every 60 days during the peak growing season (May through August). Use a sharp Hori-Hori knife or a specialized weeding tool to sever any grass stolons that have bridged the gap before they can root into the mulch bed.
Troubleshooting Common Edging Failures
| Symptom | Root Cause | Corrective Procedure |
|---|---|---|
| Edging bowing inward toward the lawn | Mulch was piled too high against the bed side, creating excessive lateral pressure. | Remove 2 inches of mulch near the edge. Install secondary support stakes on the bed side to brace the material. |
| Grass consistently invading the mulch bed | Trench bottom was not cleared of loose soil, creating a 'dirt bridge' for rhizomes. | Dig out the trench base to bare subsoil. Apply a targeted, non-selective herbicide strictly to the trench gap (avoiding drift). |
| Poly edging becoming brittle and snapping | UV degradation from using non-commercial grade plastics. | Excavate and replace with UV-stabilized, commercial-grade polypropylene or upgrade to aluminum. |
Implementing these rigorous installation and maintenance procedures ensures that your chosen landscape edging serves as a permanent, low-maintenance boundary. By prioritizing subsurface preparation and material longevity over quick-fix solutions, you protect your landscaping investment and drastically reduce weekly yard work. For further professional standards on landscape management, refer to resources provided by the National Association of Landscape Professionals (NALP).

