
Landscaping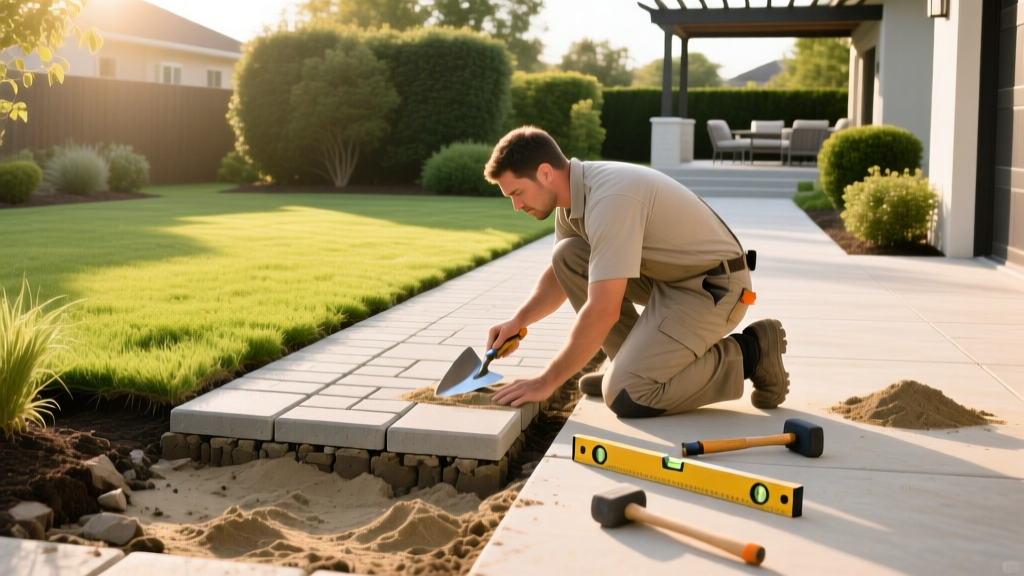
Walkway Renovation Ideas: A Step-by-Step Paver Upgrade
The Anatomy of a Failed Walkway
Before exploring specific walkway renovation ideas, it is critical to understand why existing paths fail. The vast majority of cracked, sunken, or heaving walkways suffer from subterranean issues, not surface material defects. Frost heave occurs when moisture trapped in the sub-base freezes and expands, pushing pavers upward. Washouts happen when heavy rain bypasses inadequate edge restraints, eroding the bedding sand and creating sinkholes. Finally, edge creep—the gradual outward spreading of pavers—results from relying on mortar or weak plastic edging rather than mechanical spike restraints.
Warning: Never attempt to renovate a walkway by simply laying new pavers over an existing cracked concrete slab. The slab will continue to shift independently of the new surface, causing the pavers to mirror the cracks below. Complete demolition and base reconstruction are mandatory for a lasting renovation.
Material Selection Matrix: Choosing Your Paver System
When evaluating walkway renovation ideas, material selection dictates both the installation method and the long-term maintenance profile. Below is a comparison of the three most viable systems for residential renovations.
| Material Type | Cost per Sq. Ft. (Materials Only) | Durability & Frost Resistance | DIY Difficulty | Best Application |
|---|---|---|---|---|
| Concrete Pavers (e.g., Belgard Urbana) | $3.50 - $6.00 | High (ASTM C936 compliant, 8,000 PSI) | Moderate | Standard pathways, high-traffic entryways |
| Natural Flagstone (Bluestone or PA Fieldstone) | $7.00 - $12.00 | Moderate (Prone to flaking if poorly sealed) | High (Requires custom fitting) | Rustic gardens, woodland paths |
| Permeable Pavers (e.g., Aqua-Roc) | $5.00 - $9.00 | High (Deep base handles freeze/thaw) | High (Strict base depth requirements) | Eco-friendly zones, poor drainage areas |
For most homeowners tackling a DIY renovation, interlocking concrete pavers offer the best balance of structural integrity and forgiving installation tolerances. According to the Interlocking Concrete Pavement Institute (ICPI), properly installed concrete pavers can withstand heavy loads and freeze-thaw cycles far better than poured concrete because their flexible joints dissipate stress.
The 6-Inch Base Rule: Step-by-Step Execution
A successful walkway renovation relies entirely on the unseen layers beneath the surface. Follow this exact sequence to ensure structural longevity.
Step 1: Excavation and Slope Planning
Excavate the existing walkway to a depth of 7 to 9 inches. This accounts for a 4-to-6-inch sub-base, a 1-inch bedding sand layer, and the 2 3/8-inch thickness of standard pavers. Use a rotary laser level to establish a 1% slope (1/8 inch drop per foot) away from your home’s foundation to ensure positive drainage. Before digging, always call 811 to have underground utilities marked.
Step 2: Sub-Base Preparation
Lay down a non-woven geotextile fabric (such as Mirafi 500X) to separate the soil from the aggregate and prevent weed intrusion. Fill the trench with 3/4-inch minus crushed gravel (often called Class II road base). Compact this layer in 2-inch lifts using a vibratory plate compactor capable of generating at least 5,000 lbs of centrifugal force. The goal is to achieve 95% Standard Proctor Density.
Step 3: Screeding the Bedding Sand
Do not use mason sand or play sand for your bedding layer; these lack the sharp, angular particles required for interlocking. You must use ASTM C33 washed concrete sand. Lay two 1-inch diameter PVC pipes parallel to each other as screed guides. Pour the sand between them and drag a straight 2x4 across the pipes to create a perfectly flat, uncompacted 1-inch bed. Remove the pipes and fill the voids with a trowel. Never walk on the screeded sand.
Step 4: Laying and Cutting
Begin laying pavers from a fixed 90-degree corner (like your front porch) and work outward. Maintain a tight 1/16-inch joint spacing—most modern pavers have built-in spacer bars on their sides to enforce this. For curves or borders, use a masonry wet saw equipped with a continuous-rim diamond blade to minimize chipping and suppress hazardous silica dust.
Edge Restraint and Jointing: The Secret to Longevity
The most common point of failure in walkway renovation projects is inadequate edge restraint and improper joint sand application.
Installing Mechanical Edge Restraint
Avoid mortar haunches, which crack during freeze-thaw cycles. Instead, install a heavy-duty polyethylene or aluminum edge restraint, such as SnapEdge or Perma-Edge. Secure the restraint using 10-inch galvanized steel spikes driven every 12 inches along the perimeter. This creates a rigid boundary that prevents the pavers from spreading outward under foot traffic.
Polymeric Sand vs. Traditional Joint Sand
While traditional silica sand is inexpensive, it washes out easily and invites weed growth. Polymeric sand contains water-activated polymers that bind the sand grains together, creating a flexible, weed-resistant joint. Premium brands like Alliance Gator Maxx or Techniseal offer superior adhesion and resistance to ant excavation.
Pro-Tip: Avoiding Polymeric Hazing
The number one mistake DIYers make with polymeric sand is leaving dust on the paver surface before wetting it. After sweeping the sand into the joints, use a leaf blower on a low setting to remove all residual dust from the paver faces. When activating the polymers with water, use a shower nozzle on a gentle setting. High-pressure water will wash the polymers out of the joints and leave a permanent, cloudy haze on the surface of your pavers.
The number one mistake DIYers make with polymeric sand is leaving dust on the paver surface before wetting it. After sweeping the sand into the joints, use a leaf blower on a low setting to remove all residual dust from the paver faces. When activating the polymers with water, use a shower nozzle on a gentle setting. High-pressure water will wash the polymers out of the joints and leave a permanent, cloudy haze on the surface of your pavers.
Budgeting Your Walkway Renovation
Understanding the financial scope of your project helps in comparing different walkway renovation ideas. Below is a realistic breakdown of costs for a standard 200-square-foot entryway path in 2026.
- DIY Material Costs: $600 - $1,200 (Pavers, base gravel, sand, edge restraint, and polymeric sand).
- Equipment Rental: $150 - $250 (Plate compactor, masonry wet saw, and laser level for a weekend).
- Professional Installation: $2,400 - $3,800 ($12 to $19 per square foot, including labor, materials, and site prep).
If your renovation involves integrating eco-friendly drainage solutions, consider permeable pavers. The EPA's research on permeable pavement highlights its effectiveness in reducing stormwater runoff and filtering pollutants, though it requires a deeper, more expensive open-graded aggregate base (typically 12 to 18 inches deep) to function correctly.
Final Considerations for Curb Appeal
A newly renovated walkway dramatically elevates your property's curb appeal, but the surrounding landscape must complement it. Border your new path with a 3-inch layer of double-shredded hardwood mulch to retain soil moisture and suppress weeds. Incorporate low-voltage LED pathway lights spaced 8 to 10 feet apart to illuminate the edges without creating glare. By adhering strictly to base preparation standards and utilizing modern jointing compounds, your renovated walkway will remain level, weed-free, and structurally sound for decades.

