
Landscaping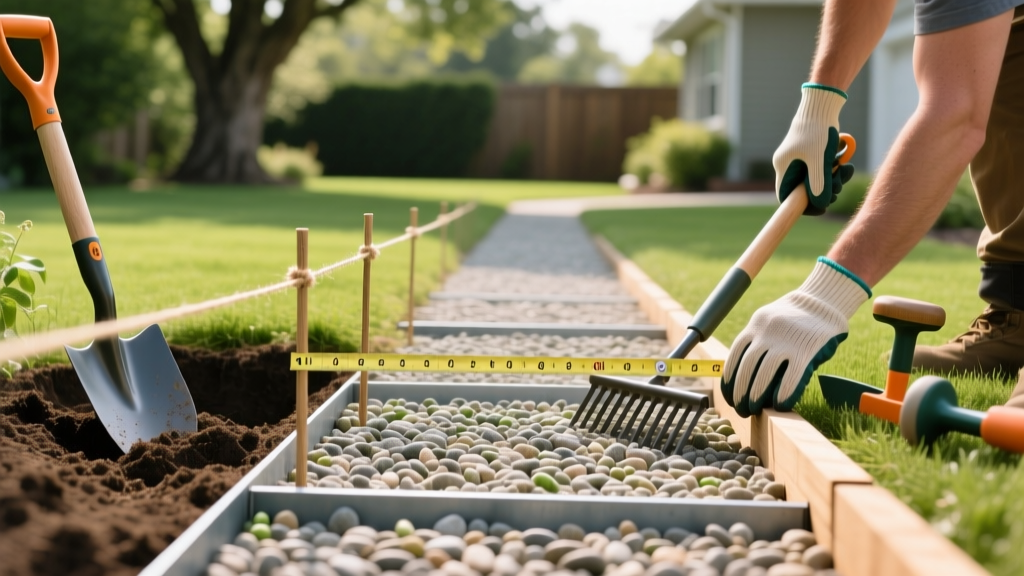
Build a Pea Gravel Path: Step-by-Step DIY Walkway Guide
The Anatomy of a Stable Pea Gravel Path
A pea gravel path is one of the most cost-effective and permeable hardscaping projects a homeowner can tackle. However, the primary reason DIY gravel paths fail within the first year is a lack of structural confinement and improper base preparation. Pea gravel, by definition, consists of small, smooth stones that naturally want to roll and migrate. To build a path that stays put and drains properly, you must engineer a contained system.
According to the Environmental Protection Agency (EPA), permeable surfaces like gravel walkways significantly reduce stormwater runoff and reduce the burden on municipal drainage systems. But to achieve this permeability without turning your path into a muddy trench, you need a specific layering approach: a compacted subgrade, heavy-duty non-woven geotextile fabric, rigid edging, and the correct gravel profile.
Material Calculator and Cost Breakdown
Before breaking ground, calculate your material needs based on a standard 3-foot wide path. The table below outlines the exact specifications and estimated 2026 material costs for a 100-square-foot section (e.g., 3 feet wide by 33 feet long).
| Material | Specification | Est. Cost (100 sq ft) | Coverage / Yield |
|---|---|---|---|
| Crushed Base Stone | #57 or #411 crushed limestone (2-inch depth) | $45 - $65 | ~1 ton covers 100 sq ft at 2" |
| Pea Gravel | 3/8-inch angular crushed pea gravel (2-inch depth) | $50 - $80 | ~1 ton covers 100 sq ft at 2" |
| Geotextile Fabric | 3 oz to 4 oz non-woven polypropylene | $40 - $60 | Rolls typically cover 300+ sq ft |
| Landscape Edging | 4-inch heavy-gauge steel or aluminum | $120 - $180 | ~$3.50 per linear foot |
| Edging Stakes | 18-inch steel U-pins or J-pins | $25 | 1 pin every 3 linear feet |
Total Estimated DIY Cost: $2.80 to $4.10 per square foot. Professional installation by a National Association of Landscape Professionals (NALP) certified contractor typically runs $8.00 to $14.00 per square foot due to labor and equipment overhead.
Step-by-Step Installation Guide
Step 1: Excavation and Slope Grading
Dig a trench 4 inches deep and exactly 2 inches wider than your desired path width on both sides to accommodate edging. The most critical metric here is the slope. Even though gravel is permeable, heavy downpours can wash the stones away if water pools and flows laterally. Grade the soil subbase with a 1/4-inch drop per linear foot away from your home's foundation or toward a designated drainage swale. Use a 4-foot level and a wooden block to verify the pitch.
Step 2: Installing Rigid Edging
Pea gravel will escape into your lawn or mulch beds if not physically contained. Avoid cheap plastic roll-edging; it warps under UV exposure and soil pressure.
Pro Tip: Install 4-inch steel or aluminum landscape edging (such as PermaLoc or Vigoro steel edging). Drive 18-inch steel stakes through the edging brackets every 3 feet. The top of the edging should sit exactly 1/2 inch above the final gravel surface to contain the stones while allowing surface water to sheet off during extreme storms.
Step 3: Laying the Geotextile Barrier
Do not skip the fabric, and do not use the cheap woven black plastic sold at big-box stores. Woven plastic restricts water flow, causing puddling on top of the gravel, and degrades rapidly under UV light.
Use a 3-ounce to 4-ounce non-woven geotextile fabric (brands like Mutual Industries or Agtec). Non-woven fabric acts like a coffee filter: it allows water to pass through vertically while blocking soil particles from migrating up into your gravel base. Overlap all seams by at least 12 inches and secure the perimeter with landscape staples.
Step 4: Base and Gravel Application
While some DIYers dump pea gravel directly on the fabric, adding a 2-inch base layer of crushed #57 or #411 stone drastically improves longevity. The angular edges of the crushed base lock together when tamped, creating a rigid floor that prevents the path from developing ruts under foot traffic or wheelbarrow loads.
- Base Layer: Spread 2 inches of crushed stone. Compact it thoroughly using a manual hand tamper or a rented vibrating plate compactor.
- Surface Layer: Spread 2 inches of pea gravel over the compacted base. Rake it level. Do not tamp the pea gravel; tamping will crush the stones and create dust that impedes drainage.
The Great Debate: Rounded vs. Crushed Pea Gravel
Not all pea gravel is created equal. When ordering from your local landscape supply yard, you must specify the stone shape.
- Rounded River Pea Gravel: Naturally smoothed by water over thousands of years. It looks beautiful and feels great under bare feet, but the rounded edges mean the stones roll against each other. Walking on it feels like walking on marbles, and it migrates easily.
- Crushed (Angular) Pea Gravel: Mechanically crushed to 1/4 or 3/8-inch size. The jagged, angular edges interlock slightly when walked on, providing a much more stable walking surface while maintaining the classic pea gravel aesthetic. Always choose crushed pea gravel for high-traffic walkways.
Troubleshooting Common Beginner Failures
Failure 1: Puddling After Rain
Cause: You used woven landscape fabric, or your soil subgrade is heavy clay with no base stone.
Fix: Remove the top layer of gravel, replace the woven fabric with 4-oz non-woven geotextile, and ensure a 2-inch crushed stone base is present to act as a sub-surface reservoir.
Cause: You used woven landscape fabric, or your soil subgrade is heavy clay with no base stone.
Fix: Remove the top layer of gravel, replace the woven fabric with 4-oz non-woven geotextile, and ensure a 2-inch crushed stone base is present to act as a sub-surface reservoir.
Failure 2: Gravel Spilling into the Lawn
Cause: Edging is too low, or flexible plastic edging has bowed outward under the lateral pressure of the stones.
Fix: Extract the plastic edging. Install rigid steel edging, ensuring the top lip sits 1/2 inch above the gravel line. Backfill the outside of the edging with soil and tamp it down to lock the steel in place.
Cause: Edging is too low, or flexible plastic edging has bowed outward under the lateral pressure of the stones.
Fix: Extract the plastic edging. Install rigid steel edging, ensuring the top lip sits 1/2 inch above the gravel line. Backfill the outside of the edging with soil and tamp it down to lock the steel in place.
Failure 3: Aggressive Weed Breakthrough
Cause: Wind-blown soil and organic matter have accumulated on top of the gravel, creating a seedbed above the fabric.
Fix: This is a maintenance issue, not an installation failure. Rake the path vigorously every spring to dislodge settling organic matter. Apply a pre-emergent herbicide (like Preen Garden Weed Preventer) directly over the gravel in early spring.
Cause: Wind-blown soil and organic matter have accumulated on top of the gravel, creating a seedbed above the fabric.
Fix: This is a maintenance issue, not an installation failure. Rake the path vigorously every spring to dislodge settling organic matter. Apply a pre-emergent herbicide (like Preen Garden Weed Preventer) directly over the gravel in early spring.
Maintenance for Long-Term Durability
A pea gravel path requires minimal but specific upkeep. Once a year, use a stiff metal rake to redistribute stones that have migrated to the edges back toward the center. If the gravel layer thins out below 1.5 inches, the base stone will become exposed. Plan to order a 'top-up' load of gravel (about 0.5 tons per 100 square feet) every 3 to 5 years to maintain the 2-inch surface depth and keep the path looking pristine.

