
Landscaping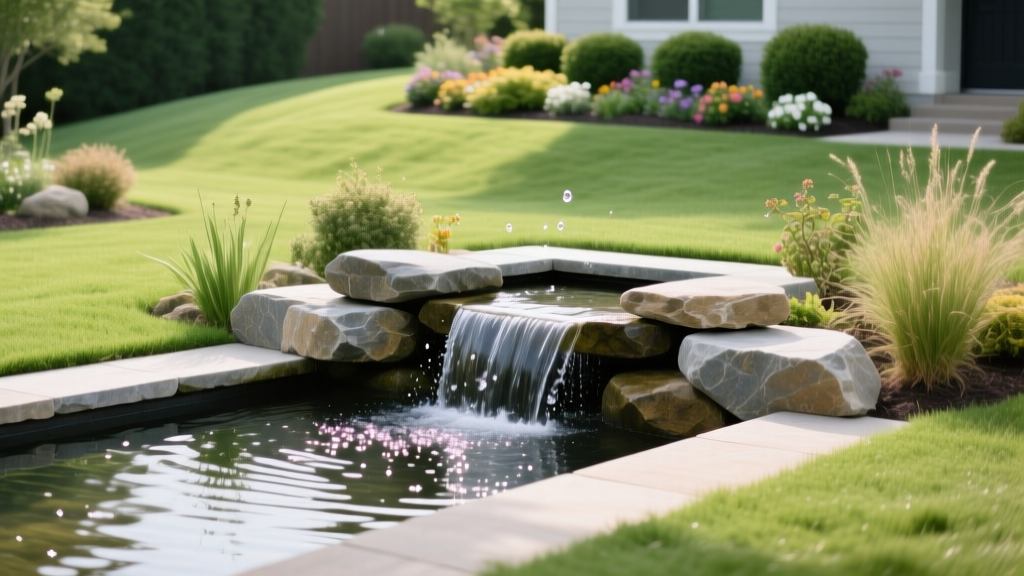
How to Build a DIY Backyard Water Feature: Pondless Waterfall Guide
Building a pondless waterfall is the most practical approach to installing a backyard water feature. Unlike traditional koi ponds or standing water gardens, a pondless system recirculates water through a hidden, gravel-filled subterranean basin. This design eliminates the safety liabilities of open water, prevents mosquito breeding, and drastically reduces the filtration maintenance required to keep the water clear. As of 2026, a professionally installed 4x6-foot pondless waterfall typically costs between $4,500 and $8,000. By executing the excavation, plumbing, and rock placement yourself, you can complete the same build for $900 to $1,400 in materials.
This guide details the exact hydraulic calculations, material specifications, and construction sequences required to build a high-flow, low-maintenance system that will not suffer from the water-loss and pump-burnout issues common in amateur builds.
Phase 1: Hydraulic Engineering and Pump Sizing
The most common failure in DIY water features is an undersized pump resulting in a trickling, underwhelming spillway. To achieve a visually solid sheet of water, you must calculate the required Gallons Per Hour (GPH) based on the width of your waterfall spillway, then adjust for vertical head pressure.
The 1,500 GPH Rule
Industry standard hydraulics dictate that you need 1,500 GPH for every 1 inch of spillway width to achieve a 1/2-inch deep water sheet. If you are installing a standard 12-inch wide stainless steel or polyurethane spillway weir, your baseline requirement is 18,000 GPH. However, for residential backyard scales, a 1/4-inch deep sheet is usually sufficient and more aesthetically pleasing for smaller drops. This reduces the requirement to 750 GPH per inch of width. For a 12-inch spillway, you need a pump that delivers 9,000 GPH at the top of the waterfall.
CRITICAL HEAD PRESSURE WARNING: Pump boxes advertise maximum GPH at zero head (0 feet of vertical lift). Water loses flow rate as it is pushed uphill. A pump rated for 4,000 GPH at 0 feet might only deliver 2,200 GPH at 5 feet of vertical lift. Always read the manufacturer's pump curve chart and select a pump that delivers your target GPH at your specific vertical lift height.
Phase 2: Calculating the Hidden Basin Volume
The hidden basin must hold enough water to keep the pump submerged and prevent the system from sucking air when the pump is turned off and the water in the stream drains back down. If the basin is too small, the pump will run dry and burn out its internal seals within minutes.
The Void Space Formula
Amateurs often calculate basin volume using raw cubic footage. This is a critical error. A pondless basin is filled with 3/4-inch clean washed gravel or structural matrix blocks, which displace water. Clean washed gravel has an approximate void ratio of 35%. This means only 35% of the basin's physical volume actually holds water.
- Raw Volume: Length (ft) x Width (ft) x Depth (ft) x 7.48 = Total Gallons
- Usable Water Volume (Gravel Matrix): Total Gallons x 0.35 = Usable Gallons
- Usable Water Volume (Structural Blocks): Total Gallons x 0.85 = Usable Gallons
For a 4-foot by 4-foot by 2-foot deep excavation filled with gravel, the raw volume is 239 gallons. The usable water volume is only 83 gallons. Ensure your usable volume exceeds the total volume of water held in your stream and waterfall when the pump is running.
Phase 3: Excavation, Underlayment, and Liner Installation
Once your dimensions are set, excavate the basin and the stream bed. The stream bed must be lined with a non-woven geotextile underlayment (minimum 8 oz weight) to protect the rubber liner from root intrusion and sharp rocks. Do not skip the underlayment; it is the primary defense against punctures.
Choosing the Right Liner
Use 45-mil EPDM (Ethylene Propylene Diene Monomer) rubber liner. Avoid PVC liners entirely. PVC becomes brittle in freezing temperatures and degrades rapidly under UV exposure, leading to catastrophic leaks within three to five years. EPDM remains flexible down to -40°F and has a proven lifespan of 20+ years in outdoor environments. According to water conservation guidelines outlined by EPA WaterSense, preventing leaks in outdoor water features is vital for reducing unnecessary municipal water waste, making durable EPDM a sustainable choice.
- Dig the basin with slightly sloped walls (15-degree angle) to prevent soil collapse.
- Remove all sharp rocks, roots, and debris from the soil base.
- Lay the 8oz geotextile underlayment, overlapping seams by 12 inches.
- Drape the 45-mil EPDM liner over the underlayment, allowing at least 18 inches of excess material around all perimeter edges.
- Push the liner tightly into the corners and crevices of the excavation before adding weight.
Phase 4: Basin Matrix and Plumbing
You have two options for creating the water-holding matrix inside your excavated basin: a gravel-filled pit or modular structural blocks.
| Feature | 3/4-inch Clean Washed Gravel | Modular Structural Blocks (e.g., AquaBasin) |
|---|---|---|
| Material Cost (per 100 gal capacity) | $45 - $70 | $180 - $240 |
| Void Ratio (Water Storage) | 35% | 85% - 92% |
| Weight Bearing Capacity | High (can support large boulders) | Moderate (requires load-bearing lids) |
| Maintenance / Cleaning | Difficult (requires gravel removal) | Easy (lift lid and access pump directly) |
Plumbing Specifications: Connect your submersible pump to the spillway using flexible corrugated PVC piping (Schedule 40 equivalent). Rigid PVC is prone to cracking under frost heave and soil settlement. Use a swing check valve installed vertically near the pump to prevent water from back-flowing out of the stream and flooding the basin when the system is powered down.
Phase 5: Spillway Sealing and Rock Placement
The spillway weir is the heart of the visual display. Whether you use a pre-formed polyurethane spillway or a custom stainless steel box, it must be sealed flawlessly to the EPDM liner to prevent water from bypassing the waterfall and eroding the soil underneath.
Do not use standard silicone caulk for underwater liner-to-spillway connections. Silicone degrades in constant submersion and fails under UV exposure. Use a marine-grade polyurethane sealant, such as PL Roof and Flashing or a dedicated EPDM lap sealant. Apply a continuous 1/2-inch bead, press the liner firmly into the spillway flange, and secure it with a stainless steel termination bar screwed into the spillway lip.
Rock Selection and Chinking
When placing rocks on the stream bed, avoid limestone or highly calcareous stones. Over time, limestone leaches calcium carbonate into the water, drastically raising the pH and causing chronic hard-water scaling on your pump and spillway. Opt for granite, basalt, or fieldstone. Use smaller gravel (1-2 inches) to "chink" or wedge the larger boulders tightly in place, ensuring water flows over and around the rocks rather than tunneling underneath them.
Long-Term Maintenance and Troubleshooting
While pondless systems are largely self-cleaning, they require specific seasonal maintenance to operate efficiently. University of Minnesota Extension experts note that proper seasonal winterization of outdoor water features is essential in freezing climates to prevent irreversible damage to plumbing and pump housings.
Common Failure Modes
- Rapid Water Loss: If the basin requires topping off more than once a week, you likely have a leak. Turn off the pump and let the water settle. If the water level drops below the spillway lip, the leak is in the basin or liner. If the water level stays high but the basin still empties when the pump runs, the leak is in the stream bed or the spillway seal.
- String Algae Blooms: Sunlight and nutrients trigger string algae. Do not use chemical algaecides if the water feature is near garden beds where runoff occurs. Instead, install an inline UV clarifier or use barley straw extract, which naturally inhibits algae cell reproduction without harming surrounding landscaping.
- Pump Cavitation: If your pump sounds like it is grinding gravel, it is cavitating. This means the basin water level is dropping too fast, creating a vortex that sucks air into the pump intake. You must add more water to the system or restrict the flow rate slightly via a ball valve.
Winterization Protocol
In zones where temperatures drop below 28°F, you must winterize the system. Remove the submersible pump, drain it completely, and store it indoors in a bucket of water to keep the internal seals from drying out. Leave the flexible PVC piping in the ground, but ensure all check valves are removed or propped open so water cannot trap and freeze inside the lines, which will split the corrugated tubing.
By adhering to these hydraulic principles and material standards, your backyard water feature will operate as a closed-loop, low-maintenance ecosystem that enhances your landscape architecture for decades.

