
Landscaping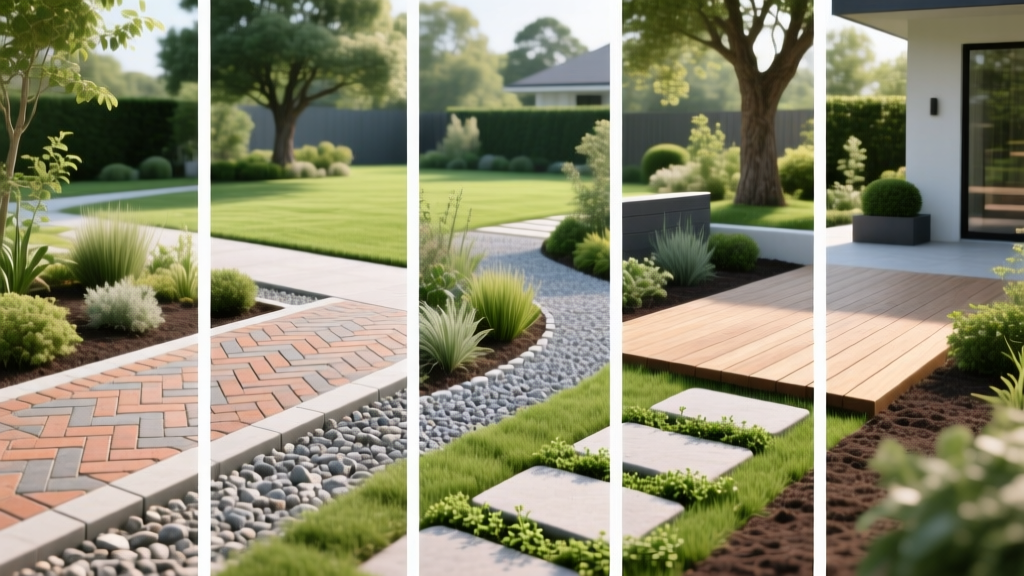
5 Brilliant Walkway Ideas on a Budget for Beginners
The Economics of Budget-Friendly Landscaping
Building a professional-grade poured concrete or natural flagstone walkway typically costs between $15 and $30 per square foot in 2026. For a standard 3-foot wide, 40-foot long path (120 square feet), that translates to $1,800 to $3,600. However, by leveraging DIY-friendly, unbound, or reclaimed materials, homeowners can execute stunning walkway ideas on a budget, dropping the cost to $2 to $7 per square foot. The secret to making cheap materials look expensive lies in meticulous base preparation, strict edging, and intentional pattern selection.
Material Cost & Durability Matrix
Before selecting a surface, evaluate the long-term maintenance requirements against your initial budget. The table below breaks down the 2026 average DIY costs for the most accessible path materials.
| Material | DIY Cost (Per Sq Ft) | Expected Lifespan | Weed Resistance | Beginner Difficulty |
|---|---|---|---|---|
| 3/4" Minus Crushed Gravel | $1.50 - $2.50 | 10-15 Years | High (with fabric) | Easy |
| Decomposed Granite (DG) | $2.00 - $3.50 | 8-12 Years | Medium | Moderate |
| Reclaimed Clay Brick | $4.00 - $7.00 | 20+ Years | High | Moderate |
| Concrete Stepping Stones | $3.00 - $5.00 | 25+ Years | High | Easy |
| Double-Shredded Hardwood Mulch | $0.75 - $1.50 | 1-2 Years | Low | Very Easy |
5 Walkway Ideas on a Budget
1. The Locked-In Crushed Gravel Path
The most common beginner mistake is using pea gravel. Pea gravel consists of smooth, rounded stones that roll underfoot, creating a frustrating walking surface and migrating into surrounding garden beds. Instead, use 3/4-inch minus crushed rock. The "minus" designation means the mix includes stone dust and smaller rock fragments down to 1/4 inch. When compacted, the angular edges and stone dust lock together to form a semi-solid surface that mimics the feel of asphalt.
- Edging: Install ProFlex aluminum landscape edging or 4-inch steel bender board. Plastic edging will warp and crack under UV exposure and frost heave within two seasons.
- Depth: Excavate 4 inches deep. Lay woven geotextile fabric, add 2 inches of paver base, compact, and top with 2 inches of the 3/4-inch minus gravel.
2. Reclaimed Brick in a Herringbone Pattern
New clay pavers cost $3 to $5 each, but reclaimed bricks can be sourced for $0.50 to $1.00 each from architectural salvage yards, Habitat for Humanity ReStores, or local demolition sites. Reclaimed bricks carry a weathered patina that instantly adds historical charm to a garden.
Critical Structural Note: Do not lay reclaimed bricks in a simple running bond (straight lines) without mortar. Because older bricks vary slightly in size, straight lines will quickly look crooked. Lay them in a herringbone pattern (45 or 90-degree angles). The herringbone pattern creates a mechanical interlock that distributes foot traffic weight evenly across the path, preventing individual bricks from shifting or sinking in a dry-laid sand base.
3. Decomposed Granite (DG) with a Liquid Stabilizer
Decomposed granite offers a refined, European-courtyard aesthetic at a fraction of the cost of poured concrete. However, loose DG easily washes away in heavy rain and sticks to shoes. To solve this on a budget, purchase standard loose DG and mix in a liquid polymer stabilizer (such as Gator Stone Dust or Technisoil G3) during the final tamping phase. The polymer binds the granite particles together when dry, creating a permeable surface that resists erosion and weed growth while maintaining a natural, earthy look.
4. Spaced Concrete Stepping Stones with Creeping Thyme
Buying bulk 12x12 or 16x16 concrete pavers from a local big-box store costs roughly $3 to $4 per stone. Instead of placing them edge-to-edge, space them 12 to 14 inches apart (measured from the center of each stone to match an average human stride). Fill the gaps with a low-growing, drought-tolerant ground cover like Creeping Thyme (Thymus serpyllum) or Irish Moss (Sagina subulata). This technique reduces the number of pavers needed by 40%, cuts down on base excavation labor, and introduces soft, fragrant greenery that breaks up the hardscape.
5. The Double-Shredded Hardwood Mulch Trail
For woodland gardens or heavily shaded areas where grass refuses to grow, mulch is the most economical walkway material available. Avoid dyed mulches (black or red), as the colorants can bleed onto shoes and surrounding foliage during heavy rains. Opt for double-shredded natural hardwood mulch. The double-shredding process creates smaller, interlocking fibers that mat together better than single-shredded or bark nuggets, which tend to float away in rainstorms. According to Penn State Extension, maintaining a 3-inch depth is optimal for weed suppression and moisture retention in shaded landscape beds.
The Universal Base Preparation Protocol
Regardless of which surface material you choose, 80% of a walkway's longevity is determined by what lies beneath it. Skipping base preparation is the primary reason budget DIY paths fail, sink, or become overrun with weeds. Follow this exact protocol for any unbound path:
- Excavation: Dig a trench 4 to 5 inches deep and 6 inches wider than your intended path width on each side to accommodate edging.
- Weed Barrier: Lay down woven geotextile landscape fabric. Avoid cheap, non-woven black plastic sheeting. Plastic blocks water drainage, leading to puddling and frost heave. Woven fabric allows water to permeate while blocking weed rhizomes, a best practice highlighted by the University of Minnesota Extension.
- Base Layer: Add 2 inches of crushed angular gravel (often sold as 'paver base' or 'road base'). Do not use rounded river rock.
- Compaction: Rent a vibrating plate compactor ($60-$90 per day) or use a manual hand tamper. Compact the base in 1-inch lifts until it feels like solid concrete.
Maximizing Curb Appeal on a Dime
A budget walkway can look like a high-end landscape feature if you integrate strategic lighting and border planting. Avoid cheap, 20-lumen solar lights that emit a weak, bluish glow. Invest in 200-lumen to 300-lumen LED solar path lights with warm-white color temperatures (2700K to 3000K). Place them 6 feet apart on alternating sides of the path to create a rhythmic visual guide without over-illuminating the yard. Finally, soften the hard edges of your walkway by planting low-growing ornamental grasses like Festuca glauca (Blue Fescue) or Liriope muscari directly against the edging to hide the transition between the path and the lawn.

