
Landscaping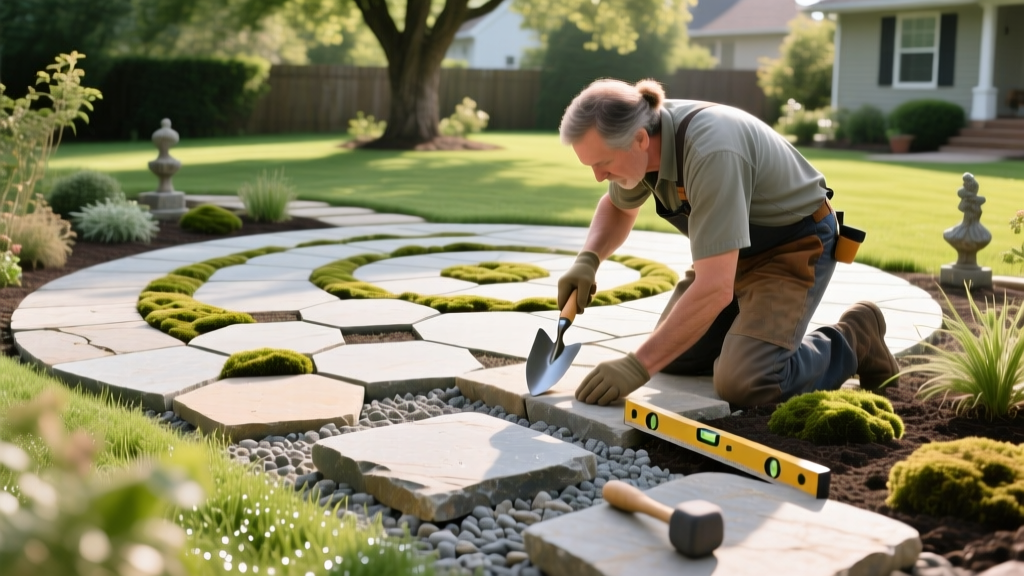
Building Whimsical Flagstone Patio Designs: A DIY How-To Guide
Standard patios rely on rigid geometry, but whimsical flagstone patio designs embrace organic chaos, meandering curves, and unexpected artistic details. Achieving this free-spirited aesthetic requires more than just tossing irregular stones onto the dirt. The structural integrity of the base must be engineered to support the stone, while the surface details—like glass inlays, copper wire spirals, and living plant joints—demand specialized installation techniques to survive freeze-thaw cycles and foot traffic.
This guide breaks down the exact materials, measurements, and installation steps required to build a durable, fairy-tale-inspired flagstone patio that withstands the elements without sacrificing its artistic charm.
The Anatomy of a Whimsical Flagstone Patio
What separates a standard natural stone patio from a truly whimsical design? According to design principles endorsed by the American Society of Landscape Architects, whimsical hardscaping relies on three core elements:
- Non-Linear Geometry: Sweeping curves, spirals, and asymmetrical branching paths that mimic natural water flow rather than rigid grid lines.
- Surprise Inlays: Embedding tumbled sea glass, fossilized wood, copper wire spirals, or polished river pebbles into the joints or focal points of the stone layout.
- Living Joints: Replacing standard mortar or polymeric sand with creeping groundcovers, moss, or succulents that soften the hardscape edges and integrate the patio into the surrounding garden.
Design Tip: The 'Golden Ratio' of curves dictates that a sweeping patio curve should have a radius of at least 6 to 8 feet. Tighter, sharper curves look forced and make laying large, irregular flagstones nearly impossible without excessive cutting.
Material Sourcing and Budget Breakdown
Whimsical designs require specific stone profiles. You need irregular, natural-cleft flagstone (not thermal-treated or gauged) to maintain the rustic, organic feel. The Natural Stone Institute recommends a minimum thickness of 1.5 inches for dry-laid pedestrian patios to prevent spalling and cracking under point loads.
| Material | Specification | Estimated Cost (2026) |
|---|---|---|
| Arizona Sandstone | Irregular, natural cleft, 1.5' - 2' thick | $4.50 - $7.00 / sq ft |
| Pennsylvania Bluestone | Irregular, thermal edges, 1.5' thick | $6.00 - $10.00 / sq ft |
| 3/4' Minus Crushed Gravel | Angular base material with fines | $35.00 - $55.00 / ton |
| Coarse Mason Sand | Bedding layer (never use fine play sand) | $20.00 - $30.00 / ton |
| Tumbled Sea Glass | Cobalt blue / amber, 1' - 2' pieces | $18.00 - $25.00 / lb |
| UV-Stable Clear Epoxy | For securing glass/metal inlays | $65.00 - $90.00 / gallon |
Step 1: Excavation and Base Preparation
The most common failure in artistic patio builds is neglecting the base because the builder is too focused on the surface aesthetics. A whimsical patio still requires a rigid, load-bearing foundation to prevent the organic curves from warping and settling over time.
- Excavate to 8 Inches: Dig out the entire patio area, plus a 6-inch perimeter buffer, to a depth of 8 inches below the final desired grade.
- Lay Geotextile Fabric: Roll out a non-woven geotextile landscape fabric over the soil subgrade. This prevents clay and silt from migrating up into your gravel base, which causes frost heave in northern climates.
- Install the Gravel Base: Spread a 5-inch layer of 3/4-inch minus crushed gravel. The 'minus' designation means it includes stone dust and fines, which lock together when compacted.
- Compact in Lifts: Do not dump all 5 inches at once. Spread it in 2.5-inch 'lifts' and run a vibratory plate compactor (minimum 5,000 lbs of compaction force) over each layer until it is rigid.
- Add the Bedding Layer: Spread exactly 1 inch of coarse mason sand over the compacted gravel. Use a screed board pulled across PVC pipes to ensure a perfectly level 1-inch depth.
Step 2: Laying Out the Curved 'Whimsical' Pattern
Avoid straight lines entirely. Use a flexible garden hose to outline your patio edges and internal spiral motifs. When arranging the flagstone, treat the layout like a jigsaw puzzle. Start from a central focal point—such as a large, flat 'medallion' stone—and work outward in a spiral or branching pattern.
Maintain a consistent joint width of 1.5 to 2 inches between stones. If you plan to install living moss joints, wider gaps (2.5 to 3 inches) provide better root space and moisture retention. Use a diamond-blade angle grinder to trim the edges of stones that disrupt your curved hose line, but keep the natural, jagged edges on the interior joints to preserve the rustic aesthetic.
Step 3: Setting the Stone and Creating Inlays
Setting whimsical inlays requires a departure from standard polymeric sand jointing, which can dull the appearance of glass and metal.
The Epoxy Inlay Technique
To embed tumbled sea glass or copper wire spirals so they sit flush with the stone and never pop out:
- Set your flagstones on the sand bed, ensuring they are perfectly level and do not rock when stepped on.
- Identify the joints or focal pockets where the inlay will go. Fill the bottom half of these specific joints with standard polymeric sand or crushed gravel for drainage.
- Mix a two-part, UV-stable clear epoxy resin (specifically formulated for outdoor stone, such as StonePoxy or Tenax).
- Fold your tumbled glass or copper elements into the wet epoxy in a wheelbarrow, ensuring every piece is coated.
- Trowel the epoxy-glass mixture into the reserved joints, packing it tightly. Strike it off flush with the top of the flagstone using a steel trowel.
Warning: Never use standard interior epoxy or superglue for glass inlays. Interior epoxies yellow and become brittle under UV exposure, causing the glass to pop out within a single summer season.
Step 4: Jointing with Living Moss and Creeping Thyme
Living joints transform a static hardscape into a dynamic, breathing landscape. However, flagstone absorbs and radiates significant heat, which will scorch delicate mosses in full-sun environments.
Choosing the Right Joint Plant
| Plant Species | Sun Tolerance | Foot Traffic Rating |
|---|---|---|
| Thymus serpyllum (Creeping Thyme) | Full Sun / High Heat | Moderate to Heavy |
| Sagina subulata (Irish Moss) | Partial Shade / Cool | Light Only |
| Sedum spurium (Dragon's Blood) | Full Sun / Drought | None (Fragile) |
| Lysimachia nummularia (Creeping Jenny) | Shade / Moist | Light Only |
Planting the Joints
Do not use pure topsoil for the joints; it compacts and suffocates roots. Mix a specialized jointing soil: 1 part peat moss, 1 part perlite, and 1 part compost. Pack this mixture tightly into the 2-inch gaps between the stones, leaving the top 1/2 inch of the joint empty. Press small plant plugs (not seeds) into the soil mixture. Water heavily every evening for the first 14 days to establish the root systems before the heat of the stone can stress them.
Common Installation Mistakes to Avoid
- Using Thin Stone in Freeze-Thaw Zones: Flagstone under 1.25 inches thick will absorb water and delaminate (flake apart) after just two or three winter freeze-thaw cycles. Always verify thickness with a tape measure at the stone yard.
- Over-Tightening Curves: Attempting to bend a patio edge around a 2-foot radius will result in excessive stone cutting, massive material waste, and a jagged, unnatural look. Keep curves sweeping and broad.
- Ignoring Drainage Pitch: Even a whimsical, organic patio must slope away from the home's foundation at a minimum grade of 1/8 inch per foot. Use a laser level during the gravel base compaction phase to guarantee this pitch.
Building whimsical flagstone patio designs is an exercise in balancing artistic vision with civil engineering. By investing heavily in a deeply compacted base, selecting UV-stable materials for your artistic inlays, and matching your living joint plants to the specific microclimate of your stone, you will create a magical outdoor space that remains structurally sound for decades.

