
Landscaping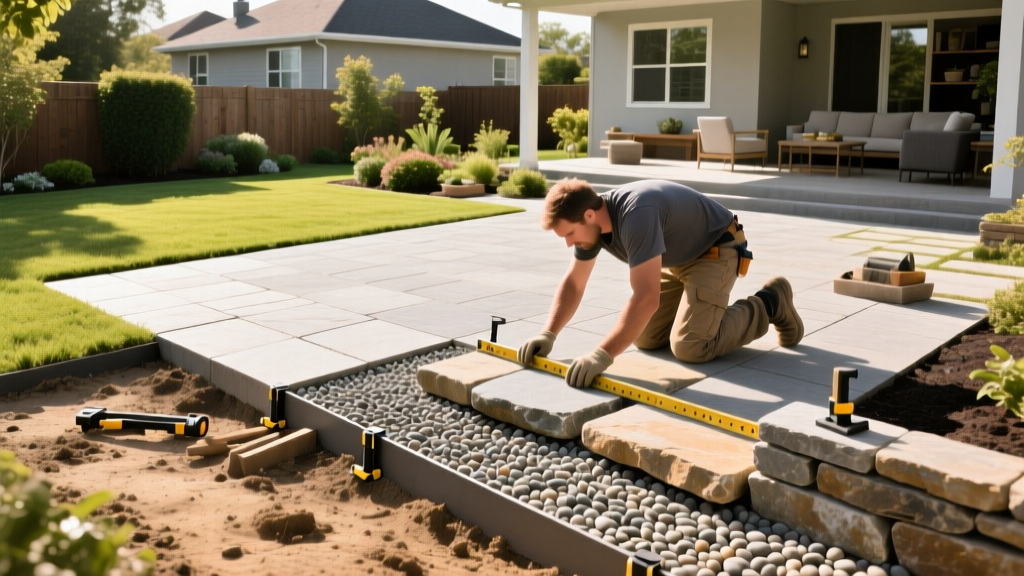
DIY Flagstone and Pea Gravel Patio: Step-by-Step Installation
Why Combine Flagstone and Pea Gravel?
Dry-laid flagstone and pea gravel patios offer a permeable, cost-effective, and visually striking alternative to poured concrete or mortared masonry. By combining the structural weight of natural stone with the drainage capabilities of loose aggregate, you create a hardscape that manages stormwater while delivering a rustic, organic aesthetic. According to the EPA's Green Infrastructure guidelines on permeable pavement, dry-laid hardscapes significantly reduce localized runoff and mitigate the urban heat island effect compared to solid surfaces.
This guide details the exact specifications, material calculations, and installation phases required to build a durable dry-laid patio that resists frost heave, weed intrusion, and gravel migration.
Material Sizing and Base Calculations
The most common failure in dry-laid patios is an inadequate base. Natural stone requires a flexible, well-draining foundation to accommodate minor soil shifts without cracking. For a standard residential patio, you must excavate to a depth of 7 inches to accommodate the following layers:
| Layer | Material Specification | Depth | Purpose |
|---|---|---|---|
| Sub-Base | 3/4-inch crushed angular gravel (ASTM C33) | 4 inches | Load distribution and primary drainage |
| Bedding | Coarse concrete sand or stone dust | 1 inch | Leveling surface for setting flagstone |
| Surface | Natural flagstone (Bluestone, Sandstone) | 1.5 to 2 inches | Walking surface and structural weight |
| Joints | 3/8-inch washed pea gravel | Flush with stone | Permeability, aesthetics, and weed suppression |
Pro Tip: Stone Thickness Matters
Never use flagstone thinner than 1.5 inches for a dry-laid application. Thinner veneer stones (1-inch) rely on mortar for structural integrity and will snap under point-loads (like a chair leg or heavy foot traffic) when set on a flexible sand base.
Phase 1: Excavation and Base Preparation
Proper excavation dictates the lifespan of your patio. Begin by marking the perimeter with landscaping paint, adding 6 inches of overhang on all sides to accommodate edge restraints or drainage buffers.
Step-by-Step Excavation
- Dig to 7 Inches: Remove all topsoil and organic matter. The subgrade must be undisturbed, compactable soil.
- Establish the Slope: A patio must drain away from structures. Use a laser level or a string line to establish a 1/4-inch drop per linear foot. The University of Minnesota Extension's research on permeable hardscaping confirms that this specific gradient optimizes water shedding without creating a noticeable incline for patio furniture.
- Compact the Subgrade: Run a vibratory plate compactor over the exposed dirt to prevent future settling.
- Lay the Base: Spread the 3/4-inch crushed gravel in 2-inch lifts (layers). Compact each lift thoroughly. Angular stone is mandatory; rounded river rock will roll and fail to lock together.
- Screed the Bedding: Add your 1-inch layer of coarse sand or stone dust. Use a 2x4 screed board dragged across PVC pipe guides to create a perfectly level, sloped bedding layer.
Phase 2: Laying the Flagstone
Dry-laid flagstone is essentially a giant, heavy jigsaw puzzle. Begin laying stones from the house or your primary focal point, working outward. Place the largest, most uniform stones along the primary walking paths and edges.
Sizing the Joints for Pea Gravel
When spacing the stones, aim for joints that are exactly 2 to 3 inches wide. This specific width is critical for pea gravel applications:
- Gaps under 1.5 inches: Pea gravel will easily kick out of the joint when walked on, leaving bare sand exposed.
- Gaps over 4 inches: Creates a trip hazard and allows enough space for aggressive weeds to establish deep root systems.
Warning: Cutting Flagstone
When cutting stones to fit edges, use a 4.5-inch angle grinder equipped with a continuous-rim diamond masonry blade. Always cut the stone from the bottom up to prevent top-surface chipping, and wear a P100 respirator to protect against silica dust.
Phase 3: Filling and Locking the Pea Gravel
The biggest complaint regarding pea gravel patios is aggregate migration—the gravel gets kicked onto the stone surface or washes away during heavy rain. To solve this, you must 'lock' the gravel into the joints.
The Dust-Mix Locking Technique
Instead of pouring pure, washed pea gravel directly into the joints, use a modified mixture:
- Mix 80% 3/8-inch pea gravel with 20% stone dust (screenings) in a wheelbarrow.
- Shovel the mixture into the joints, overfilling them slightly above the stone surface.
- Use a stiff push broom to sweep the mixture deep into the crevices.
- Mist the entire patio with a garden hose using a gentle shower nozzle. The water will activate the stone dust, causing it to bind the pea gravel together into a semi-solid matrix that still permits water drainage.
- Top off any settled areas with pure pea gravel for a finished, uniform look.
Joint Material Decision Matrix
While pea gravel is the target aesthetic, it is worth comparing it against other jointing materials to ensure it fits your specific maintenance tolerance and site conditions.
| Joint Material | Permeability | Weed Resistance | Maintenance Level | Best Use Case |
|---|---|---|---|---|
| 3/8" Pea Gravel (with dust mix) | Excellent | Moderate | Medium (annual top-offs) | Rustic designs, rain gardens, high-drainage zones |
| Polymeric Sand | Poor (unless permeable variant) | High | Low | Formal patios, high-traffic dining areas, tight joints |
| Creeping Thyme / Irish Moss | Good | High (once established) | High (watering, trimming) | Low-traffic aesthetic paths, cottage gardens |
| Decomposed Granite (DG) | Good | Moderate | Medium | Southwestern landscapes, wide joints |
Troubleshooting Common Edge Cases
Even with meticulous preparation, environmental factors can impact your patio. Here is how to address the most common failure modes:
Frost Heave in Northern Climates
If you live in a region with deep frost lines, the soil beneath your base may freeze and expand, pushing stones upward. The Fix: Increase your crushed stone sub-base from 4 inches to 6 inches (requiring a 9-inch total excavation). The deeper aggregate layer acts as a capillary break, preventing moisture from wicking up into the freezing zone.
Gravel Washout During Heavy Storms
If your patio is situated at the bottom of a slope or near a downspout, water velocity will wash the pea gravel out of the joints. The Fix: Install a hidden French drain or a gravel-filled trench drain at the patio's lowest edge to intercept and slow water flow before it crosses the hardscape. Alternatively, apply a liquid gravel binder (like Gator Stone Bond) to the top 1/2 inch of the joints to glue the surface stones while maintaining sub-surface permeability.
Weed Intrusion
Do not lay landscape fabric beneath your crushed stone base. Fabric traps moisture, prevents proper base compaction, and eventually degrades, allowing weeds to push through anyway. The Fix: Rely on the 4-inch compacted stone base to block sunlight and crush weed shoots. For existing weeds in the joints, apply a natural, horticultural-strength vinegar herbicide (20% acetic acid) on a hot, sunny day rather than using systemic chemicals that can leach into surrounding garden beds.
2026 Cost Breakdown and ROI
Building a dry-laid flagstone and pea gravel patio remains one of the most cost-effective hardscape upgrades, offering a high return on investment for curb appeal. Based on current 2026 landscape supply averages, here is what you can expect to budget for a standard 200-square-foot patio:
- 1.5-inch Bluestone Flagstone: $5.50 - $8.00 per sq. ft. ($1,100 - $1,600)
- 3/4-inch Crushed Base (4 tons): $45 per ton ($180)
- Coarse Bedding Sand (1 ton): $40 per ton ($40)
- 3/8-inch Pea Gravel (1 ton): $55 per ton ($55)
- Equipment Rental (Plate Compactor): $85 per day ($85)
- Total DIY Material Cost: $7.30 - $9.80 per sq. ft.
"A well-executed dry-laid patio not only reduces long-term maintenance costs associated with cracking concrete but also integrates seamlessly into the surrounding landscape ecology by allowing the soil to breathe and absorb rainfall."
— National Association of Landscape Professionals (NALP) Hardscape Best Practices
By strictly adhering to the 7-inch excavation rule, maintaining precise 2-to-3-inch joints, and utilizing the dust-mix locking technique, your flagstone and pea gravel patio will remain stable, permeable, and visually striking for decades.

