
Landscaping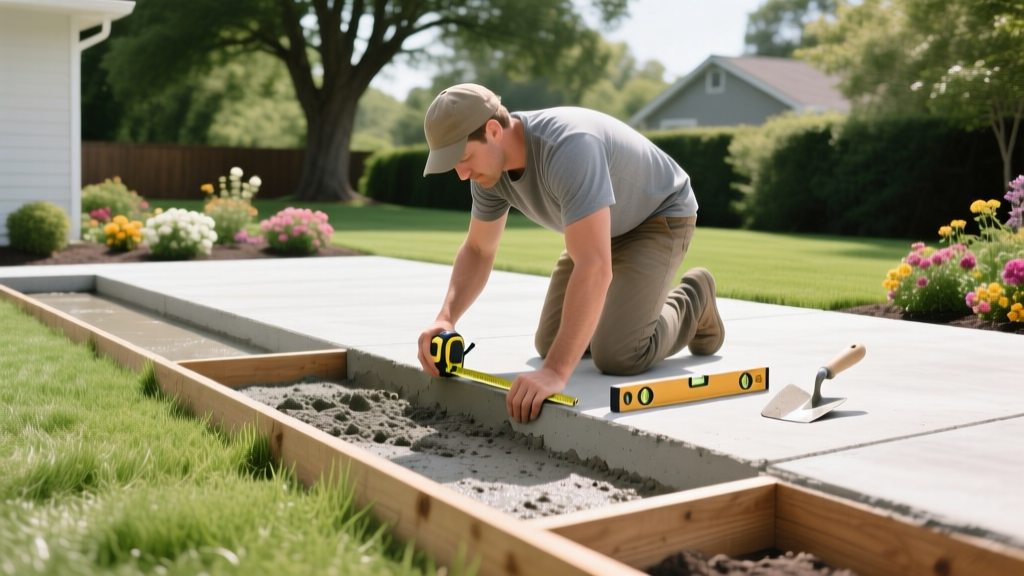
Beginner Guide to Extending Concrete Patio: Steps & Costs
Assessing Your Existing Slab and Soil Base
Extending a concrete patio is one of the highest-ROI landscaping projects a homeowner can tackle, but it requires strict adherence to structural fundamentals. Before purchasing materials, you must evaluate the existing slab and the underlying soil. Most residential patios are poured at a standard thickness of 4 inches. Your extension must match this depth exactly to maintain a uniform load-bearing capacity and visual profile.
Warning: Frost Heave and Differential Settling
If you live in a climate with freezing winters, the soil beneath your patio expands and contracts. If the soil under your new extension is not compacted to the same density as the soil under the original slab, the new section will sink over time, shearing the connection point and creating a massive trip hazard. Never pour new concrete directly over未经compacted topsoil.
You also need to verify the current drainage slope. A properly poured patio slopes away from the house at a minimum rate of 1/4 inch per foot. When extending the patio, you must carry this exact gradient outward to prevent water from pooling against your foundation or backflowing toward the existing slab.
Material Breakdown and 2026 Cost Estimates
For DIY extensions, bagged concrete is the most practical choice unless your extension exceeds 150 square feet (which would require a ready-mix truck). Standard 3000 PSI concrete is insufficient for exterior flatwork exposed to freeze-thaw cycles. You must use a 4000 PSI or 5000 PSI mix, such as Quikrete 5000, which includes air-entrainment additives for frost resistance.
| Material | Specification | Estimated 2026 Cost |
|---|---|---|
| High-Strength Concrete Mix | 5000 PSI, 80-lb bags (yields 0.6 cu ft) | $7.50 - $8.50 per bag |
| Sub-base Gravel | 3/4-inch crushed stone (driveway mix) | $45.00 per ton |
| Rebar Dowels | #4 (1/2-inch) epoxy-coated rebar | $4.20 per 10-ft stick |
| Formwork Lumber | 2x4 straight pine or spruce | $5.50 per 8-ft board |
| Concrete Anchoring Epoxy | Two-part structural adhesive (10 oz) | $28.00 per tube |
Note: For a standard 10x10 foot extension (100 sq ft at 4 inches thick), you will need approximately 1.25 cubic yards of concrete, which equates to roughly 56 bags of 80-lb mix.
Step-by-Step Execution for Beginners
1. Excavation and Formwork
Mark your extension boundaries using mason line and batter boards. Excavate the area to a depth of 8 inches: 4 inches for the concrete slab and 4 inches for the compacted gravel sub-base. Build your forms using straight 2x4 lumber. Secure the forms with wooden stakes driven into the ground every 2 feet, screwing the lumber to the stakes from the outside. Use a 4-foot level to ensure the top edge of your forms maintains the 1/4-inch-per-foot downward slope away from the house.
2. Sub-base Preparation
Fill the excavated trench with 3/4-inch crushed stone. Do not use pea gravel or smooth river rock, as round stones do not lock together and will shift under the weight of the wet concrete. Spread the crushed stone to a depth of 4 to 5 inches, then rent a vibratory plate compactor (approximately $85 per day). Make at least three overlapping passes with the compactor until the gravel is locked tight and shows no visible footprints when walked on.
3. Pinning the Slabs Together
This is the most critical step when extending a concrete patio. To prevent the new slab from pulling away from the old one, you must mechanically tie them together. Using a hammer drill and a 1/2-inch masonry bit, drill 5-inch-deep holes into the exposed edge of the existing patio, spaced every 16 inches. Clean the dust out of the holes with compressed air. Inject structural concrete epoxy into each hole and insert 10-inch lengths of #4 rebar, leaving 5 inches protruding into the new formwork. This creates a rigid structural bridge between the old and new pours.
4. Pouring, Screeding, and Floating
Mix the concrete to a slump of roughly 4 inches—it should hold its shape like thick oatmeal, not soupy water. Overwatering weakens the final PSI and causes surface scaling. Pour the mix into the forms and use a heavy 2x4 screed board in a sawing motion to strike off the excess concrete flush with the top of your forms. Once the bleed water disappears from the surface, use a magnesium bull float to push down the aggregate and bring the cream (cement paste) to the top. Finish with a push broom to create a slip-resistant texture.
Common Beginner Mistakes and Failure Modes
- Skipping the Isolation Joint: If your new patio extension abuts your house foundation or a retaining wall, you must place a 1/2-inch piece of asphalt-impregnated fiberboard (expansion joint material) between the concrete and the structure. Concrete expands in the heat; without this buffer, it will crack your foundation or buckle the slab.
- Troweling Too Early: If you trowel or broom the surface while bleed water is still present, you trap water beneath the surface crust. This leads to a weak top layer that will flake and spall during the first winter freeze.
- Inadequate Curing: Concrete does not 'dry'; it cures through a chemical hydration process. If the surface dries out too quickly in the sun or wind, it will develop plastic shrinkage cracks. You must keep the slab continuously moist for at least 7 days.
Curing and Sealing Timelines
The 28-Day Rule: While your patio extension will be hard enough to walk on in 24 to 48 hours, it only reaches about 65% of its final compressive strength at 7 days. It takes a full 28 days for the concrete to achieve its rated 5000 PSI strength. Do not place heavy furniture, fire pits, or hot tubs on the extension until the 28-day mark has passed.
After the 28-day cure cycle, apply a penetrating silane/siloxane concrete sealer. Unlike topical acrylics that form a slippery plastic film on the surface, penetrating sealers react chemically within the pores of the concrete to repel water and de-icing salts while maintaining the slip-resistance of your broom finish. Reapply the sealer every 2 to 3 years to maximize the lifespan of your new outdoor living space.
For further reading on flatwork best practices, consult the comprehensive guides provided by Bob Vila's concrete pouring tutorials and review the technical data sheets on Quikrete's official project portal for exact water-to-mix ratios specific to your local climate.

