
Landscaping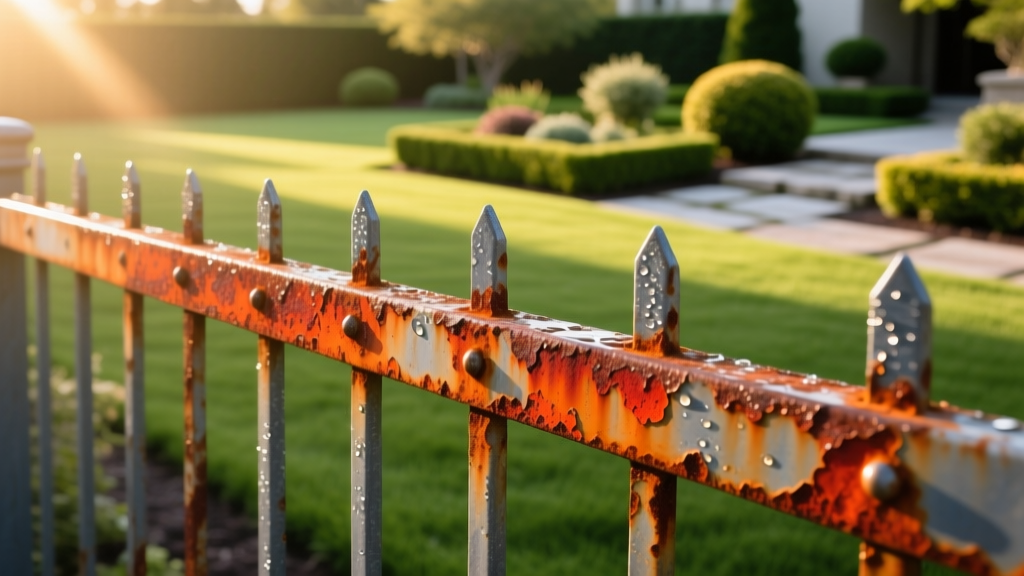
Diagnosing Fence de Metal Rust: Expert Repair Solutions
The Electrochemistry of Metal Fence Degradation
When evaluating a fence de metal (metal fence) for corrosion, surface discoloration is rarely the whole story. Wrought iron, tubular steel, and extruded aluminum fencing systems fail through distinct electrochemical pathways. Diagnosing the exact failure mode dictates whether a simple chemical conversion will suffice, or if structural welding and post-base replacement are required. Misdiagnosing structural rust as surface oxidation leads to catastrophic panel failure within 12 to 18 months of cosmetic repair.
Professional landscaping contractors and property managers must move beyond generic 'sand and paint' approaches. This guide provides a clinical framework for diagnosing metal fence corrosion, grading severity using industry standards, and executing permanent chemical and structural remediations based on 2026 material science.
Diagnostic Matrix: Symptom to Root Cause
Before purchasing primers or replacement hardware, map your fence's symptoms to this diagnostic matrix to determine the required intervention level.
| Visual Symptom | Material Affected | Root Cause | Intervention Level |
|---|---|---|---|
| Chalky white powder | Aluminum / Galvanized Steel | Oxidation / Wet Storage Stain | Level 1: Mechanical removal & clear coat |
| Orange surface dust | Uncoated Steel / Iron | Flash Rust (Moisture + Oxygen) | Level 2: Chemical conversion & DTM paint |
| Bubbling / Flaking paint | Painted Iron / Steel | Sub-film corrosion (Osmotic blistering) | Level 3: Strip to bare metal, treat, encapsulate |
| Swollen / Split tubular posts | Hollow Steel / Iron | Internal water trap & freeze-thaw expansion | Level 4: Section replacement & weep hole drilling |
Grading Corrosion: The ASTM D610 Framework
To communicate effectively with industrial coating manufacturers or commercial clients, abandon subjective terms like 'very rusty.' Instead, use the ASTM International D610 standard for evaluating the degree of rusting on painted steel surfaces. This standard grades rust from 10 to 0 based on the percentage of surface area affected.
- Grade 10 to 8 (0% to 0.1% rust): Pinpoint spotting. Requires localized spot-priming with zinc-rich epoxy.
- Grade 7 to 5 (0.5% to 3.0% rust): Scattered general rusting. Requires full-panel mechanical abrasion and phosphoric acid conversion.
- Grade 4 to 0 (5% to over 50% rust):Severe scaling and pitting. Mechanical wire brushing is insufficient; requires angular sandblasting (coal slag or aluminum oxide) to achieve an SSPC-SP6 (Commercial Blast) profile.
Pro-Tip for Tubular Fencing: Inspect the interior of hollow tubular pickets using a borescope camera. A fence de metal that grades as an 8 on the exterior may be a Grade 2 on the interior due to trapped condensation, requiring internal rust-inhibiting fogging or complete replacement.
Step-by-Step Chemical Conversion and Encapsulation
For fences grading between 5 and 8, chemical conversion is the most cost-effective and durable repair method. This process transforms unstable iron oxide (red rust) into stable iron phosphate (black/grey crust).
Phase 1: Mechanical Preparation
Do not use standard wire cup brushes on angle grinders; they polish the rust rather than removing it. Equip a 4.5-inch angle grinder with an 80-grit zirconia alumina flap disc. Grind until you reach bright, shiny base metal at the pitting sites. Feather the edges of any remaining sound paint at a 45-degree angle to prevent topcoat ridges.
Phase 2: Phosphoric Acid Application
Apply a phosphoric acid-based rust converter (such as Ospho or Naval Jelly) using a synthetic bristle brush. The acid must penetrate the microscopic pores of the steel. Allow it to dwell for 20 to 30 minutes. The steel will turn dark grey or black. Critical Step: You must neutralize and rinse the surface with clean water and a mild baking soda solution, then dry immediately with compressed air or microfiber towels. Leaving acid residue will cause the topcoat to saponify and peel within months.
Phase 3: Direct-To-Metal (DTM) Encapsulation
Bypass traditional alkyd primers, which are permeable to moisture vapor. Use a high-build DTM Acrylic Polyurethane (e.g., Sherwin-Williams DTM or PPG Speedcote). Apply using an airless sprayer with a 0.015-inch tip at 2,500 PSI. Target a Wet Film Thickness (WFT) of 5.0 mils, which yields a Dry Film Thickness (DFT) of 2.5 to 3.0 mils. Use a magnetic mil gauge to verify thickness on vertical pickets to prevent sagging.
WARNING: Galvanic Corrosion in Mixed-Metal Fences
Modern architectural designs frequently mix aluminum top rails with galvanized steel posts. When these dissimilar metals touch in the presence of an electrolyte (rain, sprinkler overspray), the aluminum acts as an anode and corrodes rapidly. According to the American Galvanizers Association, you must electrically isolate these metals using dielectric nylon washers, neoprene gaskets, or specialized isolation tape at every connection point. Never use standard steel self-tapping screws to secure aluminum rails; use 304-grade stainless steel fasteners with rubber sealing washers.
Structural Failures: Gate Sag and Post Base Rot
Corrosion often accelerates at structural stress points. A gate sag exceeding 1/4 inch over a 6-foot span indicates hinge pin deformation or post deflection, not just loose screws.
Diagnosing Gate Sag
Measure the diagonal distance from the top-hinge corner to the bottom-latch corner, and compare it to the opposite diagonal. If the difference exceeds 1/8 inch, the gate frame is racked. Weld a 1/4-inch steel turnbuckle cable across the tension diagonal to pull the frame back to square before replacing the hinges. For heavy wrought iron gates, upgrade to heavy-duty ball-bearing strap hinges rated for at least 1.5 times the gate's actual weight.
Remediating Rotted Post Bases
The most common failure point for a fence de metal is the ground-line interface. If the steel post is encased in concrete and rotting at the collar, cutting the post and welding a new base is structurally compromised. Instead, use a structural post-base retrofit. The Simpson Strong-Tie ZMAX retrofit bases feature a 1-mil G185 galvanized coating and can be bolted to a new concrete pier, elevating the metal post 1 inch above the concrete surface to prevent capillary water wicking.
Identifying Lead-Based Paint on Pre-1978 Fences
If you are restoring an older wrought iron fence de metal installed before 1978, the existing paint likely contains lead. Sanding or dry-scraping these surfaces creates toxic dust. The EPA guidelines on lead-based paint mandate strict containment protocols. Purchase an EPA-recognized lead test swab (e.g., 3M LeadCheck). If positive, you must use chemical paint strippers (like Dumond Smart Strip) or wet-sanding techniques with HEPA-filtered vacuum shrouds. Never use thermal heat guns or dry sandblasting on pre-1978 metal fences.
Cost Analysis: DIY vs. Professional Remediation (2026 Pricing)
Budgeting for metal fence restoration requires understanding the economies of scale between chemical DIY methods and professional abrasive blasting.
- DIY Chemical Conversion: $3.50 to $5.00 per linear foot. Includes flap discs, phosphoric acid, and DTM acrylic paint. Labor intensive (approx. 45 minutes per 50 sq ft).
- Professional Sandblasting & Coating: $9.00 to $14.00 per linear foot. Contractors use mobile dustless blasting (crushed glass media) followed by hot-dip galvanizing or industrial epoxy-urethane topcoats.
- Full Panel Replacement (Tubular Steel): $35.00 to $65.00 per linear foot installed, depending on gauge thickness and custom finials.
Frequently Asked Questions
Can I use cold galvanizing compound on my entire fence?
No. Cold galvanizing compounds (zinc-rich paints) are excellent for spot-priming bare metal and weld seams, but they lack the UV stability and color retention required for a full topcoat. They must be overcoated with a compatible epoxy or acrylic polyurethane within the manufacturer's specified recoat window (usually 24 to 48 hours).
Why does my black metal fence keep rusting at the bottom picket rail?
The bottom horizontal rail traps moisture, dirt, and lawn fertilizer (which contains highly corrosive salts). If the fence lacks weep holes, water pools inside the hollow rail. Drill 3/16-inch weep holes on the underside of the bottom rail every 12 inches to allow drainage, and ensure sprinkler heads are not directly overspraying the metal base.

