
Landscaping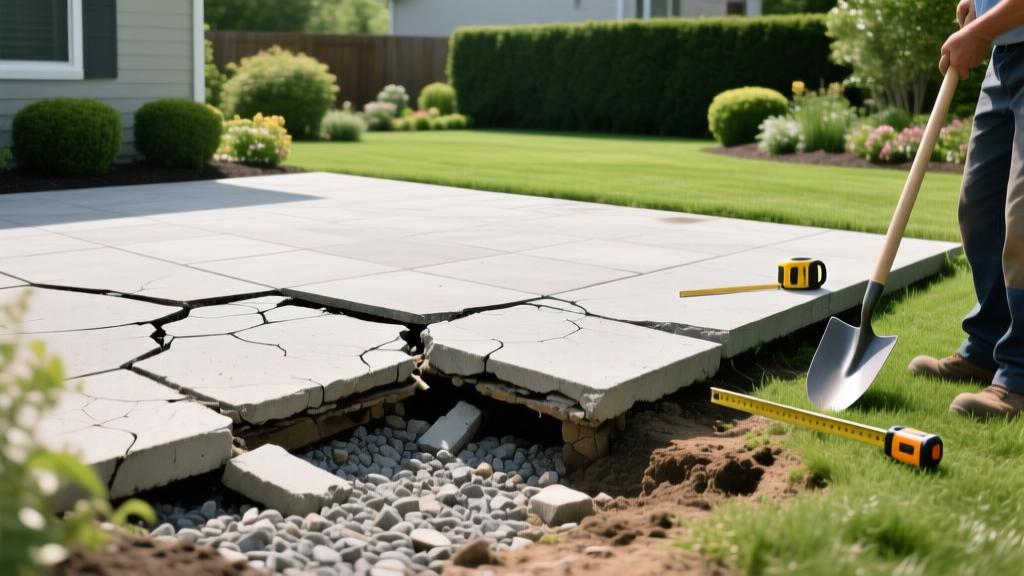
Diagnosing and Repairing a Sinking or Cracking Paved Patio
A paved patio rarely fails from the surface down; structural failure almost always originates in the subgrade, hydrology, or edge containment. When pavers shift, sink, or develop severe efflorescence, the instinct is often to blame the paving stones themselves. However, industry data shows that over 85% of interlocking concrete pavement failures are rooted in improper base preparation, inadequate drainage slopes, or substandard jointing sand application. Diagnosing the exact failure mode is the first step toward a permanent repair.
Diagnostic Matrix: Identifying Your Paved Patio Failure
Before purchasing materials or renting equipment, map your patio's symptoms to the underlying structural cause. Use this diagnostic framework to isolate the issue.
| Visible Symptom | Primary Root Cause | Secondary Contributor | Required Intervention |
|---|---|---|---|
| Localized sinking (birdbaths) | Insufficient base compaction | Organic matter decomposition in subgrade | Excavate, re-base, and re-compact |
| Edge spreading / pavers separating | Edge restraint failure or missing spikes | Lateral hydrostatic pressure | Install rigid commercial-grade restraints |
| Winter frost heave (lifting) | Water trapped in base freezing/expanding | Clay subgrade without geotextile separation | Improve drainage, add geotextile fabric |
| White powdery haze on surface | Polymeric sand applied to damp pavers | Efflorescence (calcium hydroxide migration) | Chemical haze removal and sealing |
Subsidence and Sinking: Rebuilding the Aggregate Base
If your paved patio holds water in localized depressions (often called "birdbaths"), the base material has either washed out or was never compacted in proper lifts. Many DIY installations fail because builders use rounded pea gravel or fail to use the correct angular aggregate.
The Correct Base Material Specification
For a permanent repair, you must use ASTM D2940 graded aggregate base (GAB), typically 3/4-inch minus crushed limestone or granite. The "minus" designation means it includes stone dust and smaller particles that lock together when compacted, creating a semi-rigid slab. Rounded river rock or pea gravel will never lock and will continue to shift under foot traffic.
Step-by-Step Base Remediation Protocol
- Excavation: Remove the sinking pavers and dig out the existing bedding sand and compromised base material until you reach undisturbed subgrade.
- Geotextile Separation: If your native soil is heavy clay, lay down a non-woven geotextile fabric (such as Mirafi 500X or equivalent). This prevents the clay from migrating up into the gravel base and weakening it over time.
- Base Installation in Lifts: Add your 3/4-inch minus crushed stone in 2-inch to 3-inch layers (lifts). Do not dump 6 inches of gravel and attempt to compact it all at once; the compactive force will not reach the bottom layer.
- Mechanical Compaction: Rent a vibratory plate compactor with a minimum of 5,000 lbs of centrifugal force. Make at least three overlapping passes per lift. The base should be so hard that you cannot leave a footprint on it.
- Bedding Sand: Apply exactly 1 inch of ASTM C33 washed concrete sand. Never use mason sand or play sand; the particles are too uniform and round, which leads to washout and settling.
CRITICAL WARNING: Never use a hand tamper for base compaction. Hand tamping only achieves roughly 60% of the required soil density. A mechanical plate compactor is non-negotiable for a paved patio expected to bear the weight of outdoor furniture and foot traffic.
Hydrostatic Pressure and Frost Heave Mitigation
In northern climates, water trapped in the patio base freezes and expands, causing severe frost heave. According to the Environmental Protection Agency (EPA), managing subsurface hydrology is the most critical factor in hardscape longevity. If your patio lacks a proper drainage slope or edge drainage, hydrostatic pressure will destroy the installation.
Correcting the Drainage Slope
A paved patio must slope away from the home's foundation at a minimum rate of 1/8 inch to 1/4 inch per linear foot. If your patio is flat or slopes toward the house, you must pull the pavers, re-grade the base, and re-install. There is no surface-level fix for a negative slope.
Edge Restraint Upgrades
Frost heave often pushes pavers outward, breaking cheap plastic edge restraints. Upgrade to rigid, commercial-grade restraints like SnapEdge or PermaEdge. Secure the restraint using 10-inch galvanized steel spikes driven every 12 inches directly into the compacted base, not just the soil. This locks the perimeter and forces the pavers to interlock tightly, distributing loads laterally across the entire surface.
Polymeric Sand Haze and Efflorescence Eradication
A white, cloudy film on the surface of your pavers is either polymeric sand haze or natural efflorescence. Both are chemical and physical reactions that require specific treatments.
Polymeric Sand Haze
Haze occurs when polymeric sand is swept into the joints while the pavers are damp, or when the installer fails to blow off residual dust before activating the sand with water. The polymers bind to the surface pores of the concrete. To remove it, you must use a specialized chemical haze remover. Techniseal's official efflorescence and haze removal guidelines recommend applying their specialized Haze Remover solution, allowing it to dwell for 5 to 10 minutes, and scrubbing with a stiff-bristled synthetic brush before rinsing thoroughly. Do not use muriatic acid, as it can degrade the concrete matrix and alter the paver color.
Natural Efflorescence
Efflorescence is a naturally occurring salt (calcium hydroxide) that migrates to the surface of concrete pavers as moisture evaporates. It is not a structural defect. In most cases, it will weather away naturally after 12 to 18 months of rain cycles. If immediate removal is desired, use a non-acidic efflorescence cleaner and plan to apply a breathable, silane-siloxane penetrating sealer once the pavers are completely dry to prevent future moisture migration.
Repair Cost Analysis: DIY vs. Professional Remediation
Understanding the financial scope of your repair helps determine whether to tackle the project yourself or hire a certified hardscape contractor. Below is a breakdown of 2026 market rates for patio base repair and restoration.
| Repair Category | DIY Material & Rental Costs | Professional Contractor Rates | Time Investment |
|---|---|---|---|
| Base Excavation & Re-compaction (per sq. ft.) | $3.50 - $5.00 | $14.00 - $22.00 | High (2-3 days) |
| Edge Restraint Replacement (linear ft.) | $4.00 - $6.50 | $12.00 - $18.00 | Low (Half day) |
| Polymeric Sand Re-jointing (per sq. ft.) | $0.80 - $1.20 | $3.50 - $6.00 | Medium (1 day) |
| Plate Compactor Rental (Daily) | $85.00 - $120.00 | Included in labor | N/A |
Note: Professional rates include labor, liability insurance, and commercial-grade equipment. DIY costs assume you have basic hand tools and a wheelbarrow.
Preventative Maintenance Framework
Once your paved patio is repaired, implement this annual maintenance schedule to prevent recurring failures.
Annual Hardscape Checklist
- Early Spring: Inspect perimeter edge restraints for exposed spikes or shifting. Hammer in any raised spikes immediately.
- Mid-Spring: Check joint sand levels. If sand has washed out below the paver chamfer (the beveled edge), sweep in new ASTM C33 sand or re-apply polymeric sand to prevent weed growth and paver movement.
- Late Fall: Clear all organic debris (leaves, pine needles) to prevent tannin staining and moisture retention that accelerates freeze-thaw damage.
- Winter: Never use metal snow shovels or ice-melting salts containing calcium chloride or rock salt (sodium chloride), which cause severe surface spalling. Use calcium magnesium acetate (CMA) based ice melters instead.
By addressing the subgrade, enforcing strict material specifications, and managing water runoff, you can transform a failing, uneven paved patio into a permanent, structurally sound outdoor living space.

