
Landscaping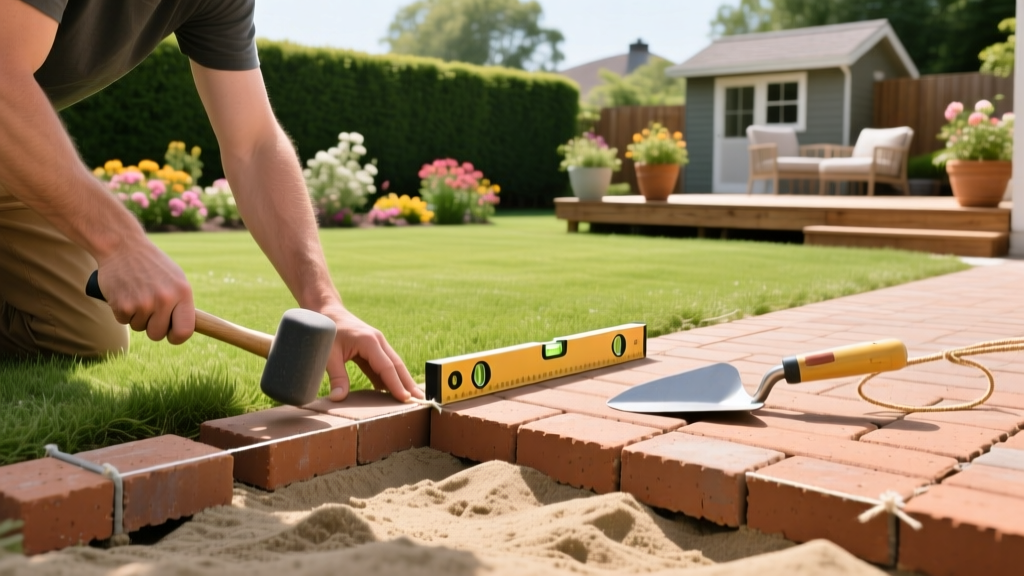
How to Install Brick Patio Pavers: Beginner's Guide
The Sand-Set Method: Why It Is the Best Approach for Beginners
Installing brick patio pavers using the sand-set method is the most forgiving hardscape technique for first-time DIYers. Unlike mortared patios that require precise masonry skills and offer zero margin for error, a flexible sand-set base accommodates minor ground shifts, frost heave, and tree root expansion. According to the Interlocking Concrete Pavement Institute (ICPI), a properly constructed flexible base can last 25 to 50 years with minimal maintenance. This guide details the exact measurements, material grades, and compaction protocols required to build a professional-grade brick patio paver surface over a compacted aggregate sub-base.
Material Calculations and Current Cost Estimates
Accurate material estimation prevents mid-project delays and ensures structural integrity. The table below outlines the exact material requirements and estimated costs for a standard 100-square-foot (10x10 feet) patio, based on 2026 landscaping supply rates.
| Material | Specification / Grade | Quantity (per 100 sq ft) | Estimated Cost |
|---|---|---|---|
| Clay Brick Pavers | ASTM C902 (Pedestrian/Light Vehicular) | 105 sq ft (includes 5% waste) | $350 - $550 |
| Sub-Base Aggregate | 3/4-inch minus crushed stone | 1.5 tons (4 inches compacted) | $60 - $85 |
| Bedding Sand | ASTM C33 concrete sand | 0.5 tons (1 inch uncompacted) | $25 - $40 |
| Joint Sand | Polymeric paving sand | 2 bags (50 lbs each) | $60 - $80 |
| Edge Restraint | Heavy-duty plastic or aluminum | 40 linear feet + 30 spikes | $50 - $75 |
Pro Tip: Never substitute 3/4-inch minus crushed stone with round pea gravel. Pea gravel lacks angular edges and will not lock together under compaction, leading to a shifting sub-base that causes pavers to sink and pool water.
Step 1: Excavation and Slope Grading
The longevity of your brick patio pavers depends entirely on the precision of your excavation. You must dig deep enough to accommodate the sub-base, bedding sand, and the pavers themselves, while maintaining a strict slope for drainage.
Calculating Excavation Depth
- Paver Thickness: Standard clay brick pavers are 2.25 inches thick.
- Bedding Sand: 1 inch (uncompacted).
- Sub-Base Gravel: 4 inches (compacted) for standard soils; increase to 6 inches for heavy clay soils.
- Total Dig Depth: 7.25 inches. Dig exactly 8 inches to allow for sub-grade compaction.
Establishing the Slope
Water must drain away from your home's foundation to prevent hydrostatic pressure and basement leaks. Drive wooden stakes at the house wall and at the patio's outer edge. Tie a mason's string between them and attach a line level. Drop the outer string exactly 1/4 inch for every linear foot of patio depth. For a 10-foot deep patio, the outer edge must be 2.5 inches lower than the house wall. Excavate the soil following this string guide, using a hand tamper to compact the exposed soil sub-grade.
Step 2: Building and Compacting the Sub-Base
The sub-base is the structural engine of your patio. Spread the 3/4-inch minus crushed stone in 2-inch layers (called "lifts"). Do not dump all 4 inches at once; a plate compactor cannot effectively densify a 4-inch layer in a single pass. After spreading each 2-inch lift, run a mechanical plate compactor over the area in overlapping, perpendicular passes until the gravel is rigid and shows no footprints. The National Concrete Masonry Association (NCMA) emphasizes that achieving 95% Standard Proctor density in the aggregate base is the primary defense against differential settling and frost heave in freeze-thaw climates.
Step 3: Screeding the Bedding Sand
Bedding sand provides a smooth, level surface for the pavers to rest on and allows for minor height adjustments. You must use ASTM C33 concrete sand. Avoid mason sand at all costs; its particles are too uniform and rounded, which prevents interlocking and retains excess moisture, increasing the risk of frost heave.
- Lay two 1-inch diameter galvanized steel pipes or aluminum screed rails parallel to each other, roughly 3 feet apart, directly on top of the compacted gravel.
- Shovel the ASTM C33 sand over the pipes until it is slightly mounded above them.
- Use a straight 2x4 wooden board as a screed. Pull it toward you while resting it on the pipes, striking off the excess sand to create a perfectly flat, 1-inch deep sand bed.
- Carefully lift the pipes out of the sand and fill the resulting trenches with sand, troweling them flush.
Warning: Never walk on or disturb the screeded bedding sand. Once a section is screeded, immediately begin laying pavers on it. If it rains before you can lay the pavers, cover the sand with a tarp to prevent washouts and surface crusting.
Step 4: Laying and Cutting the Brick Patio Pavers
Begin laying pavers from a fixed, 90-degree corner, such as the intersection of your house wall and a property line. This ensures your primary lines remain perfectly square. Use a "running bond" or "herringbone" pattern. Herringbone is highly recommended by structural engineers because the interlocking 45-degree angles distribute load laterally, preventing the pavers from creeping or shifting under foot traffic.
Maintaining Joint Spacing
Do not push the pavers tightly together. Maintain a consistent 1/16-inch to 1/8-inch gap between each unit. Many modern brick patio pavers feature built-in spacer bars on their edges to automate this gap. If yours do not, use 16d masonry nails as temporary spacers, pulling them out as you progress. This gap is critical; it allows the joint sand to lock the pavers together later.
Cutting Pavers for Borders
For straight cuts, rent a masonry wet saw with a 10-inch diamond blade (approximately $65 per day). Mark the cut line with a pencil and a speed square, then feed the brick slowly into the blade, letting the water suppress the silica dust. For complex curves, score the brick deeply with the wet saw, then snap it cleanly over a 2x4 using a 3-pound masonry hammer.
Step 5: Edge Restraint and Polymeric Joint Sand
Without edge restraint, the outer perimeter of your patio will slowly migrate outward, causing the joints to open and weeds to infiltrate. Secure heavy-duty plastic or aluminum edge restraints along the perimeter using 10-inch galvanized steel spikes driven directly into the sub-base, spaced every 12 inches.
Applying Polymeric Sand
Polymeric sand contains water-activated polymers that bind the sand grains together into a flexible, mortar-like joint that resists weed growth and ant excavation. Follow this exact sequence to avoid "polymer haze" (a stubborn white film left on the paver surface):
- Ensure the pavers and joints are completely dry. Sweep the polymeric sand diagonally across the joints to pack them tightly.
- Run the plate compactor over the patio with a urethane pad attached (to prevent scratching the brick). This vibrates the sand deep into the joints.
- Sweep a second layer of polymeric sand over the surface and compact again. The sand should be level with the paver surface or slightly below (about 1/8 inch down).
- Use a leaf blower on a low setting to remove every trace of sand dust from the surface of the pavers.
- Mist the patio with a fine spray nozzle for exactly 1 to 2 minutes. Do not use a high-pressure stream, which will wash the polymers out of the joints and onto the brick faces.
Troubleshooting Common Installation Failures
Even with careful planning, beginners may encounter specific issues during or immediately after installation. Use this diagnostic matrix to identify and correct structural flaws.
| Symptom | Root Cause | Corrective Action |
|---|---|---|
| Water pooling in the center | Insufficient slope or sub-base settling during compaction. | Remove affected pavers, add and compact new sub-base gravel to restore the 1/4-inch per foot grade, re-screed sand, and relay. |
| White polymer haze on bricks | Over-watering during activation or failing to blow off surface dust. | Apply a specialized polymeric haze remover and scrub with a stiff bristle brush; avoid using acid-based cleaners on clay brick. |
| Edges creeping outward | Edge restraint spikes driven into loose topsoil instead of the sub-base. | Remove the restraint, excavate to the compacted gravel layer, and re-drive 10-inch spikes directly into the dense aggregate base. |
| Pavers rocking or clicking | Bedding sand was too thick or unevenly screeded. | Lift the rocking pavers, remove excess sand, re-screed to exactly 1 inch, and re-compact the entire field with the plate compactor. |
By adhering strictly to these material specifications, depth measurements, and compaction protocols, your brick patio pavers will yield a structurally sound, aesthetically precise hardscape capable of withstanding decades of environmental stress and foot traffic.

