
Landscaping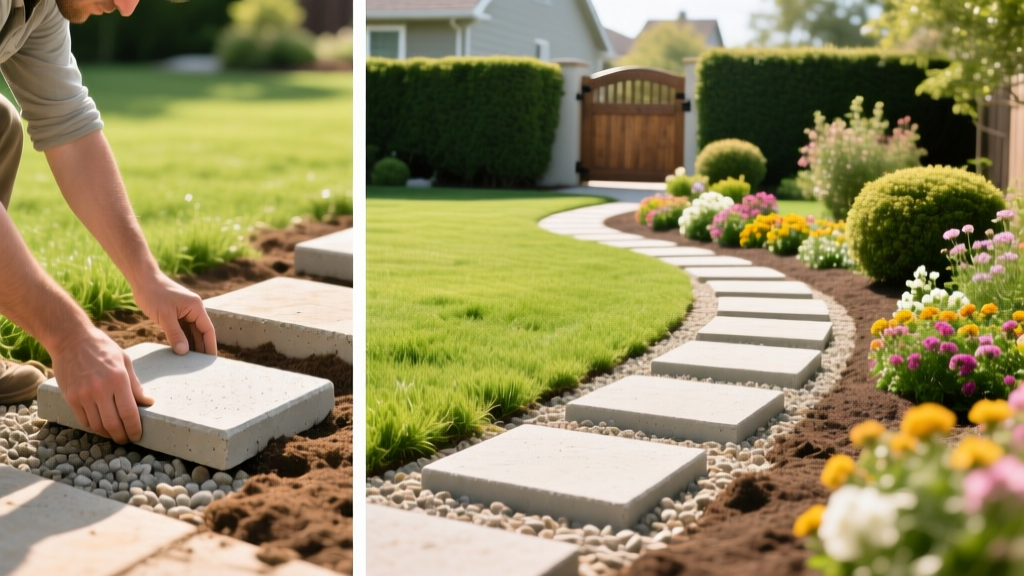
DIY Garden Paths and Stepping Stones: Step-by-Step Install Guide
The Anatomy of a Frost-Proof Path
Most DIY garden paths and stepping stones fail within three years because homeowners treat the surface material as the foundation. A beautiful flagstone or precast concrete paver is merely the wearing course; the true structural integrity lies in the sub-base. When building garden paths and stepping stones, especially in regions with freeze-thaw cycles (USDA Hardiness Zones 3 through 7), you must engineer the base to handle hydrostatic pressure and frost heave.
The industry standard for a permanent, flexible walkway is a 4-inch compacted sub-base of 3/4-inch minus crushed rock (often called crusher run or road base), topped with a 1-inch setting bed of coarse concrete sand, and finished with 2-inch thick stepping stones. This flexible matrix allows the path to shift slightly during winter freezes and settle back into place during the spring thaw, whereas rigid mortar-set paths will inevitably crack.
⚠ Warning: Heavy Clay Soil Dynamics
If your site features heavy clay soil (such as Vertisols), water retention will severely amplify frost heave. You must increase your sub-base excavation to 8 inches and consider laying a biaxial geogrid stabilizer beneath the gravel to distribute the load and prevent the base rock from sinking into the clay subgrade over time.
If your site features heavy clay soil (such as Vertisols), water retention will severely amplify frost heave. You must increase your sub-base excavation to 8 inches and consider laying a biaxial geogrid stabilizer beneath the gravel to distribute the load and prevent the base rock from sinking into the clay subgrade over time.
Material Sourcing and Cost Matrix
Selecting the right materials dictates both the longevity and the budget of your project. Below is a breakdown of current market rates for hardscaping materials, comparing natural stone against manufactured alternatives.
| Material Type | Avg. Cost (Per Sq. Ft.) | Durability & Traction | Best Use Case |
|---|---|---|---|
| Natural Flagstone (Sandstone) | $4.00 - $9.00 | High durability, excellent natural grip | Curved, organic garden paths |
| Bluestone (Thermal Topped) | $7.00 - $12.00 | Extremely dense, smooth but slip-resistant | Formal walkways, high-traffic zones |
| Precast Concrete Pavers | $2.50 - $5.00 | Uniform thickness, moderate grip | Straight lines, budget-friendly installs |
| 3/4" Minus Crushed Gravel (Base) | $40.00 - $60.00 / Ton | Locks together when compacted | Mandatory structural sub-base |
Step-by-Step Installation Protocol
Follow this precise sequence to ensure your garden paths and stepping stones remain level and weed-free for decades.
- Layout and Excavation: Use a garden hose to outline the path's curves. Spray paint the ground along the hose, then excavate the entire trench to a depth of 7 inches (4" base + 1" sand + 2" stone). Maintain a consistent 1% to 2% slope away from your home's foundation to ensure proper drainage, as recommended by University of Minnesota Extension.
- Sub-Base Compaction: Fill the trench with 3/4-inch minus gravel in 2-inch layers (lifts). Use a hand tamper for small paths or rent a vibratory plate compactor for runs exceeding 100 square feet. Compact each lift until it is rock-hard before adding the next.
- Weed Barrier and Setting Bed: Roll out a heavy-duty woven polypropylene landscape fabric (minimum 3 oz/sq yd). Avoid cheap non-woven felt, which clogs with silt and blocks drainage. Overlap seams by 6 inches. Add 1 inch of coarse concrete sand over the fabric. Never use play sand or mason sand; their rounded grains roll like ball bearings and will cause your stones to shift.
- Setting the Stepping Stones: Place your stones on the sand bed. For ergonomic walking, space the stones exactly 24 inches apart from center-to-center. This matches the average adult human stride, preventing the awkward "stutter step" that occurs with poorly spaced paths. Use a rubber mallet and a 2-foot level to tap each stone into the sand until it is perfectly flush and stable.
- Jointing and Finishing: Fill the gaps between the stones. For a low-maintenance, permeable joint, use Decomposed Granite (DG) mixed with a stabilizing binder. Alternatively, use polymeric sand, sweeping it into the joints and lightly misting it with a hose to activate the polymers. Crucial tip: Do not flood the path with water during activation, or you will wash the polymers out of the joints before they cure.
Integrating Living Joints: Groundcover Selection
Leaving 3-to-4-inch gaps between your stepping stones allows for the integration of low-growing, traffic-tolerant groundcovers. This softens the hardscape and reduces rainwater runoff. However, not all plants can survive the microclimate of a stone path, which radiates intense heat in the summer and reflects light.
- Creeping Thyme (Thymus serpyllum): Hardiness Zones 4-9. Highly drought-tolerant and thrives in the radiant heat of stone paths. Releases a pleasant fragrance when stepped on. Max height: 2 inches.
- Irish Moss (Sagina subulata): Hardiness Zones 4-8. Prefers partial shade and consistent moisture. Will scorch in full, unshaded southern exposures. Creates a lush, deep green carpet between stones.
- Mazus (Mazus reptans): Hardiness Zones 5-8. Exceptional for high-traffic joints. Spreads rapidly via stolons and produces tiny purple or white flowers in late spring. Tolerates damp soil conditions better than thyme.
Troubleshooting Common Path Failures
Even with meticulous preparation, environmental factors can challenge your hardscape. Here is how to diagnose and fix the most common issues associated with garden paths and stepping stones.
Problem: Stones Sinking in High-Traffic Areas
Cause: Insufficient base compaction or using rounded pea gravel instead of angular 3/4-inch minus gravel. Rounded gravel cannot interlock and displaces under point-loads (like a heel strike).
Fix: Pry up the sunken stones, add 2 inches of 3/4-inch minus base rock, compact thoroughly with a hand tamper, replace the coarse sand setting bed, and reset the stones.
Problem: Aggressive Weed Intrusion
Cause: Using non-woven landscape fabric or skipping the fabric entirely, allowing wind-blown organic matter in the joints to root into the sub-base.
Fix: Apply a targeted, non-selective herbicide or a horticultural vinegar solution (20% acetic acid) to the joints. For a permanent fix, you must remove the jointing material, lay a proper woven geotextile fabric, and re-apply polymeric sand to seal the surface.
Problem: Path Heaving Near Mature Trees
Cause: Excavating too close to the trunk and severing structural roots, which then die, decay, and leave voids under the path, or roots that grow upward seeking oxygen in the porous gravel base.
Fix: According to arboricultural best practices outlined by Fine Gardening, always route paths outside the dripline of mature trees. If crossing the critical root zone is unavoidable, use a flexible base and bridge large roots (>2 inches in diameter) rather than cutting them, preserving both the tree's health and your path's structural integrity.
Building durable garden paths and stepping stones requires patience and a commitment to proper base preparation. By investing your time in the unseen sub-base layers and selecting the correct angular aggregates, you will create a landscape feature that remains level, weed-free, and structurally sound for decades.

