
Landscaping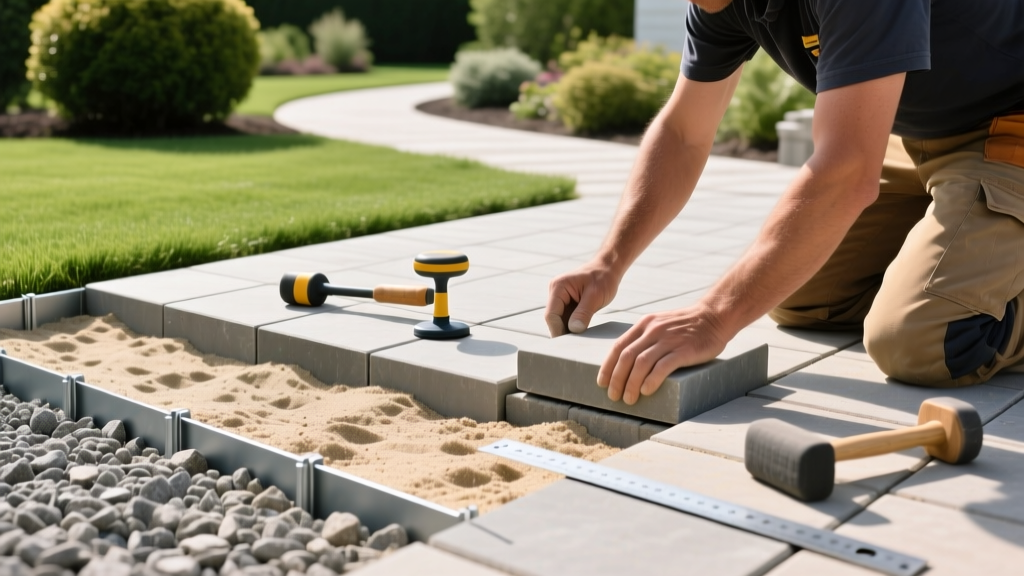
How to Build a Paver Stone Walkway: Base Prep, Sand & Edging Guide
Most DIY paver stone walkway projects fail within three to five years. The failure rarely stems from the pavers themselves cracking; instead, it is almost always a structural failure of the base. Frost heave, poor subsurface drainage, and inadequate mechanical compaction will quickly turn a perfectly straight path into a wavy, uneven tripping hazard. This guide bypasses surface-level aesthetic advice to detail the exact structural engineering and material specifications required for a permanent paver stone walkway, focusing on base mechanics, ASTM-compliant bedding, and hidden restraint systems.
Critical Failure Point: Clay Subgrades
If your native soil is heavy clay (common in the Midwest and Southeast), you must increase your excavation depth by 2 inches and install a 6-oz non-woven geotextile fabric beneath the aggregate base. Clay retains water, which freezes and expands in winter, pushing the pavers upward. The geotextile fabric prevents the aggregate base from mixing into the clay subgrade over time, a process known as pumping.
If your native soil is heavy clay (common in the Midwest and Southeast), you must increase your excavation depth by 2 inches and install a 6-oz non-woven geotextile fabric beneath the aggregate base. Clay retains water, which freezes and expands in winter, pushing the pavers upward. The geotextile fabric prevents the aggregate base from mixing into the clay subgrade over time, a process known as pumping.
Material Calculation & Tool Checklist
Accurate material ordering prevents project delays. The following metrics are calculated for a standard 100 square foot paver stone walkway, assuming a 6-inch base depth suitable for pedestrian traffic and moderate freeze-thaw cycles.
| Material | Quantity (per 100 sq ft) | Specification / Brand Example |
|---|---|---|
| Class II Road Base | 1.5 tons | 3/4-inch minus aggregate |
| Bedding Sand | 1 ton | ASTM C33 Concrete Sand |
| Polymeric Sand | 2-3 bags (50 lbs) | Alliance Gator Dust or Techniseal |
| Edge Restraint | 20 linear feet | PermaEdge hidden composite |
| Landscape Spikes | 40 count | 10-inch galvanized steel |
Required Machinery: You must rent a vibratory plate compactor that generates a minimum of 3,000 lbs of centrifugal force. Standard lightweight tampers will not achieve the 98% Proctor density required for the base. You will also need a masonry wet saw equipped with a 10-inch continuous rim diamond blade for clean cuts.
Phase 1: Excavation and Road Base Installation
The longevity of your paver stone walkway is entirely dependent on the excavation and base compaction phase.
- Calculate Excavation Depth: Excavate to 9.5 inches below your desired finished grade. The math: 6 inches of base + 1 inch of bedding sand + 2.375 inches of standard paver thickness - 0.125 inches for compaction settlement = 9.25 inches. Round up to 9.5 inches for safety.
- Compact the Subgrade: Run the plate compactor over the exposed native soil. According to the USDA NRCS soil compaction guidelines, native soil must be mechanically compacted to prevent differential settling before adding any aggregate.
- Install Geotextile Fabric: Roll out 6-oz non-woven geotextile fabric over the compacted subgrade, overlapping seams by 12 inches.
- Lay Base in Lifts: Add Class II Road Base in 3-inch layers (lifts). Compact each lift thoroughly before adding the next. Never dump 6 inches of gravel at once; the compactor's vibratory energy cannot effectively penetrate deeper than 4 inches, leaving the bottom layer loose and prone to settling.
Phase 2: Screeding the Bedding Sand
Never use masonry sand, play sand, or limestone dust for your bedding layer. Masonry sand is too fine and traps water, while play sand lacks the angularity required for structural interlock. You must use ASTM C33 concrete sand. The coarse, angular grains lock together and allow water to drain freely through to the base below.
The Screeding Process
Place two 1-inch outside-diameter aluminum pipes parallel to each other on the compacted base. Fill the gap between them with C33 sand and pull a 2x4 straightedge across the pipes to create a perfectly level 1-inch bed. Carefully remove the pipes and fill the voids with a trowel. Once screeded, do not walk on or disturb the sand bed under any circumstances.
Phase 3: Laying, Cutting, and Compacting
Begin laying the pavers from a fixed 90-degree corner, such as a house foundation or an existing concrete apron. Maintain a strict 1/16-inch joint spacing. Most modern pavers have spacer bars cast into their sides; use these to ensure uniform gaps for the polymeric sand.
Pro Cutting Tip: When cutting pavers for curves or borders, use a wet saw with a continuous rim diamond blade designed specifically for hard concrete (not a segmented masonry blade). Segmented blades cause micro-fractures and severe chipping on the visible edges of the paver stone walkway.
Once all pavers are laid, run the plate compactor directly over the surface without sand in the joints. Use a urethane pad on the compactor to prevent scratching the paver faces. This vibration forces the pavers down into the bedding sand, creating a vital mechanical lock.
Phase 4: Edge Restraints and Polymeric Sand
Without edge restraints, the outer pavers will slowly migrate outward into the soil, causing the entire walkway to unzip. Belgard's installation guidelines emphasize that proper restraint is non-negotiable for segmental paving.
Edge Restraint Comparison Matrix
| Restraint Type | Cost (per ft) | Pros & Cons |
|---|---|---|
| Visible Plastic (SnapEdge) | $2.00 - $3.00 | Cheap and easy to install, but UV degrades it and it creates a tripping hazard if surrounding mulch settles. |
| Hidden Composite (PermaEdge) | $6.00 - $8.00 | Installs below grade, allows grass to grow right up to the paver edge. Highly recommended for a professional finish. |
| Poured Concrete Curb | $10.00+ | Permanent and indestructible, but requires forming and pouring. Generally overkill for pedestrian walkways. |
Sweep your chosen polymeric sand (such as Alliance Gator Dust) into the 1/16-inch joints. Compact the surface again to force the sand deep into the cavities. Sweep off all excess dust from the surface—this is crucial to avoid permanent hazing. Finally, mist the walkway with a fine spray nozzle for 15 seconds to activate the polymer binder. Do not use a high-pressure jet, which will wash the sand out of the joints.
Troubleshooting Common Paver Walkway Failures
Even with meticulous installation, environmental factors can cause issues. Use this decision tree to diagnose and fix common problems.
- Problem: White Hazing on Pavers
- Cause: Leaving polymeric sand dust on the surface before wetting, or using too much water during activation, causing the polymers to float to the surface and dry.
- Fix: Apply a specialized paver cleaner (e.g., Techniseal Polymeric Sand Haze Remover) and scrub with a stiff bristle brush. Do not use muriatic acid, which can etch the paver pigments.
- Problem: Ants Excavating the Joints
- Cause: Ants nest in the dry, sheltered environment of the base layer and push the bedding sand up through the joints.
- Fix: Ensure polymeric sand is fully activated and sealed. If the infestation is severe, lift the affected pavers and apply a granular bifenthrin insecticide to the sub-base before re-screeding and relaying.
- Problem: Puddling in the Center of the Walkway
- Cause: Lack of cross-slope during the base screeding phase. Pavers must have a minimum 1% cross-slope (1/8-inch drop per foot) away from structures to shed water.
- Fix: You cannot fix drainage by adding more sand on top. The affected section must be excavated, the base re-compacted with the correct slope, and the pavers relaid.
Building a paver stone walkway requires physical labor and strict adherence to material specifications. DIY materials for a standard 4x20 foot (80 sq ft) path typically run between $640 and $960 ($8 to $12 per square foot), excluding the cost of tool rentals. By prioritizing a 6-inch Class II base, ASTM C33 sand, and hidden restraints, you will construct a hardscape feature that remains perfectly level for decades, surviving the harshest freeze-thaw cycles without shifting.

