
Landscaping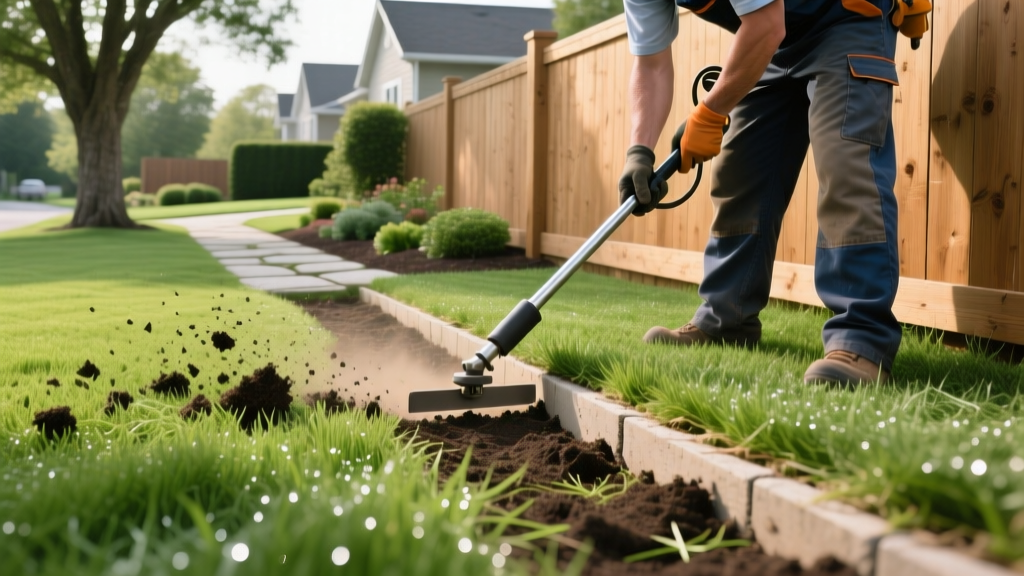
Under Fence Edging Installation: Step-by-Step Lawn Guide
The Hidden Cost of Ignoring Fence Line Perimeters
Grass rhizomes and aggressive stolons do not respect property lines or wooden fence posts. Without a physical barrier, turfgrass species like Bermuda, Zoysia, and Kentucky Bluegrass will actively colonize the base of your fencing, trapping moisture against the wood or metal and accelerating rot. Furthermore, maintaining the grass directly against a fence forces the use of string trimmers, which routinely gouge fence pickets and sever the protective galvanized coating on chain-link posts. Installing under fence edging creates a permanent, low-maintenance boundary that eliminates these failure points while streamlining your weekly lawn care procedures.
This guide details the exact materials, trenching dimensions, and installation techniques required to establish a permanent subsurface barrier along your fence line.
Material Selection Matrix: What to Buy in 2026
Not all landscape edging survives the lateral pressure of compacted soil and the freeze-thaw cycles of northern climates. Flimsy plastic roll-edging will warp and surface within two seasons. For under fence edging, you need rigid, structural materials. Below is a comparison of the most effective options based on current 2026 material pricing and structural longevity.
| Material Type | Required Specs | Estimated DIY Cost (Per Linear Ft) | Lifespan | Best Application |
|---|---|---|---|---|
| Powder-Coated Steel | 14-gauge, 4-inch depth | $1.80 - $2.50 | 30+ Years | Straight fence lines, aggressive rhizome grasses |
| Extruded Aluminum | 1/8-inch thick, 4-inch depth | $2.20 - $3.10 | 25+ Years | Curved fence lines, coastal/salty environments |
| Heavy-Duty HDPE | Commercial grade, 6-inch depth | $1.20 - $1.60 | 10-15 Years | Budget projects, temporary boundaries |
| Poured Concrete Mow Strip | 4x4 inch minimum cross-section | $4.50 - $7.00 | 50+ Years | Premium estates, zero-clearance mower decks |
Pro Sourcing Tip: When purchasing steel edging, verify that the powder coating is polyester-based and at least 2.0 mils thick. Standard painted edging will chip upon installation and rust within three years when exposed to soil moisture and lawn fertilizers.
Pre-Installation: Tools and Site Preparation
Proper trenching is the most critical phase of the installation. A shallow trench leads to frost heave, while an uneven trench creates a wavy, unprofessional appearance along the fence base.
Required Tool Loadout
- Half-Moon Manual Edger: For slicing the initial turf line.
- Trenching Shovel (V-Blade): Specifically designed for digging narrow, 4-inch wide trenches.
- Dead Blow Mallet (3 lb): For driving edging stakes without deforming the top rail of the metal.
- Mason's Line and Line Level: To ensure a consistent reveal above the soil grade.
- Angle Grinder with Metal Cut-off Wheel: For trimming sections to fit precisely around fence posts and gate hinges.
Step-by-Step Installation Procedure
Step 1: Establish the Trench Line and Depth
Measure exactly 2 inches outward from the base of the fence posts. Snap a chalk line or use landscaping spray paint to mark this boundary. Using the half-moon edger, slice through the turf along this line. Next, use the V-blade trenching shovel to excavate a trench that is exactly 4 inches deep and 3 inches wide.
Critical Edge Case: If you are installing in USDA Hardiness Zones 3 through 5, where frost heave is severe, excavate an additional 2 inches and fill the bottom of the trench with a 2-inch layer of crushed 3/4-inch angular gravel. This drainage layer prevents water from pooling under the edging and freezing, which is the primary cause of upward displacement.
Step 2: Position and Join the Edging Sections
Place the first section of edging into the trench. The top of the edging should sit exactly 1/2 inch to 3/4 inch above the final soil grade. This slight reveal allows your lawnmower deck to ride over the edging without scalping the grass, while still blocking the horizontal spread of turf.
When joining sections, overlap them by at least 6 inches and secure them using the manufacturer's interlocking brackets or heavy-duty steel splice plates. Never butt the ends of metal edging together without a splice plate; soil pressure will push the joints apart over time, creating a gap for grass infiltration.
Step 3: Stake and Secure the Barrier
Drive 12-inch steel U-stakes or J-stakes through the pre-punched holes in the edging. Space stakes no more than 3 feet apart along straight runs, and reduce spacing to 18 inches on any curves or corners. According to landscape structural guidelines outlined by Fine Gardening, driving stakes at a slight 15-degree angle away from the turf side provides superior lateral resistance against the outward pressure of expanding grass roots and soil.
Step 4: Navigating Fence Posts and Gates
Do not attempt to bend metal edging tightly around 4x4 wooden fence posts. Instead, cut the edging so it terminates exactly 1/4 inch from the post on both sides. Fill this micro-gap with high-quality polyurethane exterior sealant to block insects and water.
For gate openings, the edging must not interfere with the gate's swing radius. Terminate the edging 2 inches before the gate hinge, and ensure the top of the edging is filed completely smooth to prevent tire punctures or tripping hazards.
Step 5: Backfilling and Compaction
Backfill the trench on the grass side with the excavated topsoil. On the fence side, backfill with 3/4-inch crushed stone or coarse mulch. Do not use soil on the fence side. Soil retains moisture against the wooden fence posts, directly leading to subterranean wood decay. Water the backfilled soil heavily and use a hand tamper to compact it tightly against the steel edging, eliminating air pockets that could cause the barrier to lean.
Warning: Irrigation Line Interference
Before trenching, locate any shallow drip irrigation or low-voltage landscape lighting wires running along the fence line. If a wire crosses the trench path, notch the bottom of the steel edging with an angle grinder to allow the wire to pass underneath without being severed or pinched.
Before trenching, locate any shallow drip irrigation or low-voltage landscape lighting wires running along the fence line. If a wire crosses the trench path, notch the bottom of the steel edging with an angle grinder to allow the wire to pass underneath without being severed or pinched.
Long-Term Maintenance and Integration
Once installed, under fence edging drastically reduces weekly maintenance time, but it does not eliminate it entirely. To maintain the integrity of the barrier and the health of the adjacent turf, integrate the following procedures into your seasonal lawn care schedule:
- Spring Edging Touch-ups: After the winter thaw, walk the fence line. Frost heave may have pushed minor sections upward. Use the dead blow mallet to gently tap any raised sections back down to the 3/4-inch reveal mark.
- Mowing Pattern Adjustment: Train yourself or your landscaping crew to mow with the right mower wheel riding directly on top of the edging's top rail. This ensures a perfectly flush cut right up to the steel barrier, eliminating the need for a secondary string-trim pass along the fence.
- Chemical Edge Control: As noted in integrated pest management practices recommended by Penn State Extension, applying a targeted, non-selective herbicide (like a 2% glyphosate solution) via a shielded sprayer along the fence-side of the edging once in early summer prevents any wind-blown weed seeds from taking root in the stone mulch bed.
Evaluating the ROI of Fence Line Edging
While the upfront cost of 14-gauge steel edging and labor-intensive trenching may seem high—averaging $250 to $400 for a standard 150-foot backyard perimeter—the return on investment is realized quickly. You eliminate the need to replace rotted fence pickets at the ground level, which typically costs $15 to $25 per board plus labor. More importantly, you reclaim 15 to 20 minutes of string-trimming time per mowing session. Over a five-year period, the edging pays for itself in preserved fencing materials and reclaimed time, making it one of the highest-value structural upgrades in modern landscape maintenance.

