
Landscaping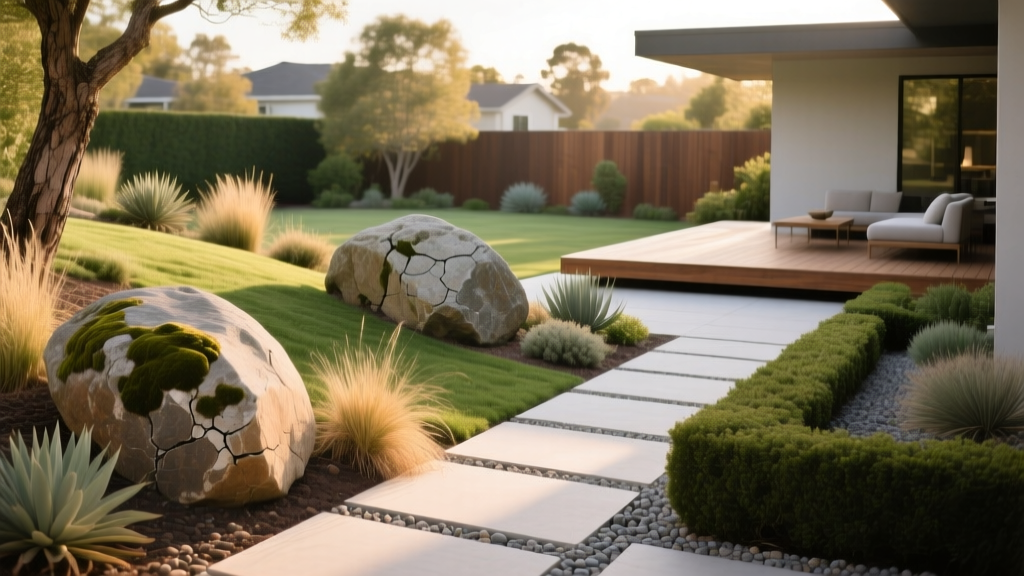
How to Landscape with Large Rocks: A Beginner's Yard Guide
The Reality of Boulders: Size, Weight, and Scale
When homeowners decide to landscape with large rocks, they are usually referring to boulders. According to the U.S. Geological Survey (USGS), a boulder is technically any rock fragment larger than 256 millimeters (10 inches) in diameter. However, in residential landscaping, 'large rocks' typically range from 200 to 2,000 pounds. Moving a 50-pound fieldstone by hand is a weekend chore; moving an 800-pound granite boulder is a logistical operation requiring heavy machinery, structural planning, and precise soil preparation.
This guide strips away the vague design advice and provides the exact specifications, pricing, and structural frameworks you need to install large landscape rocks without destroying your lawn or wasting money on improper materials.
⚠️ Beginner Warning: The Gate Clearance Rule
Before ordering any large rocks, measure your backyard gate or side-yard access path. A standard residential gate is 36 inches wide. Most compact track loaders (skid steers) require at least 48 to 60 inches of clearance to pass through with a boulder on the forks. If your access is narrower, you will either need to temporarily remove fence panels or pay a premium for a crane lift over the house, which can add $800 to $1,500 to your project cost.
Choosing the Right Stone: Geology Meets Landscaping
Not all rocks behave the same way in soil. The mineral composition of your boulders will directly impact your soil chemistry, drainage, and long-term durability. Here is how the most common landscape boulders perform in a residential setting:
Granite and Basalt (Igneous Rocks)
These are the gold standards for permanence. Granite is incredibly dense (roughly 165 lbs per cubic foot) and virtually impervious to water absorption. Basalt offers a darker, more modern aesthetic. Neither will alter your soil pH, making them safe to place directly adjacent to acid-loving plants like azaleas, rhododendrons, or blueberries.
Sandstone and Shale (Sedimentary Rocks)
Sandstone features beautiful, natural striations and is generally 20% to 30% cheaper than granite. However, it is porous. In freeze-thaw climates (USDA Zones 3 through 6), water seeps into the micro-fissures, freezes, and expands. Over 5 to 10 years, sedimentary boulders can spall, flake, or crack entirely in half. Use sandstone only in milder climates or as purely decorative, non-structural accents.
Limestone (Alkaline Sedimentary)
Limestone is highly reactive. As it weathers, it leaches calcium carbonate into the surrounding soil, steadily raising the pH (making it more alkaline). If you landscape with large rocks made of limestone, do not place them near your lawn's edge if you are growing acid-loving grasses, and keep them away from vegetable garden beds. They are best utilized in dedicated rock gardens featuring alpine plants, sedums, and lavender, which thrive in alkaline conditions.
The Financial Breakdown: Rock, Delivery, and Machinery
Budgeting for large rocks requires looking beyond the per-ton price of the stone. The National Association of Landscape Professionals (NALP) notes that logistics and equipment often account for up to 60% of the total hardscape budget. Below is a realistic cost matrix for a standard 2026 residential project.
| Expense Category | Estimated Cost Range | Details & Variables |
|---|---|---|
| Boulders (Granite) | $250 - $600 per ton | Price spikes for 'select' or 'mossy' boulders with specific coloration. |
| Delivery (Flatbed) | $150 - $350 | Depends on distance from quarry. Curbside drop-off only. |
| Skid Steer Rental | $250 - $350 / day | Requires pallet forks. Add $100/day for a ride-on trencher if needed. |
| Crane Service | $800 - $1,500 | Required if machinery cannot access the backyard. 4-hour minimum. |
| Base Gravel (3/4" Minus) | $40 - $70 per ton | Essential for drainage and preventing frost heave under the boulder. |
Step-by-Step Installation: Beating Frost Heave and Settlement
The most common failure in boulder landscaping is 'frost heave.' In colder climates, the ground freezes and expands, pushing shallow-buried rocks upward. When the soil thaws, the rock settles unevenly, tilting and looking entirely unnatural. The University of Minnesota Extension emphasizes that proper sub-grade preparation is non-negotiable for heavy hardscaping.
Step 1: Call 811 and Map Utilities
A single 800-pound boulder exerts massive point-load pressure on the soil. If placed directly over a shallow irrigation line, septic leach field, or buried fiber-optic cable, the weight can crush the infrastructure. Always call 811 at least three business days before digging.
Step 2: Excavate the Footprint
Dig a hole that is twice as wide as the boulder's base. The depth of the hole must accommodate two things: a 4-to-6-inch layer of compacted base gravel, plus enough depth to bury at least 25% to 33% of the boulder's total height. Never place a large rock entirely on top of the soil. A rock sitting on the surface looks like a dropped meteorite; a buried rock looks like a natural geological outcropping.
Step 3: Lay the Gravel Base
Fill the excavated hole with 3/4-inch minus crushed gravel. This specific aggregate contains stone dust and small chips that lock together when compacted, creating a concrete-like base that still allows water to drain away from the bottom of the boulder. Use a hand tamper or a plate compactor to solidify the base.
Step 4: Set and Orient the Rock
Using your skid steer (or contractor), lower the boulder onto the gravel bed. Pay attention to the rock's 'strata' or natural grain lines. In nature, sedimentary and metamorphic rocks form in horizontal layers. Ensure the strata lines on your boulder are parallel to the ground. Tilting the grain vertically is a dead giveaway of artificial placement.
Step 5: Backfill and Camouflage
Backfill the gap around the buried portion of the rock with native soil, tamping it down firmly every few inches to eliminate air pockets. To hide the transition line between the rock and the soil, plant low-growing, drought-tolerant groundcovers like creeping thyme (Thymus serpyllum) or creeping juniper. These plants will drape over the base, anchoring the rock visually into the landscape.
💡 Pro-Tip: Ground Pressure and Lawn Protection
If you are renting a skid steer to move the rocks yourself, rent a machine with rubber tracks instead of pneumatic tires, or buy a set of track mats. A standard wheeled skid steer carrying an 800-lb boulder exerts over 60 PSI of ground pressure, which will instantly trench and destroy your existing turf. Rubber tracks distribute the weight down to roughly 4 to 6 PSI, allowing you to drive over the lawn without tearing the root zone.
Design Frameworks: Arranging Multiple Boulders
If you are installing more than one large rock, avoid placing them in symmetrical lines or perfect circles. Nature is chaotic but balanced. Use these two design frameworks to guide your placement:
- The Rule of Odds: Group boulders in odd numbers (3, 5, or 7). The human brain struggles to easily divide odd numbers, which forces the eye to scan the entire grouping rather than splitting it into two symmetrical halves. This creates a more natural, organic feel.
- The Parent-Child Dynamic: Select one massive 'parent' boulder to serve as the primary focal point. Surround it with two or three significantly smaller 'child' boulders of the exact same stone type. Ensure the smaller rocks appear to be tumbling or eroding away from the parent, mimicking natural geological weathering.
Common Beginner Mistakes to Avoid
Beyond the 'muffin-top' placement error (leaving the entire rock above grade), beginners frequently make two other critical errors:
- Mixing Stone Types: Placing a red Arizona sandstone next to a blue-gray granite boulder creates visual dissonance. Always source all boulders for a single project from the same quarry to ensure color and grain consistency.
- Ignoring Water Runoff: Large rocks act as impermeable dams. If you place a 3-foot boulder at the bottom of a slope without planning for water diversion, rainwater will pool against the back of the rock, creating a muddy bog that will drown nearby plant roots and invite mosquito breeding. Always grade the soil away from the back of the boulder or install a concealed French drain behind it.
Frequently Asked Questions
Can I use large rocks as a retaining wall?
Only if they are specifically engineered for it. Dry-stacking random boulders to hold back soil is highly dangerous; the lateral pressure of wet soil can easily overturn unanchored rocks. For retaining walls over 2 feet high, use engineered retaining wall blocks or hire a structural engineer to design a pinned boulder wall using steel rebar and concrete footings.
How do I maintain moss on my landscape boulders?
Moss requires consistent moisture and shade. If your boulders are in full sun, moss will not survive. For shaded areas, you can encourage moss growth by painting the north-facing side of the rock with a slurry of buttermilk and existing moss spores, keeping it misted daily for the first three weeks.

