
Landscaping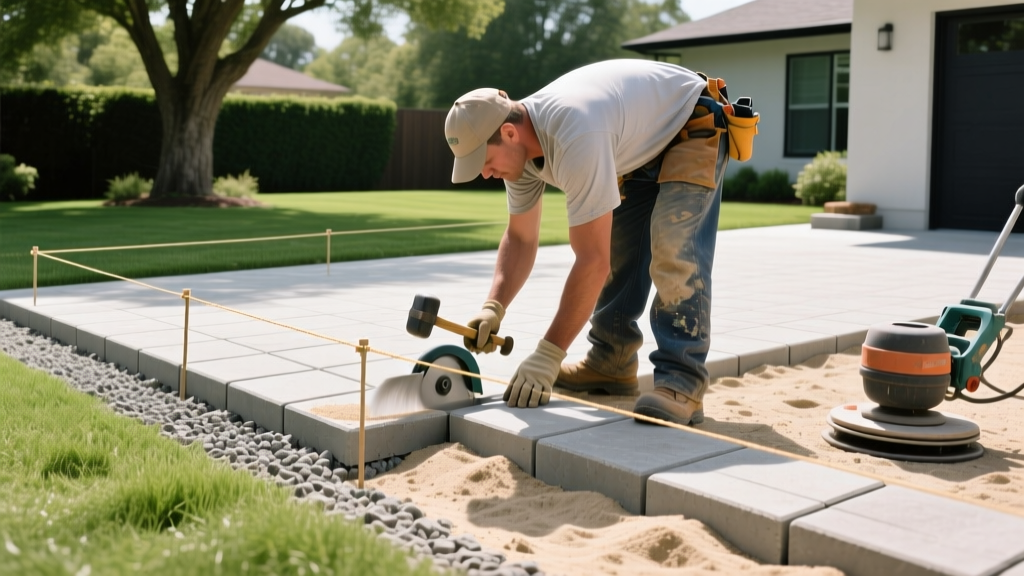
Landscaping With Pavers: Step-by-Step Patio Installation Guide
Project Scope and Material Calculator for a 100-Square-Foot Patio
Landscaping with pavers requires precise material estimation. Under-ordering base rock or polymeric sand leads to project delays and structural compromises. Below is the exact material breakdown for a standard 10x10 foot (100 sq ft) patio using 60mm thick ASTM C936 concrete pavers. Pricing reflects average 2026 regional material costs.
| Material | Quantity | Estimated Cost | Purpose |
|---|---|---|---|
| Class II Road Base (3/4" minus) | 1.5 tons | $60 - $80 | Structural sub-base |
| Coarse Concrete Sand (ASTM C33) | 0.5 tons | $25 - $35 | Leveling bedding layer |
| 60mm Concrete Pavers | 110 sq ft (10% overage) | $350 - $550 | Surface wearing layer |
| Plastic Paver Restraint | 45 linear feet | $90 - $120 | Edge containment |
| Polymeric Sand | 2 bags (55 lbs each) | $70 - $90 | Joint stabilization |
Phase 1: Excavation and Base Preparation
The most common failure in landscaping with pavers is base settlement. According to the U.S. Environmental Protection Agency, proper sub-grade compaction is critical to prevent frost heave and differential settling, especially in regions with expansive clay soils.
- Mark and Excavate: Mark the perimeter and add 6 inches on all sides for edge restraint. Excavate to a depth of 9.5 inches (6" base + 1" sand + 2.36" paver + 0.14" slope allowance).
- Establish Pitch: Create a slope of 1/8 inch per linear foot away from the house foundation. Use a rotary laser level or a string line with a line level to verify the grade.
- Geotextile Separation: Lay a non-woven geotextile fabric over the exposed subgrade if you have heavy clay soil. This prevents the clay from migrating upward into your base rock during freeze-thaw cycles.
- Compact in Lifts: Add Class II road base in 2-inch layers (lifts). Compact each lift with a plate compactor (minimum 5,000 lbs of centrifugal force) until you achieve 95% Proctor density. Do not attempt to compact 6 inches of base all at once; the lower layers will remain spongy.
Phase 2: Bedding Sand and Screeding
Never use masonry sand or play sand for the bedding layer. These lack the angularity required to lock together and will wash out over time. Use coarse, washed concrete sand that meets ASTM C33 specifications.
- Place 1-inch diameter galvanized steel pipes or specialized aluminum screed rails on the compacted base, spaced 4 feet apart.
- Pour concrete sand over and between the pipes.
- Pull a straight aluminum screed board across the pipes in a single, continuous motion toward your body. Do not push the sand away from you, as this creates voids.
- Carefully remove the pipes and fill the voids with sand, troweling them smooth. Do not step on or disturb the screeded sand.
Phase 3: Laying the Pavers and Cutting
Start laying pavers from a fixed 90-degree corner, such as the house foundation or a concrete driveway. Maintain a consistent 1/8-inch joint gap. If your pavers feature integrated spacer bars on the sides, lay them tight against each other; the spacer bars automatically create the correct joint width for sand infiltration.
For perimeter cuts, rent a 14-inch gas-powered masonry saw with a continuous-rim diamond blade. Mark the cut line with a lumber crayon, and cut through the paver in a single pass. Because cutting concrete generates hazardous dust, you must wear an OSHA-approved N95 respirator to avoid inhaling crystalline silica, which causes irreversible lung damage.
Phase 4: Compaction and Polymeric Sand Locking
Once all pavers are laid, run a plate compactor equipped with a urethane pad over the entire surface. The urethane protects the paver faces from scuffing while vibrating them down into the bedding sand, ensuring a perfectly level finish.
Joint stabilization prevents weed growth and insect infiltration. As noted in technical guidelines from Penn State Extension, polymeric sand creates a flexible, water-resistant bond that accommodates minor thermal expansion.
- Sweep polymeric sand into the joints until they are filled to exactly 1/8 inch below the paver surface.
- Use a leaf blower on a low setting to remove all residual dust from the paver surface. Critical: If you leave dust on the surface, the water activation step will create a permanent hazy film known as polymeric sand haze.
- Mist the patio with a garden hose using a shower nozzle for 3 to 5 minutes to activate the polymers. Wait 10 minutes, then apply a second light misting to ensure deep saturation.
Warning: Avoid landscaping with pavers over existing cracked concrete slabs without addressing the underlying structural issues. Reflective cracking will transfer through the sand bed and split your new pavers within a single freeze-thaw cycle. Always remove old, compromised concrete before building a new base.
Troubleshooting Common Installation Errors
| Symptom | Root Cause | Corrective Action |
|---|---|---|
| Puddling water after rain | Incorrect slope or settled base | Remove affected pavers, re-screed sand to a 1/8" per foot pitch, and relay. |
| Weeds growing in joints | Standard sand used instead of polymeric | Scrape out old sand, vacuum joints, and refill with polymeric sand. |
| Edge pavers leaning outward | Missing or improperly spiked edge restraint | Install SnapEdge, securing with 10-inch galvanized landscape spikes every 8 inches. |
| White powdery residue (Efflorescence) | Moisture reacting with calcium hydroxide | Wait 30 days for natural weathering, then apply a specialized efflorescence cleaner. |
Cost Analysis: DIY vs. Professional Installation
When planning your budget for landscaping with pavers, understanding the labor-to-material ratio is crucial. Professional hardscape contractors typically charge between $18 and $32 per square foot for a standard concrete paver patio. This includes heavy machinery excavation, base prep, and final cleanup.
By executing the DIY method outlined above, your material costs will range from $6.50 to $11.00 per square foot. However, you must factor in equipment rentals: a plate compactor ($85/day), masonry saw ($120/day), and laser level ($45/day). For a 100-square-foot patio completed over a weekend, the total DIY investment hovers around $1,100 to $1,400, saving you roughly $1,500 compared to hiring a licensed contractor. The trade-off is significant physical labor, particularly during the excavation and base compaction phases.

