
Landscaping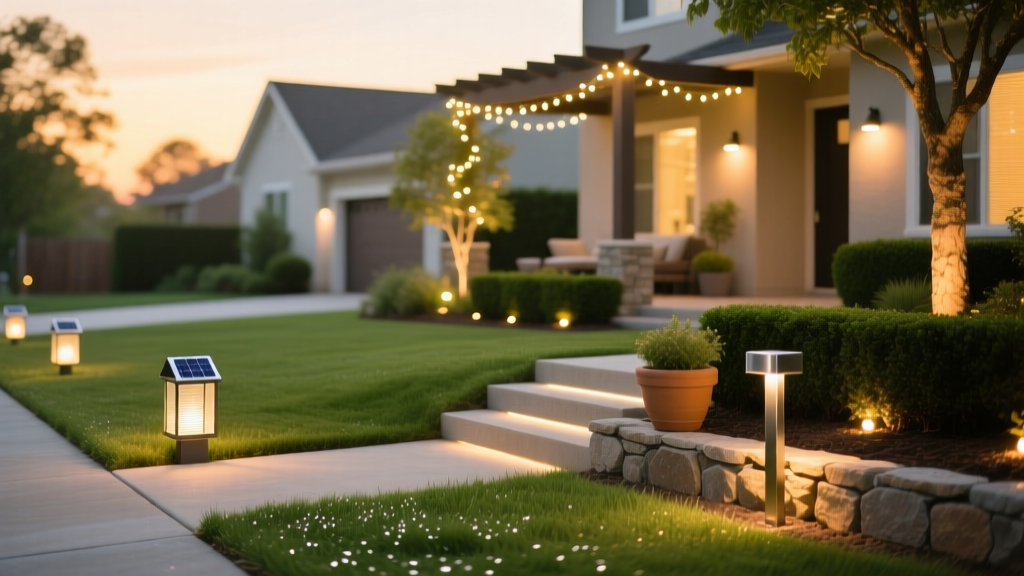
10 Beginner-Friendly Front Yard Lighting Ideas for Curb Appeal
Upgrading your home’s exterior illumination is one of the highest-ROI landscaping projects you can undertake. According to the National Association of the Remodeling Industry, landscape lighting consistently yields a 50% to 75% return on investment while drastically improving nighttime security. For beginners, 12-volt low-voltage systems are the undisputed starting point. They eliminate the need for deep trenching, bypass the requirement for a licensed electrician, and operate safely even in wet soil.
This guide skips the vague design platitudes and provides exact fixture placements, wiring specifications, and 10 actionable front yard lighting ideas you can install this weekend.
The Core Setup: Transformer Sizing and Wire Gauge
Before placing a single fixture, you must size your transformer and wire correctly. Beginners often overload transformers or use wire that is too thin, resulting in dim fixtures at the end of the run (voltage drop).
The 80% Rule: Never load a transformer to its maximum wattage. Always cap your total fixture wattage at 80% of the transformer’s rated capacity. A 200-watt transformer should only power up to 160 watts of LED fixtures. This prevents overheating and extends the transformer's lifespan.
Wire Gauge Selection Matrix
| Wire Gauge | Max Run Length | Best Application |
|---|---|---|
| 16-Gauge | Up to 100 ft (low load) | Short pathway runs, single tree uplights |
| 14-Gauge | Up to 150 ft (medium load) | Standard front yard perimeter loops |
| 12-Gauge | Up to 250 ft (heavy load) | Main trunk lines, large properties, high-wattage moonlights |
5 High-Impact Front Yard Lighting Ideas
1. Staggered Pathway Illumination (The Anti-Runway)
Amateurs line path lights directly across from each other, creating a harsh, airport-runway effect. Instead, stagger your fixtures on alternating sides of the walkway. Space them 8 to 10 feet apart. Use fixtures with 120 to 150 lumens and a wide 120-degree beam angle to cast overlapping pools of light on the ground without creating dark gaps. Position the fixtures 1 to 2 feet back from the walkway edge to prevent accidental damage from lawnmowers and snow shovels.
2. Architectural Tree Uplighting
To highlight a mature front yard oak or maple, place a brass uplight 18 to 24 inches from the base of the trunk. Aim the beam slightly off-center to create dramatic shadow play in the canopy. For medium trees (20-40 feet tall), use a 30-degree beam angle and a 3-watt to 5-watt LED bulb (roughly 200-350 lumens). Avoid cheap plastic fixtures here; the Clemson University Extension recommends cast brass or copper, which develop a natural patina and survive decades of UV exposure and soil moisture.
3. Stone and Brick Wall Grazing
If your front yard features a retaining wall, stone veneer, or brick facade, use the 'grazing' technique. Mount a narrow-beam (15-degree) wash light just 6 to 8 inches away from the wall, aiming straight up. This tight proximity exaggerates the texture of the masonry, creating deep, dramatic shadows. Keep the fixture perfectly level; even a slight tilt will cause the beam to veer off the wall.
4. Moonlighting from Mature Canopies
Moonlighting mimics natural lunar light by mounting a fixture 20 to 30 feet high in a mature tree, pointing downward through the branches. Use a 40-degree to 60-degree beam angle and a soft 2-watt LED. The branches will break up the light, casting dappled, natural-looking shadows on the lawn below. You will need a tree-mounting kit with stainless steel lag screws and a cable management system to allow for tree growth without girdling the bark.
5. Backlit House Numbers and Mailboxes
Security and aesthetics merge when you illuminate your address. Mount a dedicated micro-LED fixture behind your house numbers to create a glowing halo effect, or use a low-lumen (50-lumen) spot to uplight a stone mailbox pillar. Ensure the light source is shielded from the street to prevent blinding passing drivers.
Fixture Types & Beam Angles: Quick Reference
Choosing the wrong beam angle is the most common reason DIY landscape lighting looks unnatural. Use this matrix to match the fixture to the architectural feature.
| Fixture Type | Beam Angle | Ideal Target | Placement Tip |
|---|---|---|---|
| Path Light | 120° - 360° | Walkways, garden beds | Keep under 18 inches tall to avoid eye-level glare |
| Spot Light | 10° - 20° | Tall, narrow columns, flagpoles | Aim precisely; use a glare guard (shroud) |
| Flood Light | 40° - 60° | Broad facades, large bushes | Mount low and angle up to minimize light trespass |
| Well Light | 15° - 60° | Driveway borders, low masonry | Bury flush with soil; use heavy-duty brass covers |
Color Temperature: Setting the Right Mood
LEDs are measured in Kelvin (K). Selecting the right color temperature is critical for curb appeal.
- 2700K (Warm White): The gold standard for landscape lighting. It mimics traditional halogen bulbs, creating a cozy, inviting atmosphere. Best for pathways, patios, and architectural facades.
- 3000K (Neutral White): Slightly cooler and crisper. Excellent for highlighting stone textures, modern architecture, and darker foliage where 2700K might look too yellow.
- 4000K+ (Cool White/Daylight): Avoid this in residential front yards. It creates a harsh, clinical, and commercial look. The International Dark-Sky Association strongly recommends warmer temperatures (under 3000K) to minimize blue-light pollution and protect local nocturnal wildlife.
Real-World Budgeting for a Front Yard System
Pricing varies wildly based on material quality. Here is what you can expect to spend on a standard 15-fixture front yard setup in 2026.
Budget Warning: Big-box store 'starter kits' ($150-$250) use plastic or aluminum fixtures that degrade, crack, and corrode within 2 to 3 years. Invest in solid brass or copper fixtures from specialized brands like VOLT Lighting or Cast Lighting, which offer lifetime warranties on the housing.
- Big-Box DIY Kit (Plastic/Aluminum): $200 - $350 total. (High replacement rate, integrated non-replaceable LEDs).
- Pro-Grade DIY (Solid Brass, Replaceable LEDs): $700 - $1,200 total. Includes a 200W stainless steel transformer, 12-gauge wire, and 15 brass fixtures.
- Professional Installation: $2,500 - $4,500+. Includes trenching, direct-burial wire connectors, custom aiming, and labor.
Step-by-Step: Wiring Your First Run
- Map the Route: Lay out your main 12-gauge trunk line from the transformer to the furthest fixture, looping back to create a closed circuit (hub-and-spoke or loop method) to balance voltage.
- Bury the Wire: Dig a shallow trench 3 to 6 inches deep. Low-voltage wire does not need conduit, but burying it protects it from aeration and edging tools.
- Make Waterproof Connections: Never use standard twist-on wire nuts. Use silicone-filled gel wire connectors (like direct-burial grease caps) to prevent moisture from corroding the copper strands.
- Test Before Burying: Connect all fixtures and turn on the transformer at night. Adjust beam angles and check for voltage drop. If the last fixture is dim, you need a thicker wire or a multi-tap transformer.
- Set the Timer/Photocell: Most modern transformers feature integrated astronomical timers that adjust to local sunset times via GPS, eliminating the need to manually adjust for daylight saving time.
By prioritizing 12-gauge wiring, solid brass fixtures, and staggered placement techniques, your front yard lighting will look like it was designed by a high-end landscape architect, rather than a weekend DIYer. Start with the core pathways and architectural trees, and expand your system over time as your budget allows.

