
Landscaping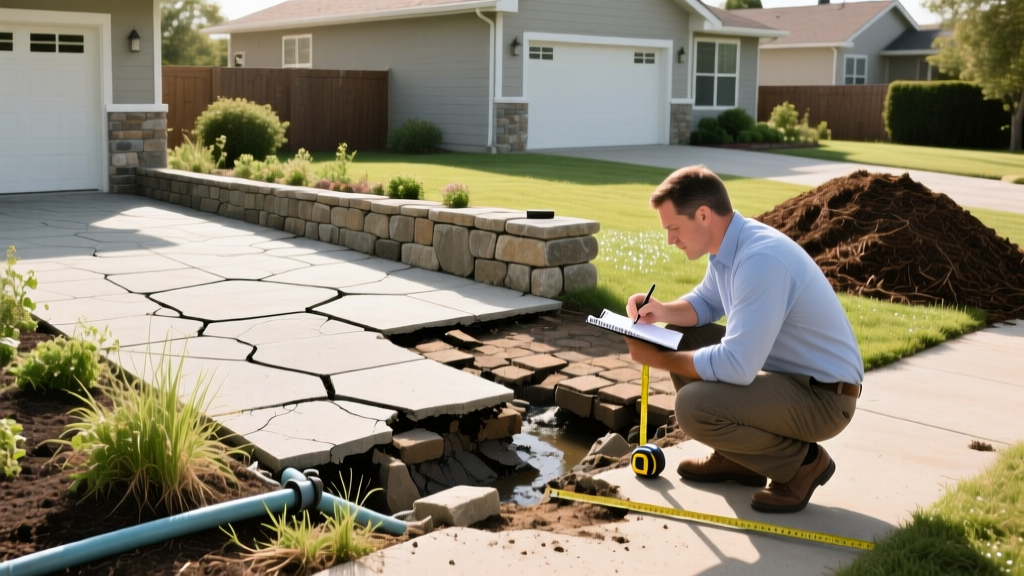
Hardscape Failure Diagnosis & Fixes: Mission Landscape Supply Guide
Diagnosing Hardscape Failures at the Source
Hardscape investments frequently fail within the first three to five years not because of poor surface materials, but due to compromised base aggregates, inadequate drainage, and incorrect jointing compounds. When diagnosing structural failures in patios, walkways, and retaining walls, the solution almost always traces back to the subgrade and the specific materials used to stabilize it. Sourcing spec-grade aggregates and engineering fabrics from specialized regional dealers like Mission Landscape Supply ensures you receive materials that meet ASTM standards for hardscape construction, avoiding the diluted or mislabeled alternatives often found at general big-box retailers.
This guide breaks down the three most common hardscape failures—paver settling, retaining wall hydrostatic bulging, and efflorescence—and details the exact diagnostic steps and material solutions required to fix them permanently.
Problem 1: Paver Settling and Frost Heave
Symptom Diagnosis
Walk across your patio. If the surface feels spongy, if individual pavers rock when stepped on, or if you notice localized pooling water after a rain event, your base aggregate has failed. In freeze-thaw climates, this manifests as frost heave, where trapped moisture in the base freezes and expands, pushing pavers upward and leaving permanent depressions upon thawing.
The Root Cause: Incorrect Aggregate Fines
The most common cause of paver settling is the use of rounded gravel (like pea gravel) or washed stone that lacks 'fines' (stone dust). Without fines, the aggregate cannot lock together to form a rigid, semi-permeable slab. According to the Interlocking Concrete Pavement Institute (ICPI) technical specifications, base materials must consist of crushed, angular aggregate with a specific gradation to achieve 98% Standard Proctor density.
The Solution: Excavation and 3/4-Inch Minus Base
To fix a failing paver bed, you must remove the affected pavers, excavate the compromised base, and replace it with the correct material.
- Remove and Excavate: Pull up the settled pavers and excavate the soft subgrade to a depth of 6 to 8 inches below the final desired grade.
- Install Geotextile Fabric: Lay a non-woven geotextile separation fabric over the native soil to prevent clay migration into your new base.
- Source the Correct Aggregate: Purchase 3/4-inch minus crushed limestone or granite from Mission Landscape Supply. The 'minus' designation means it includes stone dust and small particles that lock together when compacted.
- Compact in Lifts: Spread the aggregate in 2-inch to 3-inch layers (lifts). Compact each lift using a vibratory plate compactor with a minimum centrifugal force of 5,000 lbs. Do not attempt to compact a 6-inch layer all at once; the bottom will remain loose.
- Screed and Reset: Apply a 1-inch layer of ASTM C33 concrete sand, screed it perfectly level, and relay the pavers.
Warning: Never use limestone screening or 'stone dust' as your primary base layer. While it compacts hard, it retains water like a sponge, guaranteeing frost heave in northern climates. Always use 3/4-inch minus crushed stone for the structural base.
Problem 2: Retaining Wall Bulging and Hydrostatic Pressure
Symptom Diagnosis
Inspect your segmental retaining wall. If the face is bowing outward, if the coping stones are shifting, or if you see soil spilling through the joints, the wall is failing under hydrostatic pressure. Water-saturated soil weighs significantly more than dry soil and exerts immense lateral force against the wall face.
The Root Cause: Missing Drainage Columns and Geogrid
Many DIY walls and poorly contracted builds rely solely on the wall blocks for structural integrity, backfilling directly behind the blocks with native soil. Without a dedicated drainage column and tensile reinforcement, the wall cannot resist the lateral loads of saturated earth. Engineering guidelines from the Allan Block Engineering Manuals mandate specific clear stone drainage zones and geogrid placement intervals for walls exceeding 3 feet in height.
The Solution: Clear Stone Backfill and Biaxial Geogrid
Fixing a bulging wall requires partial deconstruction and the installation of proper drainage and reinforcement materials, readily available in bulk at Mission Landscape Supply.
- Deconstruct and Re-grade: Remove the top courses of the bulging wall section. Excavate the native soil behind the wall to create a minimum 12-inch wide trench directly behind the blocks.
- Install Perforated Drain Pipe: Lay a 4-inch perforated PVC or corrugated drain pipe at the base of the wall, sloping it at a 1% grade toward a daylight exit point or dry well.
- Backfill with 57 Clear Stone: Fill the 12-inch drainage column with #57 clear crushed stone. This stone is washed and contains no fines, allowing water to flow freely down to the drain pipe without clogging.
- Integrate Geogrid: For walls over 3 feet, unroll biaxial geogrid (such as Tensar BX1200) from the wall face back into the compacted soil zone. The geogrid must be placed every 2 courses (approximately 16 inches vertically) and extend back into the soil a distance equal to 60% of the wall's total height.
Material Sourcing Matrix: 2026 Regional Pricing & Specs
When ordering from Mission Landscape Supply, use the correct terminology to ensure you receive the exact engineering materials required for your fix. Below is a diagnostic matrix matching common failures to their required material solutions and estimated 2026 bulk pricing.
| Failure Symptom | Required Material Fix | Mission Supply Product Category | Est. 2026 Cost |
|---|---|---|---|
| Paver Settling / Sponginess | 3/4" Minus Crushed Gravel | Base Aggregates (Bulk) | $28 - $36 / ton |
| Wall Bulging / Water Trapping | #57 Clear Crushed Stone | Drainage Aggregates (Bulk) | $42 - $55 / ton |
| Joint Washout / Ant Intrusion | High-Performance Polymeric Sand | Alliance Gator Sand (Bags) | $38 - $48 / bag |
| Wall Overturning (Tall Walls) | Biaxial Geogrid Fabric | Soil Reinforcement (Rolls) | $160 - $210 / roll |
Problem 3: Efflorescence and Polymeric Sand Haze
Symptom Diagnosis
A white, powdery residue appears on the surface of your concrete pavers or retaining wall blocks. Alternatively, you may notice a hard, hazy film of polymeric sand stuck to the surface texture of the stones, making them look dull and stained.
The Root Cause: Trapped Moisture and Improper Activation
Efflorescence is a natural chemical reaction where water-soluble calcium hydroxide (lime) inside the concrete migrates to the surface and reacts with carbon dioxide in the air, forming calcium carbonate. Polymeric sand haze occurs when installers fail to blow the excess sand off the surface before activating it with water, or when they use too much water, causing the polymers to float to the surface and cure into a plastic-like film.
The Solution: Chemical Cleaning and Breathable Sealers
Fixing these surface issues requires specific chemical cleaners that do not degrade the concrete matrix.
- Remove Polymeric Haze: If the haze is recent (under 30 days), use a specialized polymeric sand haze remover. Apply it undiluted, agitate with a stiff nylon brush, and rinse thoroughly. Do not use muriatic acid, as it can burn the pigment out of colored concrete pavers.
- Treat Efflorescence: For persistent white powder, apply an efflorescence cleaner containing a mild phosphoric acid blend. Allow it to dwell for 5 to 10 minutes, agitate, and neutralize with a baking soda and water rinse.
- Seal with Siloxane: Once the pavers are completely dry and efflorescence-free, apply a breathable, penetrating siloxane-based sealer. Unlike acrylic film-forming sealers that trap moisture inside the concrete (causing white 'blushing' under the sealer), siloxane sealers repel liquid water from the top down while allowing water vapor to escape from the subgrade.
Pro Tip: Always wait a minimum of 60 to 90 days after installing new concrete pavers before applying any sealer. This allows the initial, heavy cycle of efflorescence to naturally exhaust itself from the concrete. Sealing too early traps the lime inside, which will eventually force the sealer to peel.
Preventing Mulch Bed Washouts and Grade Failures
Hardscape fixes often extend to the softscape borders. If your mulch beds are washing out onto your newly repaired walkways, the issue is usually a lack of positive grading and edge restraint. Regrade the soil in the bed so it slopes away from the hardscape at a minimum 2% grade. Install heavy-duty aluminum or steel landscape edging, staked every 4 feet, to create a physical barrier. For severe water runoff issues, integrate a 4-inch NDS corrugated French drain wrapped in filter fabric beneath the mulch bed, routing the water to a pop-up emitter in the lawn. Sourcing bulk hardwood mulch and NDS drainage components from Mission Landscape Supply ensures your softscape borders remain as structurally sound as your hardscape surfaces.

