
Landscaping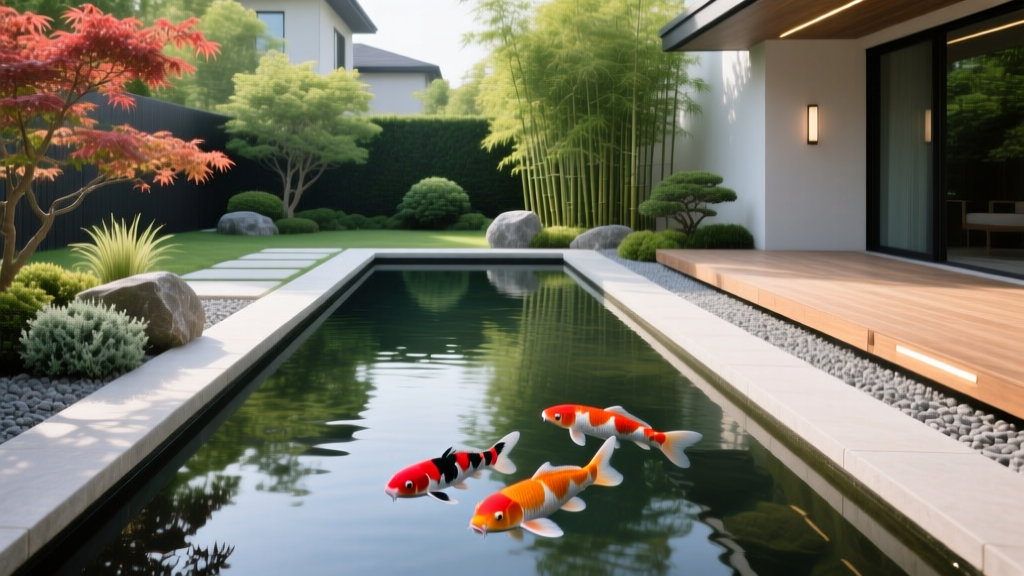
Modern Koi Pond Design Ideas: A Step-by-Step Build Guide
Core Principles of Architectural Pond Design
Executing flawless modern koi pond design ideas requires abandoning the naturalistic, irregular boulder layouts of traditional water gardens. Architectural ponds prioritize geometric precision, negative space, and concealed life-support systems. The objective is to create a structured water feature that integrates seamlessly with contemporary home facades, relying on crisp 90-degree angles, flush coping, and monochromatic interiors to make the vibrant colors of the koi the sole focal point.
- Monochromatic Interiors: Coat the shell in dark charcoal or black. Dark backgrounds absorb light, eliminate glare, and provide maximum contrast for Kohaku and Showa koi varieties.
- Concealed Mechanics: Skimmers, bottom drains, and auto-fill valves must be hidden behind cantilevered stone coping or architectural planters. Visible PVC piping ruins the modern aesthetic.
- Sheer Descent Waterfalls: Replace cascading rock waterfalls with stainless steel or brass sheer descent weirs that produce a uniform, glass-like sheet of water.
Material Matrix: Selecting the Structural Shell
The longevity and structural integrity of a modern pond depend entirely on the shell material. While EPDM rubber is common in budget builds, architectural designs demand rigid, permanent structures that can support heavy stone coping and precise 90-degree corners.
| Material | Avg. Cost per Sq Ft (2026) | Lifespan | Best Application |
|---|---|---|---|
| Shotcrete (Gunite) | $45 - $65 | 50+ Years | Complex geometries, high-end architectural builds, extreme durability. |
| CMU Block & Mortar | $30 - $45 | 30+ Years | Strict rectangular designs, raised formal ponds, DIY-friendly masonry. |
| EPDM Rubber (45-mil) | $12 - $18 | 15 - 20 Years | Budget builds, naturalistic shapes (not recommended for modern flush-coping). |
Step-by-Step Construction Protocol
Building a modern koi pond requires strict adherence to hydraulic and structural engineering principles. According to the American Koi Carp Association, proper depth and filtration are non-negotiable for fish health and overwintering survival.
Step 1: Excavation and Hydrostatic Relief
Excavate the pond to a minimum depth of 4 feet. This depth prevents the water from freezing solid in northern climates and protects koi from wading predators like herons. Install a 4-inch perforated PVC pipe beneath the pond floor, wrapped in landscape fabric and gravel, connected to a sump pump or daylight drain. This hydrostatic relief valve prevents groundwater pressure from cracking the concrete shell or lifting the pond floor during heavy rains.
Step 2: Plumbing and Bottom Drain Installation
Modern koi ponds must be gravity-fed to a settlement chamber or sieve filter. Never rely solely on submersible pumps sitting inside the pond. Install 3-inch or 4-inch Schedule 40 PVC piping from the bottom drains to the filter room. A 3-inch line can handle up to 3,000 gallons per hour (GPH), which is sufficient for a standard 1,500-gallon modern pond, ensuring a complete water turnover every 1.5 hours.
Step 3: Shell Formation and Waterproofing
For shotcrete shells, apply the concrete pneumatically over a #4 rebar grid tied at 12-inch centers. Once cured, the surface must be sealed to prevent toxic alkalinity from leaching into the water. Apply two coats of a cementitious waterproofing base like Thoroseal, followed by a topcoat of a flexible, fish-safe polyurea or synthetic rubber coating such as Saniflex. This dual-layer system prevents micro-cracking and guarantees a watertight seal.
Filtration Hydraulics and Concealment
In modern designs, the filtration system is typically housed in an adjacent, climate-controlled vault or a disguised landscape shed. A gravity-fed sieve filter (such as the Ultima II) captures mechanical debris down to 200 microns before the water reaches the biological filter. The biological stage should utilize moving bed biofilm reactor (MBBR) technology, filled with K1 media, to provide immense surface area for nitrifying bacteria. To maintain the clean aesthetic, the return water should be routed through a UV clarifier and fed back into the pond via recessed wall returns or a sheer descent waterfall.
Design Callout: The Auto-Fill Necessity
Modern ponds lose water to evaporation and splash. Install an electronic auto-fill valve (like the AquaFill system) connected to a dedicated irrigation line. Hide the float valve behind the skimmer weir or inside a concealed coping access panel to maintain unbroken architectural lines.
Integrating Modern Water Features and Lighting
To achieve the signature modern look, water features must be geometric and precise. Use a CMP 36-inch stainless steel sheer descent waterfall. Mount it flush against a rendered block wall or a Corten steel privacy screen. For illumination, avoid floating spotlights. Instead, install recessed, low-voltage LED fixtures (such as the Oase ProfiLux series) directly into the pond walls during the concrete pour. Position warm-white (3000K) LEDs near the bottom drains to illuminate the koi from below, creating dramatic shadows and highlighting their underbellies at night.
2026 Cost Breakdown for a 150-Square-Foot Modern Pond
Budgeting for an architectural koi pond requires accounting for specialized labor and premium materials. Below is an estimated cost breakdown for a 10x15 foot, 4-foot-deep modern pond in a standard suburban setting:
- Excavation & Hydrostatic Plumbing: $2,500 - $3,500
- Shotcrete Shell & Rebar: $6,500 - $8,500
- Waterproofing (Thoroseal & Saniflex): $1,800 - $2,400
- Filtration Vault & Plumbing (Sieve, MBBR, UV): $4,000 - $6,000
- Coping & Architectural Finishes (Bluestone/Corten): $3,500 - $5,500
- Sheer Descent & Recessed LED Lighting: $2,000 - $3,000
- Total Estimated Project Cost: $20,300 - $28,900
Common Failure Modes in Modern Builds
String Algae on Light-Colored Coping
Modern designs frequently use light-colored limestone or concrete coping. However, nutrient-rich water splashing over light stone creates the perfect breeding ground for string algae. Fix: Seal all porous coping stone with a penetrating siloxane water repellent and ensure the water level is kept exactly 1 inch below the coping edge to prevent capillary action.
Dead Zones and Poor Skimming
Rectangular ponds often suffer from dead zones in the corners where debris accumulates. Fix: Do not rely on a single bottom drain. For a 10x15 footprint, install two 3-inch bottom drains positioned equidistant from the corners. Angle the return jets slightly to create a slow, counter-clockwise rotational flow that pushes floating debris toward the surface skimmer. For comprehensive maintenance protocols, refer to guidelines from Penn State Extension's Water Garden resources.
Thermal Shock from Shallow Shelves
Many designers incorporate 1-foot-deep plant shelves for marginal plants. In full sun, these shallow shelves heat up rapidly, causing thermal shock to koi that wander into them. Fix: Eliminate plant shelves entirely in modern koi ponds. If marginal plants are desired, use standalone, architectural Corten steel planters positioned outside the pond's perimeter.

