
Landscaping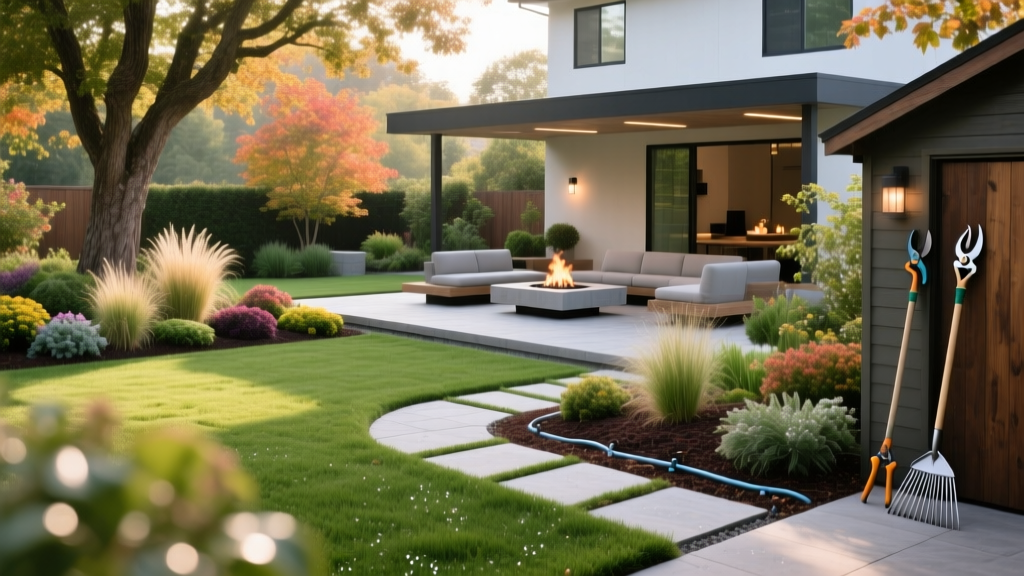
How to Design a Nice Landscape: Step-by-Step Yard Layout Guide
A truly nice landscape is never an accident. It is a calculated intersection of subsurface drainage, hardscape geometry, and botanical layering. While amateur yard makeovers often fail because homeowners plant shrubs before establishing proper grading and walkways, professional landscape architects follow a strict sequence: base mapping, hardscape installation, infrastructure integration, and finally, softscape layering. This guide provides the exact framework, material specifications, and 2026 pricing data you need to transform a flat, unstructured yard into a high-functioning outdoor living space.
Phase 1: Site Analysis and Base Mapping
Before buying a single paver or plant, you must create a base map. This is a scaled drawing of your property that dictates every subsequent decision.
The 1/4-Inch Scale Rule
Use architectural graph paper where 1/4 inch equals 1 foot. To measure your property accurately, skip the traditional tape measure and use a laser distance measurer like the Bosch GLM 50 C (approx. $120), which connects via Bluetooth to map out property lines, existing tree canopies, and foundation perimeters with millimeter accuracy.
⚠️ Critical Utility Warning: Before breaking ground for any retaining wall, patio base, or drainage trench, you must call 811 (the national 'Call Before You Dig' number) at least 72 hours in advance. Hitting a buried gas or fiber-optic line can result in fines exceeding $10,000 and severe safety hazards.
Mapping Microclimates and Drainage
Track sunlight patterns across your yard for three consecutive days. Note areas that receive full sun (6+ hours), part shade (3-6 hours), and full shade. Simultaneously, observe water pooling after a heavy rain. According to the USDA Natural Resources Conservation Service, proper yard grading requires a minimum slope of 1/4 inch per foot for the first 10 feet extending away from your home's foundation to prevent structural water damage.
Phase 2: Hardscape First (The Bones of the Yard)
The most common mistake in creating a nice landscape is treating hardscapes as an afterthought. Patios, walkways, and retaining walls define the 'outdoor rooms' of your property. As of 2026, supply chain stabilizations have normalized material costs, making high-end pavers more accessible than in previous years.
Hardscape Material Comparison Matrix
| Material Type | Avg. Cost (Installed) | Lifespan | Best Application |
|---|---|---|---|
| Poured Concrete (Broom Finish) | $8 - $14 / sq ft | 25-30 years | Modern, minimalist patios; utility pads |
| Concrete Pavers (e.g., Belgard) | $14 - $24 / sq ft | 40+ years | Traditional walkways, fire pits, driveways |
| Natural Flagstone | $22 - $38 / sq ft | 50+ years | Rustic paths, pool coping, stepping stones |
| Permeable Pavers | $18 - $28 / sq ft | 30+ years | Eco-friendly driveways, municipal runoff zones |
Pro-Tip for Paver Bases: Never lay pavers directly on dirt or sand alone. A proper base requires 6 to 8 inches of compacted crushed angular gravel (like #57 stone), topped with 1 inch of coarse concrete sand. This prevents the frost-heave and settling that plagues amateur installations.
Phase 3: Subsurface Infrastructure
A beautiful surface will quickly degrade if the hidden infrastructure fails. This phase covers drainage and irrigation.
French Drains and Dry Wells
If your soil has a high clay content and fails a percolation test (draining less than 1 inch per hour), you must install subsurface drainage. Use a 4-inch corrugated slotted pipe wrapped in landscape fabric, buried in a trench filled with washed #57 gravel. Route this pipe to an NDS Flo-Well dry well system (approx. $85 per 50-gallon unit) buried at the lowest point of your property to safely dissipate water into the subsoil.
High-Efficiency Irrigation
Ditch traditional spray heads that lose up to 40% of their water to wind and evaporation. The EPA WaterSense program strongly recommends rotating nozzles. Upgrade to Hunter MP Rotator nozzles (approx. $8 to $12 each). These apply water at a much slower rate (0.4 inches per hour), allowing heavy clay soils to absorb the moisture without runoff, ultimately reducing landscape water consumption by up to 30%.
💡 The 70/30 Hardscape to Softscape Ratio: For a highly functional, low-maintenance nice landscape in suburban environments, aim for a ratio of roughly 70% softscape (planting beds, lawn) to 30% hardscape (patios, walkways). Exceeding 40% hardscape creates a 'heat island' effect, raising the ambient temperature of your yard by up to 5°F in the summer and drastically increasing stormwater runoff.
Phase 4: Softscape Layering (Canopy to Groundcover)
With the bones and plumbing in place, you can now introduce plant life. Professional designers use a three-tier layering approach to create depth and visual interest.
Tier 1: The Canopy and Understory (Trees)
Trees anchor the landscape. For immediate impact and long-term shade, plant semi-mature specimen trees (10-15 feet tall, 3-inch caliper trunk).
- Shade Canopy: Acer rubrum (Red Maple) or Quercus palustris (Pin Oak). Expect to pay $400-$800 per tree installed.
- Ornamental Understory: Cornus florida (Dogwood) or Cercis canadensis (Redbud). These provide spring color and stay under 25 feet, preventing interference with overhead utility lines.
Tier 2: The Structural Shrubs
Use evergreen shrubs to create privacy screens and define garden rooms. Avoid the outdated practice of planting shrubs in a straight 'foundation line.' Instead, use staggered, zig-zag planting patterns in sweeping curves.
- Privacy Screens: Thuja occidentalis 'Green Giant' (Arborvitae). Plant 5 to 6 feet apart on center for a dense, fast-growing hedge.
- Mid-Level Texture: Hydrangea macrophylla 'Endless Summer' for continuous blooms, or Ilex glabra (Inkberry Holly) for a low-maintenance, deer-resistant native alternative to boxwood.
Tier 3: Groundcover and Mulch
Bare soil invites weeds and erosion. Apply a 3-inch layer of double-shredded hardwood mulch. Keep mulch exactly 3 inches away from the base of tree trunks to prevent 'volcano mulching,' which causes trunk rot and invites rodent damage. For shaded areas where turfgrass fails, plant Pachysandra terminalis or Liriope muscari as a living groundcover.
Real-World Budgeting Framework (1,500 Sq Ft Front Yard)
Understanding the financial commitment is crucial. Below is a realistic 2026 cost breakdown for transforming a 1,500 square foot front yard from basic builder-grade turf into a structured, high-curb-appeal landscape.
| Project Phase | Specific Scope | Estimated Cost Range |
|---|---|---|
| Design & Demolition | Site plan, removal of old walkway and overgrown shrubs, hauling | $1,200 - $2,500 |
| Hardscape | 200 sq ft concrete paver walkway and front porch landing | $3,500 - $5,500 |
| Infrastructure | French drain installation, 4-zone Hunter irrigation upgrade | $2,000 - $3,800 |
| Softscape Materials | 2 specimen trees, 15 structural shrubs, 50 perennials, 4 cubic yards mulch | $2,800 - $4,500 |
| Labor & Installation | Professional planting, grading, and system testing | $3,000 - $5,000 |
| Total Project | Complete front yard overhaul | $12,500 - $21,300 |
Frequently Asked Questions
How do I handle HOA restrictions when designing my landscape?
Homeowners Associations frequently dictate hardscape materials, fence heights, and specific tree species. Before purchasing materials, request your HOA's architectural guidelines. A common pitfall is installing a retaining wall over 3 feet tall or planting non-approved invasive species like Pyrus calleryana (Bradford Pear), which many HOAs and municipalities have outright banned due to structural weakness and ecological harm.
What is the best low-voltage lighting for path illumination?
Avoid cheap solar path lights that degrade in one season. Invest in a hardwired 12V LED system. Kichler 12V LED path lights (approx. $75-$110 per fixture) offer warm 2700K color temperatures that highlight softscape textures without creating harsh glare. Space them 8 to 10 feet apart along walkways, staggering them on opposite sides of the path to create a natural, guiding wash of light rather than a rigid 'runway' effect.
Can I design a nice landscape on a steep slope?
Yes, but slopes over a 3:1 grade (3 feet horizontal for every 1 foot vertical) require engineered retaining walls rather than simple mounding. For walls exceeding 4 feet in height, most local building codes require a stamped engineering plan and the use of geogrid reinforcement—a synthetic mesh layered into the backfill soil that ties the wall face to the earth behind it, preventing catastrophic blowouts during heavy saturation.

