
Landscaping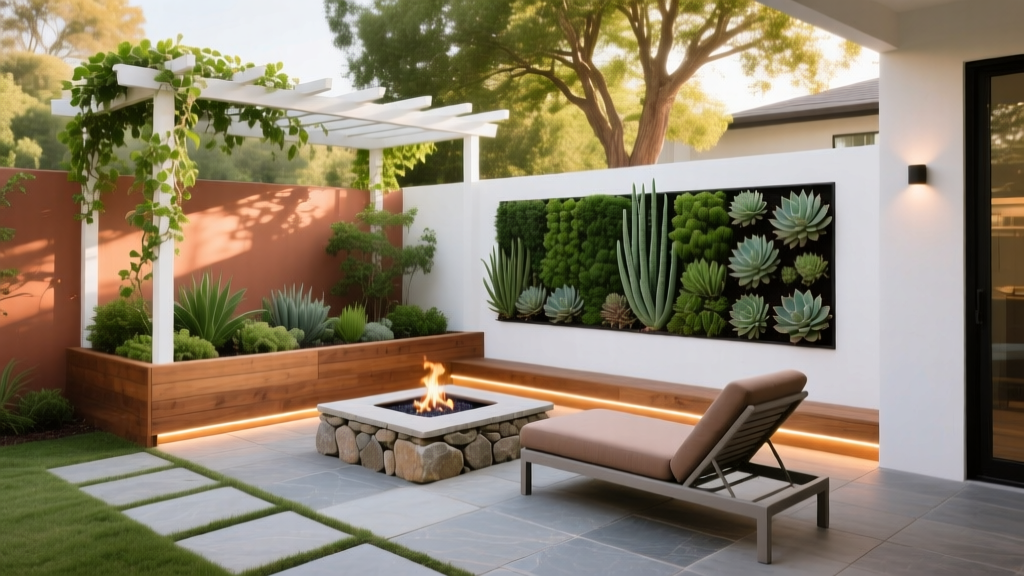
Clever Patio Ideas for Small Backyard Spaces: A Beginner's Guide
Designing a functional outdoor living area in a compact yard requires precision. When your total property footprint is under 500 square feet, a poorly planned hardscape can consume your entire lawn, leaving no room for greenery, drainage, or movement. The best patio ideas for small backyard environments prioritize spatial efficiency, multi-use functionality, and visual flow. This guide breaks down beginner-friendly layouts, material costs, and the exact base-preparation specifications required to build a durable patio that won't sink or shift after the first heavy rain.
The 3 Golden Rules of Compact Hardscaping
Rule 1: Maintain the 60/40 Ratio. Never let hardscaping exceed 60% of your total usable yard space. Keeping at least 40% as permeable surface (lawn, mulch beds, or gravel) prevents stormwater runoff issues and maintains visual balance.
Rule 2: Blur the Boundaries. In small spaces, rigid geometric squares make the yard feel boxed in. Use curved edges or diagonal paver patterns to draw the eye outward, creating an illusion of depth.
Rule 3: Plan for Permeability. According to the Environmental Protection Agency (EPA), small urban lots are highly susceptible to localized flooding. Always factor drainage into your design, utilizing permeable joint sand or grading the patio away from your foundation.
Rule 2: Blur the Boundaries. In small spaces, rigid geometric squares make the yard feel boxed in. Use curved edges or diagonal paver patterns to draw the eye outward, creating an illusion of depth.
Rule 3: Plan for Permeability. According to the Environmental Protection Agency (EPA), small urban lots are highly susceptible to localized flooding. Always factor drainage into your design, utilizing permeable joint sand or grading the patio away from your foundation.
Material Comparison Matrix for Small Yards
Selecting the right material dictates both your budget and your DIY feasibility. Below is a comparison of the top four materials suited for compact spaces, reflecting 2026 market pricing for materials only.
| Material | Cost (Per Sq Ft) | DIY Difficulty | Best Application |
|---|---|---|---|
| Concrete Pavers | $3.50 - $7.00 | Moderate | Beginners wanting high ROI and easy repairs |
| Decomposed Granite (DG) | $1.50 - $3.00 | Easy | Rustic looks, budget builds, organic shapes |
| Composite Deck Tiles | $4.00 - $8.00 | Very Easy | Renters or covering existing cracked concrete slabs |
| Stamped Concrete | $12.00 - $18.00 | Expert (Pro Only) | Seamless modern aesthetics, requires heavy machinery |
For beginners tackling their first project, concrete pavers offer the best intersection of forgiveness and durability. If a paver cracks or shifts, you simply lift it, add a handful of sand, and replace it. Stamped concrete, while beautiful, requires professional forming, pouring, and stamping before the slab cures—a high-risk endeavor for novices.
4 Beginner-Friendly Patio Layouts
1. The Corner L-Shape (Maximize Open Lawn)
Instead of centering a square patio, push an L-shaped paver arrangement into the back corner of your property lines. This layout keeps the center of the yard open for pets or children while creating two distinct zones: one for dining (under a pergola) and one for lounging (around a fire pit). Use a diagonal running bond pattern to visually stretch the corner.
2. The Floating Island (Create Flow)
A floating patio is completely detached from the house, surrounded by a 12-inch border of dark mulch or creeping thyme. This works exceptionally well in narrow side-yards or shallow backyards. By leaving a gap between the home's foundation and the patio, you protect your siding from splash-back and create a natural drainage channel.
3. The Multi-Level Micro-Terrace (For Sloped Yards)
If your small backyard drops more than 12 inches over a 10-foot run, do not attempt a single flat slab. Build two smaller terraces connected by a single step. The upper 8x8 foot tier serves as the dining area, while the lower 6x8 foot tier houses a built-in bench wall using retaining wall blocks (like Allan Block Classic).
4. The Permeable Gravel Grid
For ultra-small urban courtyards where drainage is strictly regulated, use a plastic gravel stabilization grid (such as TRUEGRID). You lay the interlocking grids over a compacted base and fill them with 3/8-inch angular gravel. It provides a rock-solid surface for patio furniture without creating the impervious runoff of solid concrete.
Budget Breakdown: The 10x10 Concrete Paver Patio
To give you a realistic financial framework, here is the exact material cost breakdown for a standard 100-square-foot (10x10) paver patio built in 2026. This assumes you are doing the labor yourself and renting a plate compactor.
- Excavation & Soil Disposal: $150 (Dump bag fees and truck rental)
- Base Material (3/4-inch DOT Type 2 Gravel): $135 (Approx. 1.5 tons delivered)
- Bedding Sand (ASTM C33 Concrete Sand): $45 (1 cubic yard)
- Concrete Pavers (Tumbled 6x6 style): $450 (100 sq ft + 10% waste)
- Polymeric Sand (Alliance Gator Maxx G2): $65 (2 bags)
- Plastic Edging & 10-inch Galvanized Spikes: $75
- Plate Compactor Rental (Weekend): $120
- Total Estimated DIY Cost: $1,040 ($10.40 per sq ft fully installed)
Hiring a professional landscaping crew for this exact footprint will typically cost between $2,500 and $3,500, factoring in labor, overhead, and profit margins.
Critical Base Preparation (Where Beginners Fail)
The Interlocking Concrete Pavement Institute (ICPI) emphasizes that 90% of paver failures are due to improper base preparation, not the pavers themselves. Follow these exact specifications to avoid sinking edges and pooling water:
⚠️ WARNING: Do Not Skip Geotextile Fabric
Before laying your gravel base, line the excavated soil with a non-woven geotextile fabric. In small yards, tree roots and aggressive weeds will easily push through 4 inches of gravel if left unprotected. The fabric separates the subgrade soil from the aggregate base, preventing the gravel from sinking into the mud over time.
Before laying your gravel base, line the excavated soil with a non-woven geotextile fabric. In small yards, tree roots and aggressive weeds will easily push through 4 inches of gravel if left unprotected. The fabric separates the subgrade soil from the aggregate base, preventing the gravel from sinking into the mud over time.
- Excavate to 7 Inches: Dig out the patio area to a depth of 7 inches below your desired final height. This allows for 4 inches of base gravel, 1 inch of bedding sand, and roughly 2 3/8 inches for the paver thickness.
- Establish the Slope: Use a string line and line level to ensure the base slopes away from your house at a minimum rate of 1/8 inch per foot. A 10-foot patio must drop 1.25 inches from the house to the outer edge.
- Compact in 2-Inch Lifts: Do not dump 4 inches of gravel and compact it once. Spread the 3/4-inch crushed gravel in two 2-inch layers (lifts), running a mechanical plate compactor over each layer until it is rigid and leaves no footprint.
- Screed the Bedding Sand: Use 1-inch PVC pipes as screed rails to drag a 2x4 board across the concrete sand, creating a perfectly flat, 1-inch resting bed for the pavers. Never tamp the bedding sand.
Small Backyard Patio FAQs
Can I build a patio directly over existing grass?
No. While some shortcut guides suggest laying pavers directly on the lawn, the grass will rot, creating a spongy, uneven subgrade that will cause the pavers to tilt and sink within months. You must excavate the topsoil and grass roots to reach stable, undisturbed subgrade soil before laying your gravel base.
What is the best joint sand for small patios?
Use a high-quality polymeric sand, such as Alliance Gator Maxx G2. Unlike regular mason sand, polymeric sand contains binders that harden when misted with water, locking the pavers together and preventing weeds and ants from invading the joints. Ensure your paver joints are between 1/8 inch and 4 inches wide for this product to cure correctly.
How do I make a small patio look bigger?
Match the color of your pavers to the interior flooring of the adjacent room. This visual continuity tricks the eye into perceiving the indoor and outdoor spaces as one continuous area. Additionally, use large-format pavers (e.g., 12x12 or 16x24 inches) rather than small cobblestones; fewer joint lines reduce visual clutter, making the footprint feel more expansive.

