
Landscaping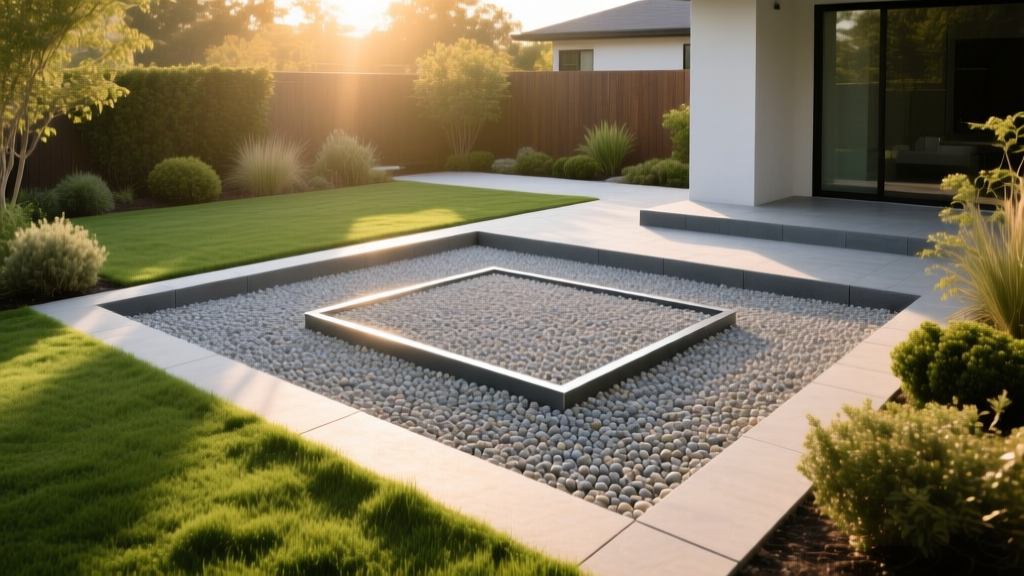
Pea Gravel Landscaping: How to Build a Stable Patio with Edging
Pea gravel is a staple of modern outdoor design, offering a permeable, cost-effective, and aesthetically pleasing surface for patios and walkways. However, most DIY pea gravel landscaping projects fail within two years due to two predictable issues: lateral migration (gravel spilling into the lawn) and weed breakthrough. The secret to a permanent installation is not the stone itself, but the rigid containment and the structural base beneath it.
This guide details the exact specifications, material grades, and installation sequence required to build a 10x10-foot pea gravel patio that remains stable, weed-free, and properly drained for decades.
Project Cost & Material Calculator (10x10 Patio)
Accurate material estimation prevents mid-project delays. The pricing below reflects average 2026 regional supplier rates for delivery and materials. Do not substitute angular base rock with round river rock; round stone will not interlock under compression.
| Material | Specification | Quantity Needed | Est. Unit Cost (2026) | Total Cost |
|---|---|---|---|---|
| Base Rock | 3/4" minus crushed angular | 1.25 tons | $55 / ton | $68.75 |
| Surface Gravel | 3/8" washed pea gravel | 1 ton | $65 / ton | $65.00 |
| Landscape Edging | 14-gauge steel (4" tall) | 40 linear ft | $5.50 / ft | $220.00 |
| Weed Barrier | Woven slit-film geotextile | 120 sq ft (roll) | $0.65 / sq ft | $78.00 |
| Edging Stakes | Steel J-stakes (12" long) | 20 stakes | $2.00 / ea | $40.00 |
| Estimated Material Total (Excluding Tool Rentals & Taxes) | $471.75 | |||
Phase 1: Excavation and Sub-Base Compaction
A common failure mode in pea gravel landscaping is building directly on topsoil. Soil expands and contracts with moisture, causing the gravel to sink and pool water. You must excavate to a total depth of 5.5 inches to accommodate a 3.5-inch compacted base and a 2-inch gravel surface.
- Mark and Excavate: Use a string line to mark the perimeter. Dig down 5.5 inches, ensuring you remove all topsoil and organic matter until you reach the denser subsoil layer.
- Establish the Slope: Grade the excavated soil to a minimum slope of 1/8 inch per foot away from any structures to ensure positive drainage.
- Lay the Base Rock: Spread the 3/4" minus crushed angular rock evenly. The "minus" designation means it includes stone dust and fine particles, which are critical for binding the aggregate together when compacted.
- Mechanical Compaction: Rent a vibratory plate compactor (approx. $85/day). Make at least three overlapping passes over the base rock. Hand tampers are insufficient for achieving the 95% Proctor density required to prevent future settling.
Phase 2: Rigid Steel Edging Installation
Plastic and aluminum edging will warp under the lateral pressure of shifting gravel and degrade under UV exposure. For a permanent patio, 14-gauge steel landscape edging is mandatory.
Installation Specifications
- Placement: Position the steel edging along the perimeter of the compacted base. The top of the edging should sit exactly 1/2 inch below your final desired gravel surface level to prevent tripping hazards while containing the stone.
- Staking: Drive 12-inch steel J-stakes through the edging loops. Place a stake at every joint, at every corner, and at maximum intervals of 24 inches along straight runs.
- Flushing: Strike the stakes with a sledgehammer until the top of the stake is completely flush with the top of the edging. Protruding stakes will catch on rakes and shoes.
Phase 3: Weed Barrier Selection and Layout
Not all landscape fabrics are created equal. According to research from the University of Vermont Plant and Soil Science department, non-woven spunbond fabrics trap moisture, restrict gas exchange in the soil, and break down rapidly under the friction of shifting gravel.
✅ Expert Selection Rule:
Always use woven slit-film geotextile fabric (often rated for driveway or heavy-duty use). The woven matrix allows water to permeate vertically while physically blocking weed rhizomes from penetrating upward. Overlap all seams by a minimum of 6 inches and secure them to the base with 6-inch landscape staples.
Phase 4: Gravel Distribution and the "2-Inch Rule"
When purchasing stone, specify 3/8-inch washed pea gravel. Larger 3/4-inch gravel is uncomfortable for bare feet and patio furniture, while smaller 1/4-inch gravel tracks easily into the house on shoes.
Dump the gravel in small piles across the fabric and spread it with a heavy-duty steel landscape rake. The most critical metric in this phase is depth. Maintain a strict gravel depth of 2 to 2.5 inches.
⚠️ Warning: The "Pea Gravel Soup" Effect
If you lay pea gravel deeper than 3 inches, the bottom layer of stones will slide against the fabric while the top layer shifts underfoot. This creates a fluid-like "soup" effect where shoes and chair legs sink deeply into the surface. A shallow 2-inch layer locks against the firm base below, providing a much more stable walking surface.
Troubleshooting Common Pea Gravel Failures
Even with proper installation, environmental factors can impact your patio. Use this decision matrix to diagnose and correct issues.
| Symptom | Root Cause | Corrective Action |
|---|---|---|
| Water pooling on surface | Base slope is less than 1/8" per foot, or fabric is clogged with silt. | Rake gravel aside, wash fabric with a pressure washer on a wide fan tip, and re-grade the base. |
| Gravel spilling into lawn | Plastic edging flexed, or steel edging stakes pulled up due to frost heave. | Replace plastic with 14-gauge steel. For frost heave, drive stakes 2" deeper and add a gravel collar behind the edging. |
| Weeds pushing through | Used cheap non-woven fabric, or wind-blown organic matter decomposed on top of the gravel. | Apply a post-emergent organic herbicide (e.g., 20% horticultural vinegar) to surface weeds. Prevent organic buildup by leaf-blowing the patio bi-weekly in autumn. |
| Surface feels spongy | Base rock was not mechanically compacted, or subsoil has high clay content. | Remove gravel and fabric, rent a plate compactor, and add a 1-inch layer of coarse sand to stabilize clay subsoils before re-compacting. |
Maintenance and Long-Term Care
Pea gravel landscaping requires minimal but specific maintenance. Avoid using metal snow shovels in winter, as they will catch the fabric and tear it. Instead, use a plastic pusher shovel and leave a 1-inch buffer of snow to protect the stone layer. Every 3 to 4 years, you may need to order a "top-dressing" of roughly 0.25 tons of pea gravel per 100 square feet to replenish stones that have worked their way into the soil profile or migrated to the edges.
By adhering to strict base compaction standards, utilizing rigid steel containment, and selecting the correct woven geotextile, your pea gravel patio will remain a highly functional, permeable, and beautiful extension of your living space. For more advanced drainage solutions and soil percolation testing methods, consult the USDA Natural Resources Conservation Service guidelines on soil management and compaction mitigation.

