
Landscaping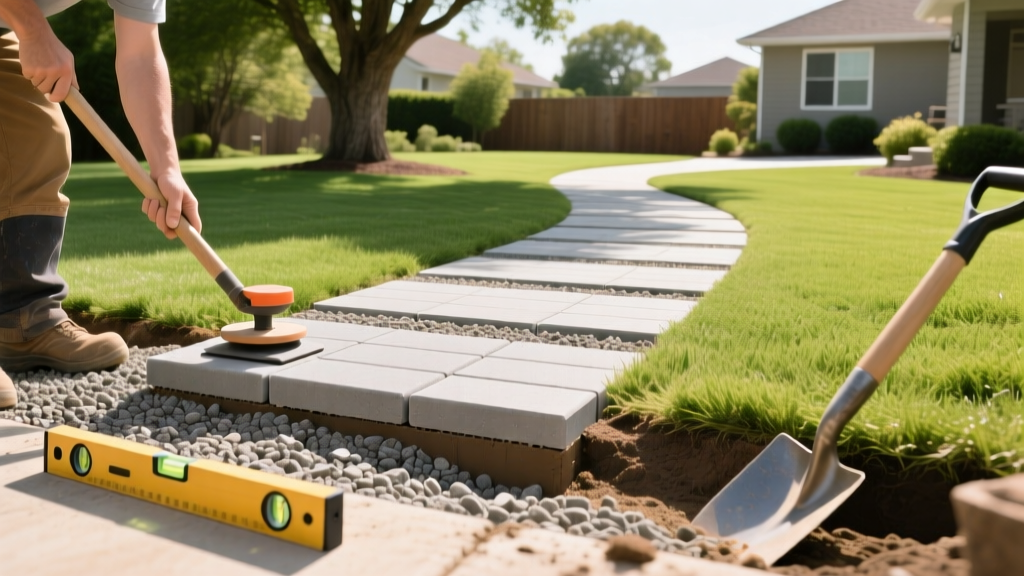
How to Build a Permeable Paver Path: Base Prep and Drainage Guide
The Hidden Cost of Improper Base Preparation
Most DIY paver path installations fail within three to five years. The primary culprit is rarely the pavers themselves, but rather the base preparation. Traditional paver installations often rely on stone dust or limestone screenings as a bedding layer, which traps water and leads to frost heave in freezing climates and hydrostatic pressure buildup in wet soils. A permeable paver path solves this by utilizing an open-graded aggregate base that allows surface water to infiltrate directly into the subgrade, eliminating pooling and dramatically reducing freeze-thaw damage.
Warning: Never use masonry sand, concrete sand, or stone dust in a permeable paver path. These materials contain fine particles that will wash into the open-graded base and clog the drainage voids, effectively turning your permeable system into an impermeable one.
Material Selection Matrix: Permeable Systems
Selecting the right materials requires understanding the specific gradations required for water infiltration. According to the Environmental Protection Agency (EPA), the void space in the aggregate base must be maintained at roughly 40% to ensure adequate water storage and drainage.
| Component | Material Specification | Depth / Thickness | Primary Function |
|---|---|---|---|
| Subgrade Soil | Native soil (compacted to 95% Proctor) | N/A | Structural foundation |
| Geotextile Fabric | Non-woven filter fabric | 1 layer | Prevents soil migration into base |
| Base Course | ASTM No. 57 crushed stone (open-graded) | 6 to 12 inches | Load bearing and water reservoir |
| Bedding Course | ASTM No. 8 crushed stone | 1.5 to 2 inches | Leveling and paver support |
| Pavers | Permeable interlocking concrete pavers | 2.375 to 3.125 inches | Wear surface with spacer tabs |
| Jointing Material | ASTM No. 8 or No. 9 crushed stone | Full joint depth | Locks pavers, allows infiltration |
Step-by-Step Excavation and Subgrade Compaction
Proper excavation dictates the lifespan of your paver path. You must dig deep enough to accommodate the paver thickness, bedding course, base course, and an additional 1 inch to account for settlement during compaction.
- Mark and Excavate: Outline the path using marking paint. Excavate to a depth of 12 to 16 inches below the desired finished grade. Ensure the subgrade slopes at a minimum 1% grade (1/8 inch per foot) away from structures, even though the system is permeable, to handle overflow during extreme rain events.
- Test the Subgrade Infiltration: Dig a 12-inch deep test hole and fill it with water. If the water drains at a rate of less than 0.5 inches per hour, your native soil has high clay content. According to Penn State Extension, low-infiltration soils require an underdrain pipe (perforated PVC) embedded in the base course to route excess water to a daylight exit or dry well.
- Compact the Subgrade: Use a vibratory plate compactor with a minimum centrifugal force of 5,000 lbf (such as the Wacker Neuson BVP 13/45). Make at least three overlapping passes over the native soil to achieve 95% Standard Proctor density.
- Lay Geotextile Fabric: Roll out a non-woven geotextile fabric over the compacted subgrade. Overlap seams by 12 inches and run the fabric up the sides of the excavated trench. This barrier is non-negotiable; it prevents fine clay particles from migrating upward and clogging the voids in your ASTM No. 57 base stone.
The Open-Graded Aggregate Base: The Secret to Drainage
The base course is the structural and hydrological engine of a permeable paver path. You must use ASTM No. 57 crushed stone. This stone is typically 1/4 inch to 1 inch in diameter and is 'washed' or 'open-graded,' meaning it contains virtually no fine dust. The angular edges of the crushed stone lock together under compaction to provide structural strength, while the uniform size creates the 40% void space needed for water storage.
Pro Tip: Do not dump all the base stone into the trench at once. Spread the ASTM No. 57 stone in 4-inch lifts (layers). Compact each 4-inch layer with your plate compactor before adding the next. Attempting to compact 10 inches of loose stone at once will result in poor interlock at the bottom of the base and future settling.
Once the base course is fully compacted, spread your bedding course. The bedding course must be ASTM No. 8 stone (1/8 inch to 3/8 inch). Do not compact the bedding course; simply screed it perfectly level using aluminum screed rails and a straight 2x4. The bedding stone will naturally lock into the pavers and the base course once the final surface compaction is applied.
Laying the Bedding Course and Setting Pavers
Permeable pavers feature built-in spacer tabs on their edges. These tabs automatically create the 1/4 inch to 3/8 inch gaps required for water to flow through the joints. When laying the pavers, follow these strict guidelines:
- Start at a Fixed Edge: Begin laying pavers from a rigid boundary, such as a concrete foundation, a driveway apron, or an installed edge restraint.
- Maintain Straight Lines: Use a masonry line to ensure your courses remain straight. Do not pull the line tight against the spacer tabs; allow the tabs to dictate the spacing.
- Cutting Pavers: When cutting pavers to fit the ends of the path, use a gas-powered cut-off saw with a diamond masonry blade. Any cut piece must be at least 1/3 the size of a full paver to prevent small slivers from shifting under foot traffic.
- Initial Compaction: Once a 10x10 foot section is laid, run the plate compactor over the surface using a urethane pad (to prevent scuffing the paver faces). This drives the bedding stone up into the bottom of the pavers, locking them in place.
Jointing and Edge Restraint: Preventing Lateral Creep
Without edge restraints, the lateral forces of foot traffic and thermal expansion will cause the pavers to spread apart, widening the joints and allowing the bedding stone to wash out. Install a rigid plastic edge restraint, such as SnapEdge or PermaEdge, along all unrestrained perimeters.
'Edge restraints must be secured with 10-inch galvanized steel or stainless steel landscape spikes driven every 12 inches. Never use standard rebar or untreated nails, as they will rust, expand, and spall the surrounding base material, compromising the restraint.' — Interlocking Concrete Pavement Institute (ICPI) Installation Guidelines.
After securing the edges, sweep ASTM No. 8 or No. 9 jointing stone across the surface. Use a push broom to force the stone deep into the joints. Run the plate compactor over the path one final time. The vibration will settle the jointing stone down to the bedding layer. Sweep more stone into the joints until they are completely filled to within 1/8 inch of the paver surface.
Cost Breakdown and Time Estimates
Building a permeable paver path requires a higher upfront investment in materials and labor compared to traditional sand-set methods, but it eliminates the need for subsurface French drains and reduces long-term maintenance. Below is the estimated cost breakdown for a 100-square-foot path in 2026.
| Item | Estimated Cost (per sq ft) | Total for 100 sq ft |
|---|---|---|
| Permeable Concrete Pavers | $4.50 - $7.00 | $450 - $700 |
| ASTM No. 57 & No. 8 Aggregate | $1.50 - $2.50 | $150 - $250 |
| Geotextile & Edge Restraints | $1.00 - $1.50 | $100 - $150 |
| Equipment Rental (Compactor/Saw) | N/A | $250 - $350 (flat rate) |
| Total DIY Material & Rental Cost | $950 - $1,450 |
For a DIY installer, expect to spend 16 to 24 hours completing a 100-square-foot path, heavily weighted toward the excavation and compaction phases. Professional installation typically adds $15 to $25 per square foot in labor.
Common Failure Modes and Troubleshooting
Even with meticulous installation, specific environmental factors can challenge a permeable paver path. Understanding these edge cases allows you to intervene before catastrophic failure occurs.
Pavers Sinking at the Edges
Cause: Inadequate edge restraint spacing or failure to compact the base stone near the trench walls. The plate compactor often cannot reach the outer 4 inches of the trench.
Fix: Hand-tamp the perimeter base stone using a manual hand tamper before laying the bedding course. Ensure edge restraint spikes are driven at a 45-degree angle toward the pavers, not straight down, to pull the restraint tight against the paving field.
Surface Ponding After Heavy Rain
Cause: The jointing stone has become clogged with organic debris, pollen, or wind-blown silt, reducing the infiltration rate.
Fix: Perform annual maintenance by sweeping the path with a stiff-bristled push broom. If clogging is severe, use a wet-dry vacuum or a specialized paver cleaning machine to extract the top 1 inch of jointing stone and replace it with fresh, clean ASTM No. 9 aggregate.
Weed Intrusion in the Joints
Cause: Using polymeric sand instead of open-graded crushed stone in the joints, or allowing organic matter to accumulate on the surface, providing a seedbed.
Fix: Never use polymeric sand in a permeable system; it will destroy the permeability. If weeds appear, apply a targeted, environmentally safe herbicide or pour boiling water directly onto the weed crown. Do not pull weeds by hand, as this will dislodge the jointing stone and compromise the interlock.

