
Landscaping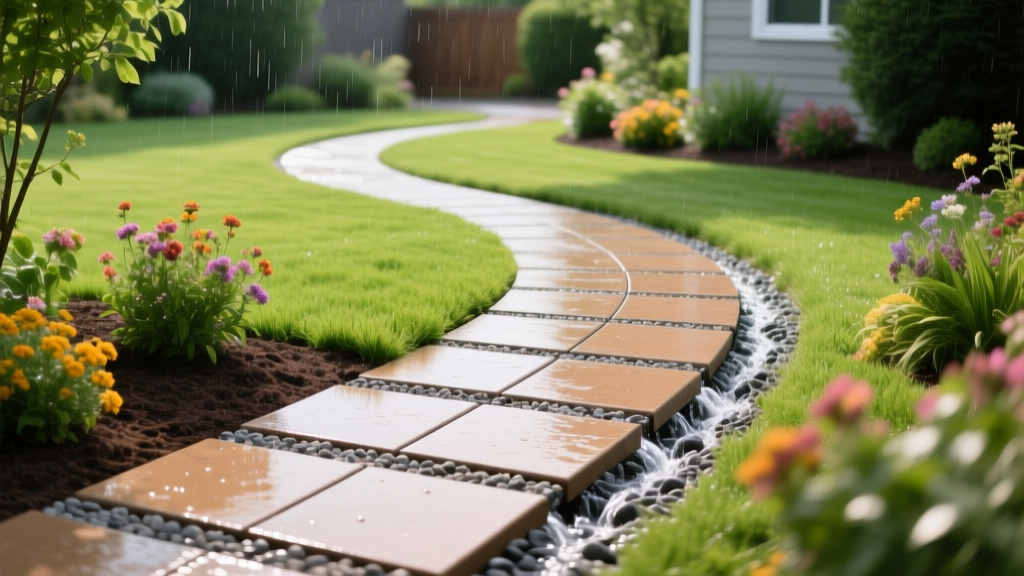
How to Install a Permeable Paver Pathway for Yard Drainage
Why Choose Permeable Pavers Over Traditional Concrete?
Standing water on a walkway ruins the user experience and accelerates landscape erosion. A permeable paver pathway solves this by allowing surface runoff to infiltrate directly into the underlying soil, eliminating puddles and reducing the burden on municipal storm drains. According to the EPA Green Infrastructure guidelines, permeable pavements can reduce runoff volume by up to 80% compared to impermeable surfaces like poured concrete or asphalt.
| Feature | Permeable Paver Pathway | Poured Concrete Walkway |
|---|---|---|
| Surface Drainage | Infiltrates directly through joints | Requires sloping and channel drains |
| Frost Heave Risk | Low (flexible joints absorb movement) | High (rigid slab cracks under freeze-thaw) |
| Heat Island Effect | Moderate (lighter colors available) | High (absorbs and radiates heat) |
| Repairability | High (remove and replace individual units) | Low (requires patching or full slab replacement) |
Material Sizing and 2026 Cost Breakdown
The structural integrity and permeability of your pathway rely entirely on using open-graded, washed aggregates. Never use materials containing "fines" (stone dust or masonry sand), as these will clog the void spaces and render the system impermeable. The National Concrete Masonry Association (NCMA) strictly mandates specific ASTM stone gradations for each layer.
2026 Material & Installation Cost Estimates (Per Square Foot):
- Permeable Pavers (Units only): $4.50 – $8.00
- Aggregates (Sub-base, bedding, jointing): $2.00 – $3.50
- Geotextile Fabric & Edge Restraints: $1.50 – $2.50
- Professional Labor (Excavation to Compaction): $12.00 – $18.00
- Total Installed Cost: $20.00 – $32.00 per sq. ft.
Step-by-Step Installation Guide
Step 1: Excavation and Soil Percolation Testing
Before digging the full trench, perform a percolation test to determine your native soil's infiltration rate. Dig a test hole 12 inches deep and 6 inches wide. Fill it with water and let it drain completely to saturate the soil. Refill it to 12 inches and measure the water level drop after one hour.
- Drop > 0.5 inches/hour: Native soil is suitable. Excavate the pathway trench to a depth of 12 to 15 inches (depending on local frost line requirements).
- Drop < 0.5 inches/hour: Heavy clay soil. You must excavate deeper (up to 18 inches) and install a perforated PVC underdrain pipe at the sub-grade level, sloped at 1/8 inch per foot toward a dry well or storm sewer.
Step 2: Geotextile Fabric and Sub-Base Installation
Line the excavated trench with a non-woven geotextile fabric (minimum ASTM D4491 water flow rate of 100 gpm/sq ft). This prevents native soil fines from migrating up into your aggregate layers. Overlap seams by at least 18 inches.
Next, add your sub-base layer. Use ASTM No. 57 stone (1 to 1.5-inch washed, open-graded crushed rock). Spread the stone in 4-inch lifts (layers), compacting each lift with a vibratory plate compactor until you reach a total sub-base depth of 6 to 8 inches. The sub-base acts as a reservoir for stormwater while providing structural load-bearing capacity.
Step 3: Bedding and Paver Placement
For the bedding layer, use ASTM No. 8 stone (3/8-inch washed aggregate). Spread it to a uniform depth of 1.5 to 2 inches. Screed the bedding stone using a straight 2x4 resting on 1-inch PVC pipe guides to ensure a perfectly level surface. Do not walk on the screeded bedding layer.
Warning: Never use a rubber mallet to tap permeable pavers into place. The bedding stone is rigid and will not compress like sand. If a paver sits too high, remove it, scrape away excess bedding stone, and reset it.
Lay the pavers in your chosen pattern, maintaining consistent joint widths (typically 1/4 to 3/8 inch for standard permeable units). Use snap lines every 4 feet to prevent joint drift.
Step 4: Jointing and Compaction
Sweep ASTM No. 8 or No. 9 stone (1/8 to 3/8-inch) into the joints. The jointing stone locks the pavers together while maintaining the void spaces required for water infiltration. Sweep in multiple directions until the joints are completely filled to the top of the paver chamfer.
Run a low-amplitude plate compactor over the entire pathway. Critical: You must attach a urethane pad to the bottom of the compactor. Standard steel plates will spall, chip, and crack the edges of the concrete pavers. Make two passes in perpendicular directions to fully vibrate the jointing stone down into the joints. Top off any settled joints with additional No. 8 stone and sweep clean.
Common Installation Failures and How to Avoid Them
| Failure Mode | Cause | Prevention Strategy |
|---|---|---|
| Surface Ponding | Fines in the aggregate or native soil migration | Strictly use washed, open-graded ASTM stone; never substitute with cheaper crusher run or masonry sand. |
| Edge Creep / Spreading | Inadequate edge restraint | Install heavy-duty plastic or aluminum edge restraints spiked every 6 inches into the sub-base, not just the native soil. |
| Paver Spalling | Steel plate compactor used without a pad | Always use a urethane or thick rubber pad on the plate compactor. |
| Sub-base Settlement | Skipping the percolation test on clay soils | Install an underdrain pipe and increase sub-base depth to 12+ inches for soils with <0.5 in/hr infiltration. |
Maintenance and Long-Term Care
Permeable paver pathways are not maintenance-free. Over time, windblown soil, leaf debris, and organic matter will accumulate in the joints, reducing the infiltration rate. To maintain optimal drainage:
- Bi-Annual Vacuuming: Use a commercial walk-behind vacuum sweeper (not a standard leaf blower, which just moves debris around) in the spring and fall to extract sediment from the joints.
- Joint Replenishment: If vacuuming removes too much jointing stone, broadcast fresh ASTM No. 8 stone over the surface and sweep it into the voids. Maintain joint fill to within 1/4 inch of the paver surface.
- Weed Control: If weeds emerge, pull them manually or apply a post-emergent herbicide. Avoid pre-emergent granular herbicides, as the granules can clog the stone voids.
By adhering to strict aggregate sizing and proper sub-base compaction, your permeable paver pathway will provide a durable, puddle-free walking surface that actively manages stormwater runoff for decades.

