
Landscaping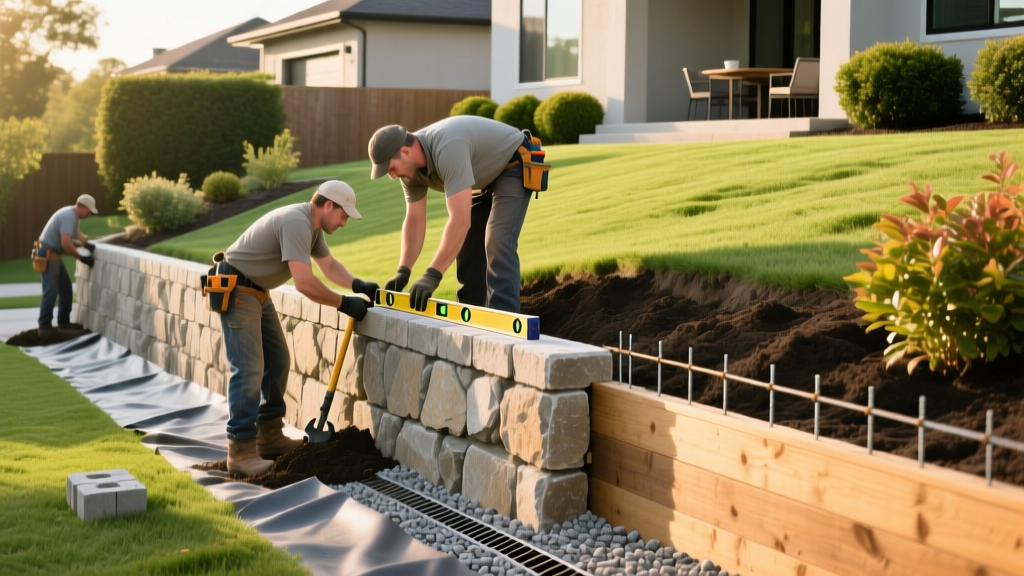
How to Plan Retention Wall Landscaping: Step-by-Step Build Guide
When executing retention wall landscaping, the aesthetic finish is only as good as the structural engineering beneath it. A beautifully terraced yard will quickly collapse into a muddy sinkhole if the builder ignores lateral earth pressure and hydrostatic forces. According to the National Concrete Masonry Association (NCMA), over 80% of retaining wall failures are not caused by the weight of the soil, but by the weight of trapped water pushing against the back of the blocks.
This guide bypasses surface-level design tips to provide the exact excavation measurements, drainage material specifications, and geogrid installation protocols required to build a segmental retention wall that survives decades of freeze-thaw cycles and heavy saturation.
The Physics of Retention Wall Landscaping
Before digging a trench, you must understand the forces at play. Soil exerts lateral pressure on a wall, but water multiplies that force exponentially. One cubic foot of water weighs 62.4 pounds. If a 4-foot-tall wall holds back a 10-foot deep wedge of saturated clay during a spring thaw, the hydrostatic pressure can easily exceed 2,000 pounds of lateral force per linear foot of wall.
⚠️ Critical Failure Point: Never build a retention wall against native clay without a dedicated drainage aggregate column. Clay acts as a sponge and an impermeable barrier, trapping water directly behind the wall face and causing catastrophic blowouts.
Material Selection Matrix
Choosing the right block system dictates your excavation depth and reinforcement needs. Below is a comparison of the three most common materials used in modern retention wall landscaping.
| Material Type | Max Unreinforced Height | Avg. Material Cost (per sq. ft.) | Best Application |
|---|---|---|---|
| Segmental Concrete (SRW) (e.g., Allan Block, Versa-Lok) |
4 feet (up to 30+ ft with geogrid) | $12 - $22 | Curved walls, tiered terraces, high-load driveways |
| Natural Stone (Mortarless) (e.g., Fieldstone, Limestone) |
3 feet | $25 - $45 | Rustic aesthetics, low-impact garden borders |
| Treated Timber (e.g., 6x6 Pressure Treated) |
4 feet | $8 - $14 | Temporary erosion control, budget-friendly rural builds |
Step 1: Excavation and Base Trenching
The base trench is the foundation of your entire project. A poorly compacted base will lead to differential settling, causing the wall to bulge or crack within two years.
- Calculate Trench Depth: Use the industry standard rule of thumb: bury 1 inch of the first block for every 8 inches of total wall height, plus 6 inches for the compacted gravel base. For a 4-foot (48-inch) wall, you need 6 inches of burial + 6 inches of gravel = 12 inches total trench depth below grade.
- Determine Trench Width: The trench must be wide enough to accommodate the block depth plus 6 inches of working space. If your SRW block is 12 inches deep, dig an 18-inch wide trench.
- Select the Right Aggregate: Fill the trench with 3/4-inch to 1-inch angular crushed stone (ASTM D448 standard). Never use round river rock or pea gravel, as the rounded edges roll under pressure and fail to lock together.
- Compact in Lifts: Use a vibrating plate compactor (minimum 5,000 lbs of centrifugal force). Compact the gravel in 3-inch lifts (layers), running the plate over each layer twice until the stone locks into a rigid, concrete-like mass.
Step 2: Drainage and Backfill Engineering
Proper retention wall landscaping requires a dedicated drainage zone immediately behind the wall face to relieve hydrostatic pressure.
The Drainage Column Protocol
- The Aggregate: Use washed 57 stone (angular gravel roughly 3/4" in size). The angularity creates void spaces that allow water to flow freely downward.
- The Pipe: Lay a 4-inch perforated PVC pipe (SDR 35 or Schedule 40) at the base of the drainage column, directly behind the first course of blocks. Ensure the perforations face downward at the 4 o'clock and 8 o'clock positions. This prevents sediment from washing into the top holes and clogging the pipe.
- The Separator: Line the excavation cavity with a non-woven geotextile fabric (minimum 4 oz per square yard, such as Mirafi 140N). This fabric acts as a filter, allowing water to pass through while preventing fine native soil particles from migrating into the 57 stone and clogging the drainage voids.
💡 Pro Tip: Daylight the drain pipe every 30 to 50 feet by routing it through the wall face or around the wall's terminus. If the pipe has no exit point, it simply becomes an underground cistern that will eventually overflow and saturate the wall base.
Step 3: Geogrid Reinforcement for Surcharge Loads
If your retention wall landscaping project involves a wall taller than 4 feet, or if there is a "surcharge load" within 10 feet of the wall top (such as a driveway, pool, or patio), you must use geogrid reinforcement. Geogrid is a synthetic mesh that ties the wall blocks to the compacted soil mass behind it, creating a single, cohesive gravity structure.
According to engineering guidelines published by Allan Block Corporation, biaxial geogrid (like Tensar BX1200) is typically used for walls up to 6 feet, while uniaxial geogrid is required for taller, heavily loaded commercial walls. Lay the geogrid layers directly on the block seams, extending them back into the compacted soil to a distance equal to 60% of the wall's total height.
Step 4: Capstones and Landscape Integration
The final phase of retention wall landscaping bridges structural engineering with aesthetic design.
Securing the Capstone
Do not rely on gravity to hold capstones in place. Freeze-thaw cycles will heave them off the top course. Clean the top of the wall blocks with a wire brush and apply a continuous bead of SRW-approved polyurethane construction adhesive (such as SureBond SB-10) before setting the capstones.
Planting Tiers and Root Zones
When integrating plants into the terraced soil above the wall, avoid planting deep-rooted trees or large shrubs within 4 feet of the wall edge. Expanding root systems can exert lateral pressure that mimics a surcharge load. Instead, utilize shallow-rooted groundcovers, ornamental grasses, or creeping perennials that stabilize the topsoil without threatening the geogrid layers below.
Project Cost Breakdown and Permitting
Budgeting accurately requires separating material costs from heavy equipment and labor. Below is an estimated cost breakdown for a standard 20-foot long, 3-foot high segmental concrete wall (60 square feet of face) in the current market.
| Expense Category | Estimated Cost Range | Notes |
|---|---|---|
| SRW Blocks & Capstones | $720 - $1,320 | Based on $12-$22 per sq. ft. |
| Base Gravel & 57 Stone | $250 - $400 | Approx. 3-4 tons delivered |
| Geotextile & PVC Pipe | $150 - $250 | Includes fabric, pipe, and fittings |
| Equipment Rental | $150 - $300 | Plate compactor and mini-excavator (1 day) |
| Total DIY Material/Rental | $1,270 - $2,270 | Excludes soil removal and backfill dirt |
Navigating Local Permits
Before breaking ground, consult your local municipal building department. Most jurisdictions require a stamped engineering permit for any retention wall exceeding 4 feet in height (measured from the bottom of the base trench to the top of the capstone). Furthermore, the Federal Highway Administration (FHWA) notes that walls supporting critical infrastructure or public right-of-ways require rigorous geotechnical soil testing, a standard that many local HOAs and city councils have adopted for residential properties bordering public roads.
By prioritizing subterranean drainage and precise base compaction over superficial block patterns, your retention wall landscaping will remain structurally sound and visually striking for decades.

