
Landscaping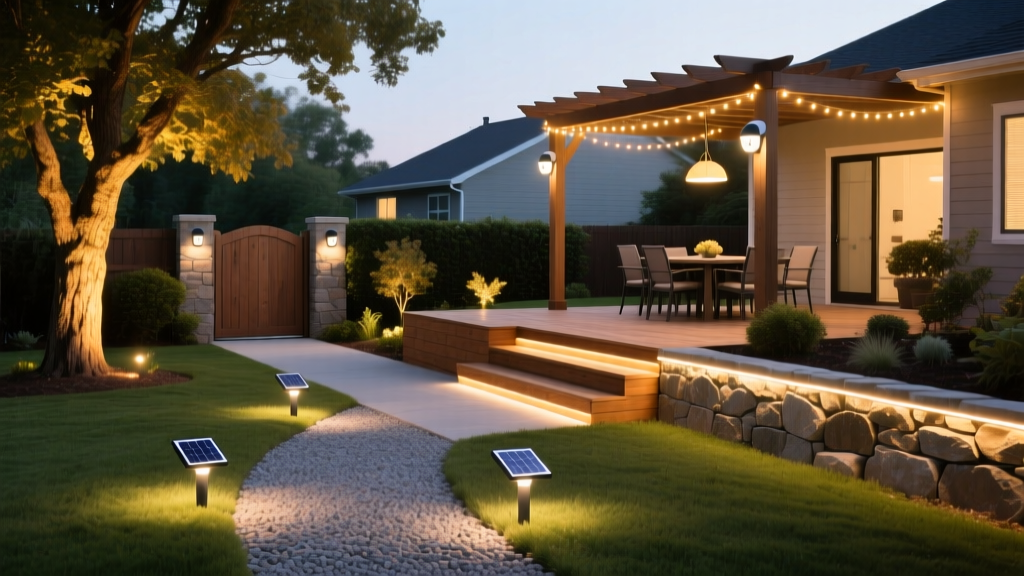
7 Practical Landscaping Lights Ideas and DIY Installation Steps
Transforming a dark yard into a navigable, secure, and visually striking space requires more than just sticking a few solar stakes in the mulch. Professional-grade low-voltage (12V) LED systems offer longevity, energy efficiency, and precise beam control. When brainstorming landscaping lights ideas, the goal is to create layers of light that guide the eye, highlight architectural features, and eliminate harsh glare.
This guide breaks down seven high-impact lighting techniques and provides a comprehensive, code-compliant DIY installation framework for your outdoor space.
The Core Framework: Layering Your Landscape Lighting
Before purchasing fixtures, map your yard using the three foundational layers of outdoor illumination. A well-designed system balances all three:
The Lighting Layer Matrix
- Ambient (General): Soft, widespread illumination for overall visibility and safety (e.g., moonlighting, wash lights).
- Task: Focused light for specific functional areas (e.g., path lights, step lights, grill area lighting).
- Accent: High-contrast, directional light used to create drama and highlight specific features (e.g., tree uplighting, silhouetting).
7 Practical Landscaping Lights Ideas for Every Zone
1. Path Lighting: The Spaced Stagger
Avoid the "runway effect" by placing path lights on alternating sides of a walkway. Space fixtures 8 to 10 feet apart. Use 3-watt LED fixtures with a 35-degree beam spread and a frosted lens to cast a soft, 4-foot pool of light downward without blinding pedestrians. Look for solid brass or copper housings to prevent the corrosion common in stamped aluminum fixtures.
2. Uplighting Specimen Trees
To highlight the canopy and trunk texture of mature trees, place a 5-watt to 7-watt directional well light or spot light 12 to 18 inches from the base of the trunk. Aim the beam straight up or slightly angled toward the center of the canopy. For trees with dense foliage (like oaks), use a narrower 15-degree beam spread to punch light through the leaves.
3. Hardscape Hiding (Under-Cap Illumination)
Retaining walls and seating walls present a trip hazard in the dark. Mount low-profile, brass hardscape fixtures directly beneath the stone or concrete capstones. These fixtures emit a horizontal wash of light downward across the wall face, providing safe navigation while accentuating the texture of the masonry.
4. Moonlighting from High Branches
For the most natural ambient light, mount specialized downlights 20 to 30 feet high in large trees. Aim them down through the branches to cast dappled, moon-like shadows on the lawn below. Ensure you use fixtures with a U1 (Uplight) rating of zero to prevent light from bleeding into the sky, adhering to DarkSky International guidelines for minimizing light pollution.
5. Silhouetting Fences and Sculptures
Place a wide-beam (60-degree) wash light on the ground behind an ornamental grass cluster, statue, or small tree, aiming it at a fence or wall directly behind the object. This turns the subject into a stark, dramatic black silhouette against the illuminated backdrop.
6. Water Feature Reflection
Ponds and waterfalls require specialized submersible fixtures with an IP68 waterproof rating. Place a warm (2700K) underwater light near the base of a waterfall to catch the aeration and movement of the water, creating a dynamic, shimmering effect that reflects onto surrounding foliage.
7. Smart Zone Highlighting
Modern systems utilize Wi-Fi or Bluetooth-enabled transformers (such as the Kichler Design Pro LED or FX Luminaire Luxor series). These allow you to group fixtures into independent zones via a smartphone app, enabling you to dim pathway lights to 30% after midnight while keeping security uplights at 100%.
Technical Specifications: Choosing the Right LED Color Temperature
Color temperature, measured in Kelvin (K), drastically alters the mood of your landscape. According to ENERGY STAR guidelines, selecting the right temperature is crucial for both aesthetics and minimizing ecological disruption.
| Kelvin (K) | Visual Effect | Best Application |
|---|---|---|
| 2200K | Amber / Candlelight | Water features, fire pit seating areas, bug reduction |
| 2700K | Warm White | Pathways, patios, general ambient (Industry Standard) |
| 3000K | Soft White / Neutral | Uplighting trees, highlighting stone or brick textures |
| 4000K+ | Cool White / Daylight | Moonlighting (simulates natural moonlight), security zones |
Step-by-Step DIY Low-Voltage Installation Guide
Installing a 12V system is highly accessible for DIYers, but cutting corners on wiring leads to voltage drop and premature fixture failure. Follow these steps for a professional-grade result.
- Map and Calculate the Load: Tally the total wattage of all planned fixtures. A 300-watt transformer should never be loaded past 80% capacity (240 watts max) to account for startup surges and line loss.
- Dig the Trenches: Dig a main trench from the transformer to your first fixture hub, and branch trenches to individual fixtures. Trenches only need to be 6 to 8 inches deep, as the low voltage poses no severe shock hazard, though burial protects the wire from aeration and edging tools.
- Lay the Main Line: Use 10/2 or 12/2 AWG direct-bury copper wire. Always choose 10-gauge for main runs exceeding 100 feet to mitigate voltage drop.
- Mount the Transformer: Mount the transformer on a wall or post at least 12 inches above grade. Strip the main wire ends, attach them to the transformer's terminal block, and tighten securely.
- Splice the Fixtures: Connect fixture leads to the main line using silicone-filled, direct-bury wire nuts (such as the 3M DBY/Y-31 series). Standard indoor wire nuts will trap moisture and cause copper oxidation, leading to intermittent flickering within months.
- Test and Adjust: Power on the system at night. Use a digital multimeter at the furthest fixture to ensure the voltage reads between 10.8V and 12V. Adjust the transformer's multi-tap output if necessary.
Pro Tips for Avoiding Common Voltage Drop Mistakes
⚠️ The 10% Voltage Drop Rule
LED fixtures require a minimum of 10.8 volts to operate at full brightness without flickering. If your transformer outputs 12V, you can only afford a 1.2V drop across the entire wire run. Solution: Avoid daisy-chaining fixtures in a single long line. Instead, use a "T-method" or "Hub-and-Spoke" wiring layout, running a thick 10-gauge main line to a central hub, then splitting off with shorter 12-gauge wires to individual fixtures. This ensures the first light and the last light receive nearly identical voltage.
Frequently Asked Questions
Are solar landscaping lights a viable alternative to low-voltage?
Solar lights are suitable for temporary or highly shaded accent spots, but they lack the lumen output, beam control, and winter reliability of hardwired 12V LED systems. Solar panels degrade, and battery replacements are frequent. For permanent curb appeal and security, low-voltage hardwired systems are the professional standard.
How do I ensure my outdoor electrical setup is safe?
While the 12V landscape side is safe for DIY, the 120V outlet powering your transformer must be GFCI-protected and equipped with a weather-proof "in-use" bubble cover. The Electrical Safety Foundation International (ESFI) strongly recommends having a licensed electrician install or verify any outdoor 120V receptacles before plugging in your transformer.
What maintenance do brass LED fixtures require?
Solid brass and copper fixtures develop a natural patina over time, which actually protects the metal. However, you should wipe the glass lenses with a microfiber cloth twice a year to remove hard water spots and pollen, which can reduce light output by up to 20% and cause the LED chip to overheat.

