
Landscaping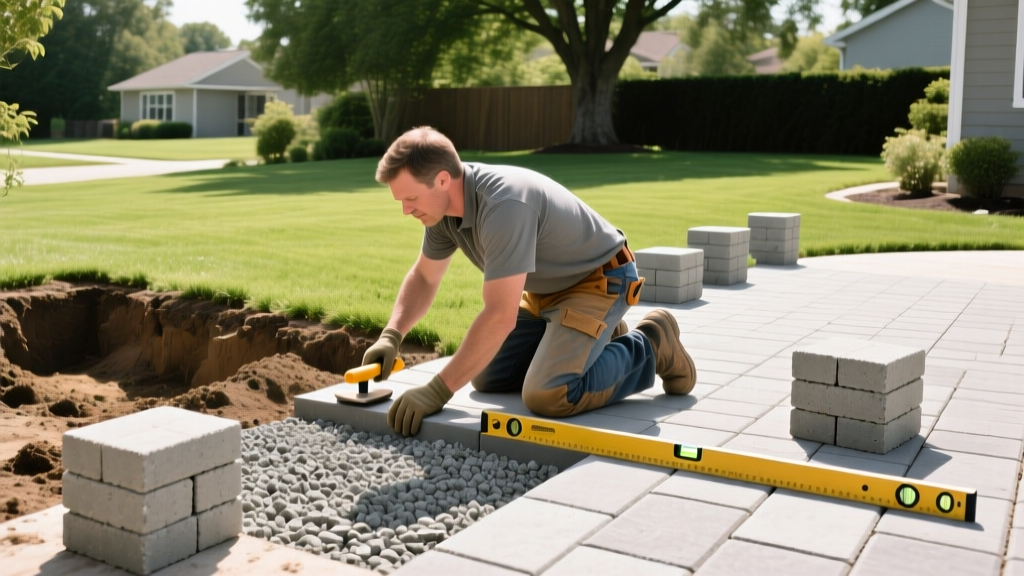
How to Remodel a Walkway: DIY Paver Base and Layout Guide
Assessing Your Current Walkway: Overlay vs. Full Tear-Out
Before breaking ground, you must determine whether your existing walkway can support an overlay or requires a complete tear-out. Remodeling a walkway over an existing concrete slab is only viable if the slab is structurally sound, free of frost heave, and slopes away from the foundation at a minimum 2% grade. If the existing concrete exhibits cracking wider than 1/4 inch, differential settling, or spalling, an overlay will simply mirror the failures below within two freeze-thaw cycles.
| Condition Factor | Full Tear-Out Required | Overlay Viable |
|---|---|---|
| Concrete Cracking | Multiple cracks > 1/4 inch, map cracking | Isolated hairline cracks only |
| Elevation/Grade | Adding 3 inches blocks doors or violates ADA ramps | Sufficient clearance at thresholds |
| Base Stability | Visible settling, frost heave, or mud boils | Solid, unmoving substrate |
| Drainage | Puddling against foundation or negative slope | Positive 2% slope away from structures |
Material Selection and 2026 Pricing Realities
The material you choose dictates both the aesthetic and the structural requirements of the base. According to the Interlocking Concrete Pavement Institute (ICPI), concrete pavers remain the industry standard for DIY walkway remodels due to their interlocking friction and ease of replacement.
- Concrete Pavers (e.g., Belgard Dublin Cobble, Techo-Bloc Mega-Arbel): $4.50 to $9.00 per square foot. Highly durable, available in permeable options, and withstand heavy de-icing salts.
- Natural Flagstone/Bluestone: $12.00 to $22.00 per square foot. Requires a thicker base and wider joints. Best set in a mortar bed over a concrete slab rather than a flexible sand base.
- Decomposed Granite (DG) with Stabilizer: $3.00 to $6.00 per square foot. Excellent for rustic or woodland paths, but requires annual re-grading and edge containment.
Pro-Tip on Permeability: If your municipality charges stormwater runoff fees, consider permeable pavers (like Aqua-Roc). They require a specialized open-graded base (clear washed stone without fines) that allows water to infiltrate the subgrade, potentially qualifying you for local landscaping rebates.
Step-by-Step Excavation and Base Preparation
The longevity of your remodeled walkway relies entirely on the sub-base. A common failure mode in DIY projects is under-excavating. For a standard pedestrian walkway in a climate with freezing winters, you must excavate to a depth of 7 to 9 inches below the desired final grade.
1. Excavation and Geotextile Installation
Remove the old surface and dig down 8 inches. Slope the subgrade at a 1/4-inch per foot drop away from the house. Once excavated, lay down a non-woven geotextile fabric (such as Mirafi 500X). This fabric separates the native clay soil from your aggregate base, preventing the gravel from sinking into the mud during wet seasons—a critical step often skipped by amateurs.
2. Aggregate Base Layer
Fill the trench with 3/4-inch minus crushed angular gravel (often called crusher run or road base). The 'minus' designation means it includes stone dust and smaller particles that lock together when compacted. Do not use round river rock, which will never lock into a rigid matrix. Spread the gravel in 2-inch lifts (layers), compacting each layer with a mechanical plate compactor (minimum 5,000 lbs of centrifugal force) until you achieve a 4 to 6-inch thick, rock-solid base.
3. Screeding the Bedding Sand
Use coarse, sharp concrete sand that meets ASTM C33 specifications. Avoid stone dust or limestone screenings; these materials retain moisture and turn to mush during freeze-thaw cycles, leading to severe frost heave. Lay two 1-inch diameter PVC pipes parallel to each other on the compacted base. Dump the sand between them and use a straight 2x4 to screed the sand perfectly level. Remove the pipes and fill the voids, ensuring a uniform 1-inch bedding layer.
Edge Restraint and Polymeric Sand Jointing
Pavers rely on confinement to maintain their interlock. Without edge restraint, the perimeter pavers will migrate outward, causing the entire walkway to unzip and sink.
Abandon traditional plastic L-shaped edging secured with 6-inch nails; it routinely snaps under frost pressure. Instead, use a poured concrete curb (a 6-inch wide, 6-inch deep trench filled with concrete along the perimeter) or a commercial aluminum restraint system like PermaEdge, which bends to curves and is secured with 10-inch galvanized steel spikes driven at a 45-degree angle.
Applying Polymeric Sand
Once the pavers are laid and compacted, sweep a high-quality polymeric sand (such as Alliance Gator Maxx G2) into the joints. The polymers bind the sand particles together when wet, creating a flexible, weed-resistant joint that resists ant excavation.
Warning: Avoiding Polymeric Haze
The number one mistake during jointing is over-watering. You must activate the polymers with a gentle mist, not a direct jet. Use a shower nozzle on your hose and mist the surface for 15 seconds, wait 3 minutes, and mist again. Blasting the joints with high pressure will wash the polymers to the surface, leaving a permanent, cloudy white haze on your pavers that requires harsh chemical strippers to remove.
The number one mistake during jointing is over-watering. You must activate the polymers with a gentle mist, not a direct jet. Use a shower nozzle on your hose and mist the surface for 15 seconds, wait 3 minutes, and mist again. Blasting the joints with high pressure will wash the polymers to the surface, leaving a permanent, cloudy white haze on your pavers that requires harsh chemical strippers to remove.
Common Walkway Remodeling Mistakes to Avoid
According to troubleshooting data from the National Association of Landscape Professionals (NALP), callback repairs on hardscapes almost always trace back to three specific errors:
- Ignoring the Frost Line: In northern climates, failing to excavate below the topsoil layer into the stable subsoil allows the walkway to act as a sail during frost heave. Always excavate to mineral subsoil.
- Using the Wrong Sand: Mason sand is too fine and washes out easily. Play sand is rounded and lacks locking friction. Only use coarse, angular concrete sand for the bedding layer.
- Negative Grading: A walkway that slopes toward the home's foundation will channel thousands of gallons of runoff directly into your basement or crawlspace over a single season. Always verify the 2% positive slope with a digital level before laying the first paver.
For comprehensive drainage strategies and soil management during hardscape installation, the Penn State Extension offers excellent regional guidelines on managing stormwater runoff in residential landscapes. Remodeling a walkway is a labor-intensive process, but by adhering strictly to base preparation standards and material specifications, your new path will remain level, weed-free, and structurally sound for decades.

