
Landscaping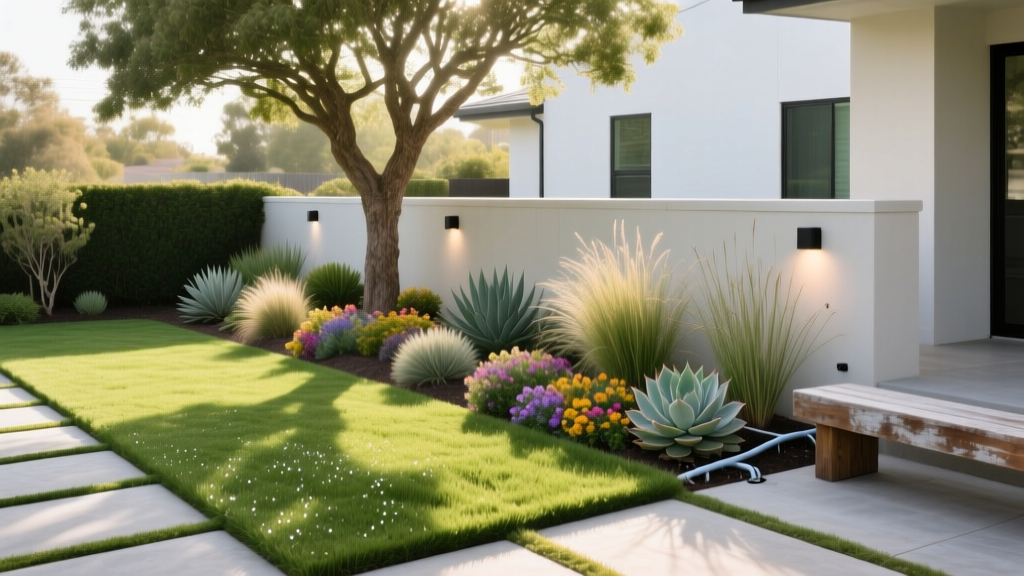
How to Copy Landscaping Photos of Small Front Yards: A Design Guide
When browsing landscaping photos of small front yards, most homeowners experience a frustrating gap between visual inspiration and physical execution. A beautifully curated image on Pinterest or Houzz rarely comes with a blueprint, a bill of materials, or a planting schedule. Translating a 2D photograph into a 3D, buildable space requires a systematic deconstruction process. This guide provides the exact frameworks, measurement hacks, and material substitutions needed to reverse-engineer professional landscape photography and build it in your own compact front yard.
Deconstructing the Photo: The 3-Zone Analysis Method
Professional landscape photographers frame shots to emphasize depth and texture. To replicate the design, you must strip away the camera angles and analyze the image in three distinct horizontal zones. Print the photo or load it into a tablet, and physically draw lines separating these layers:
- Zone 1: The Hardscape Bones (0-12 inches) - This includes walkways, edging, retaining walls, and porch steps. These elements dictate the physical flow and require the most capital. Note the joints, patterns, and border materials.
- Zone 2: The Softscape Flesh (12-60 inches) - This encompasses foundation shrubs, ornamental grasses, and perennial beds. Identify the texture contrast (e.g., fine-leaf grasses next to broadleaf evergreens) rather than fixating on specific plant species immediately.
- Zone 3: The Canopy and Focal Points (60+ inches) - Specimen trees, architectural lighting, and vertical structures like trellises. In small front yards, this zone is usually restricted to one or two anchor elements to prevent overcrowding the sightlines from the street.
The 60/30/10 Rule for Small Yards: According to landscape design principles outlined by Penn State Extension, compact spaces thrive on strict proportions. Dedicate 60% of your visual footprint to low-growing groundcovers and lawn alternatives, 30% to mid-height structural shrubs, and exactly 10% to vertical focal points. Exceeding the 10% vertical threshold in a small yard creates a claustrophobic, walled-in effect.
Scaling and Measuring: From 2D Image to 3D Reality
The most common failure when replicating landscaping photos of small front yards is misjudging scale. Photographers use wide-angle lenses that distort depth. To find the true dimensions of the elements in your reference photo, use 'anchor objects'—items with standardized, known dimensions.
Reverse-Engineering Dimensions Using Anchor Objects
Locate one of these standard items in the photo to create a scale multiplier:
- Standard Front Door: 36 inches wide, 80 inches tall.
- Standard Porch Step: 7-inch rise, 11-inch run (depth).
- USPS Mailbox Post: Typically 42 inches from the ground to the bottom of the box.
- Standard Hose Bib (Spigot): Usually mounted 12 to 16 inches above the foundation grade.
If the walkway in the photo appears to be 1.3 times the width of the front door, you know the path is roughly 47 inches wide. Use these calculated dimensions to map your own yard. Below is a reference table for standard small-yard hardscape dimensions and current 2026 material costs to help you budget your replication.
| Hardscape Element | Ideal Small-Yard Dimension | 2026 Material Cost (Per Sq Ft) | Pro Install Cost (Per Sq Ft) |
|---|---|---|---|
| Primary Walkway | 48" wide (min. for two people) | $8 - $15 (Pavers) | $18 - $28 |
| Secondary Path | 30" - 36" wide | $4 - $7 (Decomposed Granite) | $9 - $14 |
| Foundation Planting Bed | 4" - 6" depth (mulch/soil) | $1.50 - $3.00 (Hardwood Mulch) | N/A (Usually DIY) |
| Low Retaining Wall | Max 24" height without engineering | $6 - $12 (Segmental Block) | $25 - $40 |
Sourcing the Exact Materials (And Budget Substitutions)
High-end landscaping photos often feature premium materials that can blow a residential budget. The secret to successful replication is identifying the visual characteristics of the premium material and sourcing a mid-tier alternative that mimics the texture and color.
Plant Identification and the 'Mature Size' Trap
Use AI-driven apps like PictureThis or iNaturalist to identify specific shrubs and trees in your reference photos. However, you must account for the Mature Size Multiplier. Professional photos typically showcase landscapes that are 3 to 5 years old. If the photo features a dense, 4-foot-tall hedge of Buxus sempervirens (English Boxwood), the designer likely installed 15-gallon specimens at $120 each. If you buy 1-gallon specimens at $25 each to save money, it will take four years to achieve the same visual density. Always check the plant tag for mature width and space them accordingly, accepting a slightly 'sparse' look for the first 24 months.
Hardscape Substitution Matrix
Budget Warning: Natural stone prices have surged due to 2025-2026 freight cost increases. Always price out manufactured concrete alternatives before committing to natural stone quarry orders.
- Photo Shows: Bluestone Tread Steps ($45-$60/linear ft).
Substitute: Techo-Bloc Villagio or Belgard Westminister wall blocks capped with wet-cast concrete treads ($18-$24/linear ft). The color-matching is nearly identical, but the weight and cutting requirements are vastly reduced for DIYers. - Photo Shows: Corten Steel Edging ($12-$18/linear ft).
Substitute: Col-Met powder-coated steel edging in 'Rust' finish ($6-$9/linear ft). It provides the exact same industrial, rusted aesthetic without the 10-year structural degradation of raw, unsealed Corten. - Photo Shows: Mature Japanese Maples (Acer palmatum 'Bloodgood') as focal points ($600-$1,200 each).
Substitute: Coral Bark Dogwood (Cornus sericea) or a multi-stem Serviceberry (Amelanchier). These provide the same architectural branching and seasonal color shifts for $150-$250 per specimen.
Step-by-Step Execution Plan
Do not attempt to build the entire landscape in one weekend. Small front yards require precise grading to ensure water flows away from the foundation, a critical factor emphasized by EPA WaterSense guidelines for sustainable property management. Follow this phased approach:
- Phase 1: Demo and Rough Grading (Days 1-3)
Remove existing sod and hardscape. Establish a minimum 5% slope (6 inches of drop over the first 10 feet) away from your home's foundation. Rent a laser level ($45/day) to verify the grade. Do not rely on visual estimation. - Phase 2: Hardscape and Infrastructure (Days 4-10)
Excavate walkways to a depth of 7 inches (4 inches for compacted crushed stone base, 1 inch for bedding sand, 2.5 inches for pavers). Install PVC conduit sleeves under the walkways now for future low-voltage lighting wires. This prevents tearing up the path later. - Phase 3: Soil Amendment and Softscape (Days 11-14)
Test your soil pH. Most ornamental shrubs thrive between 6.0 and 7.0. Till in 2 inches of organic compost. Plant your Zone 3 anchor trees first, followed by Zone 2 shrubs, and finally Zone 1 groundcovers. - Phase 4: Mulch and Lighting (Days 15-16)
Apply exactly 3 inches of double-shredded hardwood mulch. Keep mulch 3 inches away from tree trunks and house siding to prevent rot and termite access. Install 2700K warm-white LED path lights, spacing them 8 feet apart in a staggered pattern to avoid the 'runway' effect.
Common Mistakes When Copying Professional Photos
The final hurdle in replicating landscaping photos of small front yards is ignoring the environmental context of the original image. A photo taken in a Portland, Oregon garden (USDA Zone 8b, heavy winter rain, mild summers) will fail spectacularly if copied in Austin, Texas (Zone 9a, extreme heat, alkaline clay soil).
Always cross-reference the plants in the photo with your specific USDA Hardiness Zone and local microclimate. Furthermore, professional photos are often taken during the 'peak bloom' window of a specific season. If the photo features a massive drift of purple Salvia, understand that this visual impact lasts for roughly four weeks in early summer. To maintain the 'photo-ready' look year-round in a small yard, you must interplant with structural evergreens like Agastache or dwarf Chamaecyparis that carry the visual weight during the dormant months.
By treating reference photos as data points rather than exact blueprints, you can extract the core design principles—scale, texture contrast, and spatial flow—and adapt them to the unique soil, budget, and climate realities of your own property.

