
Landscaping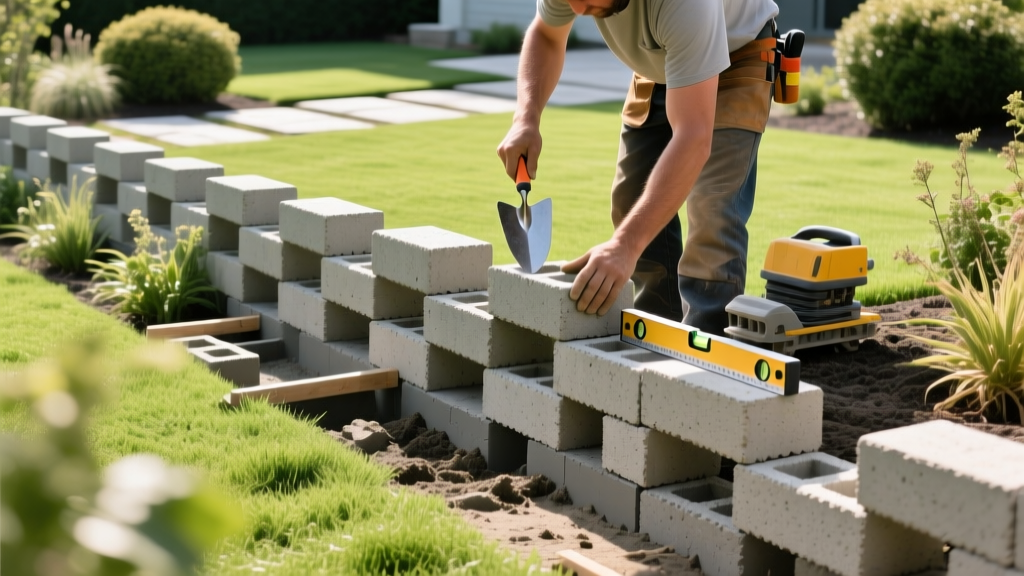
Step-by-Step Guide to Building Segmental Block Garden Retaining Walls
Retaining soil requires managing two primary forces: gravity and hydrostatic pressure. When building garden retaining walls under 4 feet, segmental concrete blocks offer the optimal balance of structural integrity, aesthetic versatility, and DIY feasibility. Unlike poured concrete or mortared stone, segmental systems rely on their mass, interlocking geometry, and engineered drainage to hold back earth without a rigid concrete footing.
Code & Engineering Warning: Most municipal building codes require a stamped engineering permit for retaining walls exceeding 3 to 4 feet in height (measured from the bottom of the base gravel to the top of the wall). Always call 811 before excavation to locate underground utilities.
Material Selection and 2026 Cost Breakdown
Selecting the right material dictates both the installation method and the long-term lifespan of the wall. Segmental blocks, such as Belgard's retaining wall systems or Allan Block, remain the industry standard for residential landscaping due to their built-in setback lips and hollow cores for drainage.
| Material | Cost (per sq. ft. installed) | Best For | Limitations |
|---|---|---|---|
| Segmental Concrete Block | $25 - $45 | Walls 2-4 ft, curves, DIY | Heavy blocks, requires strict base prep |
| Natural Flagstone (Mortared) | $50 - $85 | High-end aesthetics | Frost heave risk, needs concrete footing |
| Pressure-Treated Timber | $15 - $25 | Budget, straight lines | Rot over 10-15 years, chemical leaching |
Phase 1: Excavation and the Compacted Base
The base trench is the foundation of your wall. A poorly compacted base will lead to differential settling, causing the wall to crack or lean forward. Never excavate into undisturbed native clay and immediately lay blocks; you must create an engineered aggregate base.
Base Trench Dimensions
- Width: The depth of the block plus 6 inches (to allow room for a hand tamper or plate compactor).
- Depth: 6 inches of compacted base aggregate, plus 1 inch of buried block for every 8 inches of total wall height. For a 32-inch wall, you need 4 inches of block buried below grade, meaning your trench must be 10 inches deep below the finished soil grade.
Fill the trench with 3/4-inch crushed angular gravel (often sold as #57 stone or ASTM C33). Do not use round pea gravel. Angular stone interlocks when compacted, creating a semi-rigid slab. Rent a vibratory plate compactor with a minimum of 5,000 lbs of centrifugal force. Compact the gravel in 2-inch lifts (layers), spraying it lightly with water to achieve maximum proctor density.
Phase 2: Laying the Critical First Course
The first course dictates the alignment, level, and batter (setback angle) of the entire wall. If the first course is off by a fraction of an inch, that error will compound and magnify with every subsequent layer.
- Establish a String Line: Run a masonry string line along the back edge of the base trench to guide the rear alignment of the blocks.
- Dry Lay and Cut: Place the first row of blocks without adhesive. Use a gas-powered demo saw with a 14-inch diamond masonry blade to cut the final block to close the gap. Always cut blocks at the ends of the wall, never in the middle, to maintain structural continuity.
- Leveling: Use a 4-foot torpedo level and a deadblow mallet (filled with lead shot to prevent chipping the concrete face). Check level side-to-side and front-to-back on every single block. Do not rely on the level of the gravel base alone.
Phase 3: Stacking, Geogrid, and Drainage
According to guidelines published by the National Concrete Masonry Association (NCMA), managing water is the single most critical factor in retaining wall longevity. Saturated soil increases lateral earth pressure by up to 40%, which will easily push an unreinforced wall outward.
"Hydrostatic pressure is the enemy of retaining walls. A wall designed to hold 4 feet of dry soil may fail catastrophically if the backfill becomes saturated, as water adds immense lateral weight without adding shear strength." — Geotechnical Engineering Best Practices
The Drainage and Stacking Protocol
- Core Fill: As you stack the second and third courses, fill the hollow cores of the blocks with 3/8-inch crushed stone (chip rock). This adds mass and creates vertical drainage channels.
- Toe Drain: Lay a 4-inch perforated PVC pipe (SDR 35) at the heel of the first course, directly behind the blocks. Ensure the pipe has a 1% slope (1/8 inch drop per foot) to daylight at the ends of the wall or tie into a solid PVC drain line.
- Backfill: Place 12 inches of 3/4-inch clear crushed angular stone directly behind the blocks. Wrap the stone in a non-woven geotextile separation fabric to prevent fine native soils from migrating into the drainage aggregate and clogging the system.
- Geogrid Reinforcement: For walls over 24 inches, unroll biaxial geogrid (such as Tensar BX1200) every 2 to 3 courses. Pin it to the block lip and roll it back into the compacted native soil. The geogrid creates a coherent soil mass, effectively turning the earth itself into the retaining structure.
Troubleshooting Common Failure Modes
Even well-planned garden retaining walls can exhibit distress if edge cases are ignored during construction. Review these failure modes to ensure your build survives the freeze-thaw cycles.
1. Face Bulging (Overturning)
The Cause: Insufficient geogrid length or lack of geogrid entirely in cohesive (clay-heavy) soils. It can also result from a "surcharge load"—such as parking a vehicle or placing a heavy shed too close to the top edge of the wall.
The Fix: Maintain a clear zone at the top of the wall. The distance from the back of the wall to any heavy structural load must be equal to or greater than the total height of the wall. Ensure geogrid extends at least 60% of the wall's height into the reinforced soil zone.
2. Differential Settling
The Cause: Leaving organic topsoil or loose debris under the compacted base gravel, or failing to compact the base in 2-inch lifts.
The Fix: Excavate down to undisturbed, mineral subsoil before adding your 6-inch aggregate base. If a section of the wall settles after a heavy rain, you must remove the affected blocks, re-grade the base gravel with a laser level, and re-lay the course.
3. Weep Hole Clogging and Efflorescence
The Cause: Using round pea gravel instead of angular stone, or failing to use geotextile fabric between the drainage stone and the native clay backfill. Water forces fine clay particles through the block joints, leaving white calcium carbonate stains (efflorescence) and eventually clogging the drainage path.
The Fix: Strictly enforce the use of angular #57 stone and non-woven geotextile fabric. If efflorescence appears, clean it with a specialized masonry efflorescence cleaner (diluted phosphoric acid), never use muriatic acid, which will degrade the concrete face and accelerate spalling.

