
Landscaping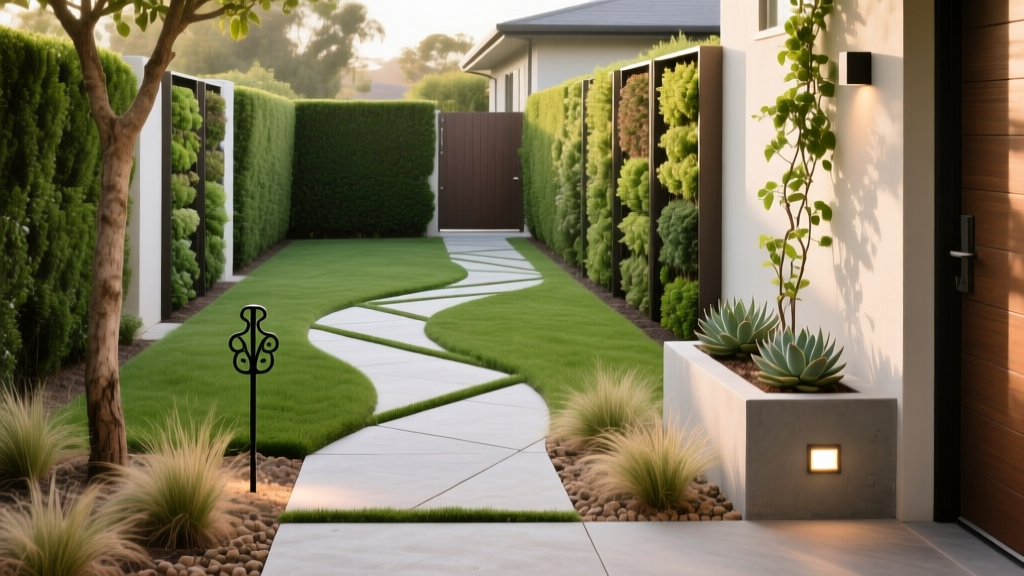
15 Small Walkway Ideas for Narrow Yards and Tight Spaces
The Unique Challenge of Narrow Side Yards
Side yards and narrow passages between houses often become neglected "dead zones" in landscape design. Typically ranging from 3 to 5 feet wide, these tight corridors present specific engineering and aesthetic challenges. You are dealing with restricted access for machinery, poor sunlight, concentrated water runoff from the roofline, and the infamous "bowling alley" visual effect. Designing functional small walkway ideas requires balancing permeability, structural integrity, and visual scaling. A 4-foot wide path in a sprawling backyard looks proportional; that same width in a 5-foot side yard leaves zero room for softscaping. The strategies below focus specifically on optimizing 2-foot to 4-foot wide corridors, utilizing materials and layouts that maximize drainage and visual depth without overwhelming the space.
Material Matrix: What Actually Works in Tight Corridors?
Before selecting a design, you must choose a base material that suits the microclimate of a narrow yard. Side yards often suffer from poor air circulation, meaning moisture-retaining materials will breed algae and moss. Below is a comparative analysis of the most viable materials for small-scale walkways in 2026.
| Material | Avg. Cost (Per Sq. Ft.) | DIY Difficulty | Drainage Profile | Best Application |
|---|---|---|---|---|
| Decomposed Granite (DG) | $2.50 - $4.00 | Moderate | High (if unstabilized) | Dry, shaded side yards |
| Concrete Stepping Stones | $3.00 - $6.00 | Easy | Moderate (via joints) | High-traffic utility paths |
| Permeable Pavers | $8.00 - $14.00 | Hard | Excellent | Wet climates, heavy runoff |
| Gravel Grid Stabilizers | $4.50 - $7.00 | Moderate | Excellent | Wheelbarrow/cart access paths |
| Stamped Concrete | $12.00 - $18.00 | Pro Only | Low (requires sloping) | Permanent, zero-maintenance |
7 High-Impact Small Walkway Ideas for Beginners
1. Stepping Stones with Creeping Thyme Joints
For a 3-foot wide path, use large 24x24 inch cast concrete or natural bluestone pavers. Space them exactly 18 inches on-center to match the average adult stride (approximately 2.5 feet). Instead of filling the joints with gravel, plant Thymus serpyllum (creeping thyme). According to the University of Minnesota Extension, creeping thyme tolerates light foot traffic, stays under 3 inches tall, and releases a pleasant scent when stepped on. This breaks up the "bowling alley" effect by introducing organic textures and softening the hardscape edges.
2. Decomposed Granite with Steel Edging
Decomposed Granite (DG) provides a crisp, upscale look reminiscent of high-end modern landscapes. The critical success factor here is using "1/4-inch minus" DG, which contains the fine dust necessary for compaction. To prevent the DG from spilling into adjacent mulch beds, install 1/4-inch thick galvanized steel landscape edging. Avoid plastic edging entirely; it warps under the pressure of compacted stone and UV exposure. For high-traffic zones, mix in a liquid polymeric stabilizer like Gator Stone DP to lock the particles together while maintaining some permeability.
3. Gravel Grid Stabilizers for Utility Access
If your side yard serves as the primary route for dragging trash bins or pushing a wheelbarrow, loose gravel will quickly become a frustrating, rutted mess. Gravel grid systems, such as TRUEGRID PRO LITE, feature a honeycomb structure that locks aggregate in place. You must use 3/8-inch crushed angular gravel—never round pea gravel, which will roll out of the grids under lateral pressure. This setup provides a rigid, ADA-compliant surface that still allows 100% of rainwater to percolate into the soil.
4. Herringbone Brick in a Bordered Channel
Brick is a classic choice, but laying it in a straight running bond down a narrow yard exaggerates the length and narrowness. Instead, lay the bricks in a herringbone pattern. The 45-degree angles force the eye to move side-to-side, visually widening the corridor. Border the brick with a single row of soldier-course bricks (laid end-to-end) to create a clean, structured frame. This requires a 4-inch compacted aggregate base and a 1-inch bedding sand layer to prevent frost heave in northern climates.
5. Permeable Pavers for Runoff Management
Side yards are notorious for catching roof runoff from adjacent gutters. Standard concrete will pool this water against your foundation. Permeable pavers are designed with wider joints filled with small, clean-washed aggregate (typically ASTM No. 8 or No. 9 stone) that allows water to pass directly through the surface. The EPA's Green Infrastructure guidelines highlight permeable pavement as a primary tool for reducing urban stormwater runoff and filtering pollutants. While the base prep requires a deeper excavation (up to 12 inches of open-graded crushed stone for water storage), it solves chronic side-yard drainage issues permanently.
6. Reclaimed Composite Sleepers and River Rock
While traditional railway sleepers offer a rustic look, they are often treated with creosote, which can leach into adjacent garden beds. For a safer, longer-lasting alternative, use composite landscape timbers (like Trex or similar recycled wood-plastic materials). Lay them horizontally across the path as "steps," filling the intervening spaces with 2-inch washed river rock. This creates a striking, modern boardwalk effect that handles heavy shade and moisture without rotting.
7. Stamped Concrete with a Flagstone Pattern
If budget allows and you want zero maintenance, stamped concrete is the ultimate solution. For narrow spaces, choose a "seamless slate" or "flagstone" stamp pattern with a width of at least 36 inches. Avoid intricate, small-scale patterns like cobblestone, which can look chaotic and visually clutter a tight space. Ensure the contractor cuts control joints along the faux grout lines to manage cracking, and apply a non-slip additive to the sealer, as stamped concrete becomes dangerously slick when wet.
Step-by-Step: Prepping a 3-Foot Wide Side Yard Base
The most common reason DIY walkways fail within two years is inadequate base preparation. A narrow yard does not mean you can skip the heavy lifting. Follow this exact sequence for a 90-square-foot path (3x30 feet):
- Excavation: Dig down 7 inches below the desired finished height. Remove all organic topsoil; if you hit clay, stop and assess drainage.
- Geotextile Fabric: Lay down a non-woven geotextile fabric (minimum 4 oz/sq yd). This prevents the base rock from sinking into the native soil over time.
- Base Layer: Add 4 inches of 3/4-inch crushed stone (Class II road base). Do not dump it all at once. Spread it in 2-inch lifts.
- Compaction: Rent a 14-inch vibratory plate compactor (typically $60-$80 per day). Run it over each 2-inch lift until the surface is rigid and shows no footprints.
- Cross-Slope Check: Use a 2-foot level to ensure the base slopes away from the house foundation at a 2% grade (a 1/4-inch drop per foot). This prevents the "bowling alley" water trap.
⚠️ Critical Beginner Mistake: The Pea Gravel Trap
Never use loose pea gravel for a primary walkway without a stabilizing grid. Pea gravel is round and smooth; it acts like thousands of tiny ball bearings underfoot. In a narrow side yard where you cannot step off the path to regain your balance, walking on loose pea gravel is a major slip-and-fall hazard and makes pushing carts impossible.
Budgeting Your Small Walkway Project
For a standard 3-foot by 30-foot side yard path (90 square feet), here is a realistic 2026 cost breakdown for a DIY installation using Decomposed Granite:
- Excavation & Disposal: $150 (Dump bag fees and labor)
- Geotextile Fabric: $45 (10x100 ft roll, you will have leftover)
- Class II Road Base (1.5 tons): $75 (Delivered from local quarry)
- 1/4" Minus DG (1 ton): $85 (Delivered)
- Steel Edging (60 linear feet): $180 (Includes stakes and hardware)
- Plate Compactor Rental: $75 (One day)
- Total Estimated DIY Cost: $610 (Approx. $6.77 per sq. ft.)
Hiring a landscape contractor to perform the same installation will typically range from $1,400 to $2,200, factoring in minimum job charges, labor, and profit margins. By executing the base prep yourself, you secure the structural integrity of the path while keeping costs manageable.

