
Landscaping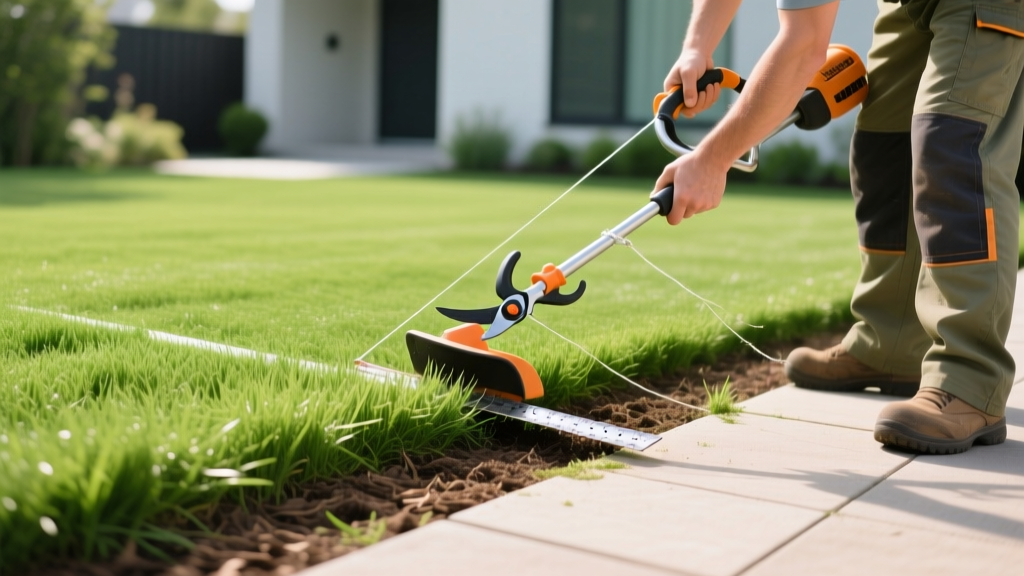
Step-by-Step Border Grass Maintenance and Edging Guide
Border grass serves as the critical visual hinge between your turf lawn and hardscape or garden beds. When maintained correctly, species like Liriope, Mondo grass, and ornamental fescues provide crisp, architectural lines. When neglected, creeping rhizomes invade your turf, and unkempt foliage obscures walkways. Maintaining border grass requires a fundamentally different approach than standard lawn care; it relies on mechanical containment, precise seasonal cutbacks, and targeted nutrient management rather than broad-spectrum mowing.
This guide details the exact step-by-step procedures used by professional landscapers to install, edge, and maintain border grass, ensuring your landscape lines remain razor-sharp year-round.
Selecting the Right Border Grass for Containment
Before executing maintenance procedures, you must understand the growth habit of your specific border grass. Misidentifying a clumping variety as a creeping variety is the leading cause of landscape bed failure. According to the Clemson Home & Garden Information Center, selecting the correct species dictates your long-term edging requirements.
| Species | Common Name | Growth Habit | Containment Strategy | USDA Zones |
|---|---|---|---|---|
| Liriope muscari | Big Blue Liriope | Clumping | Annual V-trench edging | 5-10 |
| Liriope spicata | Creeping Lilyturf | Aggressive Spreading | 60-mil HDPE root barrier required | 4-10 |
| Ophiopogon japonicus | Mondo Grass | Slow Spreading/Clumping | Biannual mechanical edging | 6-11 |
| Festuca glauca | Blue Fescue | Strict Clumping | Manual division every 3 years | 4-8 |
Step 1: The Seasonal Cutback Procedure
Unlike turfgrass, border grasses like Liriope and Mondo grass should never be mowed with a rotary mower. The foliage must be cleared annually to remove winter-burned tips and make way for spring flushes.
Timing and Execution
Execute the cutback in late winter, exactly two weeks before your region's last expected frost date. Cutting too early exposes the crown to freeze damage; cutting too late shears off emerging spring shoots, resulting in blunt, brown tips that persist until autumn.
- Tool Selection: Use professional-grade bypass hedge shears (such as the ARS HS-KR1000) for small beds, or a string trimmer equipped with a rigid plastic blade attachment for large linear borders.
- Cut Height: Shear Liriope muscari to exactly 2.5 inches above the soil line. Shear Ophiopogon japonicus (Mondo grass) to 1.5 inches. Do not cut into the woody crown, as this invites fungal pathogens.
- Debris Removal: Rake out the thatch immediately using a flexible leaf rake. Trapped moisture in the crown area is the primary catalyst for Anthracnose (caused by Colletotrichum graminicola).
Step 2: Mechanical Edging and V-Trenching
To prevent border grass rhizomes from migrating into your turf lawn, you must establish a physical void. The 'V-trench' method is the industry standard for creating a clean, maintainable edge without the use of brittle plastic lawn edging strips that heave during freeze-thaw cycles.
The V-Trench Execution Steps
- Mark the Line: Use a garden hose to lay out a smooth, sweeping curve or a taut mason's line for straight borders. Avoid sharp 90-degree angles, which impede mower navigation.
- Cut the Turf Side: Drive a half-moon edger or a flat steel spade straight down into the soil on the lawn side of your mark, exactly 4 inches deep.
- Cut the Bed Side: Step into the garden bed and angle your spade at 45 degrees toward your first cut. Drive it down to meet the base of the first cut.
- Extract the Soil: Pry out the V-shaped wedge of soil. This leaves a trench that is 4 inches deep and roughly 3 inches wide at the top.
- Mulch the Bed Side: Apply a 2-inch layer of double-shredded hardwood mulch on the bed side of the trench. The mulch will naturally wash into the trench over time, suppressing weed seeds while keeping the visual line dark and crisp.
Pro Tip: Never blow grass clippings or mulch into the V-trench. The trench must remain an empty void to effectively stop rhizome migration. Use a backpack blower at a low angle to clear debris out of the trench after every mowing session.
Step 3: Root Barrier Installation for Creeping Varieties
If your landscape features Liriope spicata or aggressive ornamental grasses like Chasmanthium latifolium, a V-trench alone will fail within 18 months. You must install a subterranean root barrier.
According to turf management guidelines from Penn State Extension, containing aggressive rhizomatous grasses requires impenetrable physical barriers. Purchase a 60-mil High-Density Polyethylene (HDPE) root barrier. Thinner materials (like 20-mil landscape fabric) will be pierced by Liriope rhizomes within a single growing season.
Barrier Installation Protocol
- Dig a straight trench 18 inches deep along the border line.
- Insert the HDPE barrier vertically.
- Ensure the top lip of the barrier protrudes exactly 1 inch above the final soil grade. This prevents rhizomes from 'jumping' over the barrier during heavy rains.
- Backfill with native soil, tamping down every 6 inches with a hand tamper to eliminate air pockets that could cause the barrier to bow inward.
Step 4: Targeted Nutrient and Weed Management
Border grasses have different nutritional requirements than standard turfgrass (like Bermuda or Kentucky Bluegrass). Over-fertilizing border grass leads to weak, floppy foliage that collapses over walkways and loses its variegation.
Fertilization Matrix
Apply a slow-release, low-nitrogen fertilizer in early spring. A 16-4-8 NPK ratio with micronutrients (specifically iron and manganese) is ideal. Apply at a rate of 3 pounds per 1,000 square feet of bed area. Avoid high-nitrogen lawn fertilizers (e.g., 32-0-4), which will cause excessive blade elongation and increase susceptibility to scale insects.
Pre-Emergent Weed Control
Weeds growing inside a border grass clump are nearly impossible to pull without damaging the ornamental roots. Apply a pre-emergent herbicide containing prodiamine (e.g., Barricade) in early spring when soil temperatures reach 55°F at a 2-inch depth. Prodiamine is safe for established Liriope and Mondo grass but will effectively halt crabgrass and spurge germination within the bed.
Troubleshooting Common Border Grass Failures
⚠️ Symptom: Brown, necrotic lesions on leaf tips.
Diagnosis: Anthracnose fungal infection, usually caused by overhead irrigation or poor air circulation.
Fix: Switch to drip irrigation. Prune out heavily infected foliage and apply a systemic fungicide containing myclobutanil at a rate of 2 oz per 1,000 sq ft.
Diagnosis: Anthracnose fungal infection, usually caused by overhead irrigation or poor air circulation.
Fix: Switch to drip irrigation. Prune out heavily infected foliage and apply a systemic fungicide containing myclobutanil at a rate of 2 oz per 1,000 sq ft.
⚠️ Symptom: Grass clump dying out in the center.
Diagnosis: Crown senescence (natural aging of the clump center) or severe soil compaction.
Fix: Dig up the entire clump in early fall. Use a sharp spade to divide the outer healthy rings into three or four smaller sections. Discard the dead center, amend the soil with compost, and replant the divisions.
Diagnosis: Crown senescence (natural aging of the clump center) or severe soil compaction.
Fix: Dig up the entire clump in early fall. Use a sharp spade to divide the outer healthy rings into three or four smaller sections. Discard the dead center, amend the soil with compost, and replant the divisions.
2026 Tool and Material Cost Matrix
Proper border grass maintenance requires specific investments. Below is a realistic cost breakdown for DIY homeowners and professionals sourcing commercial-grade materials in 2026.
| Item / Material | Specification | Est. Cost (DIY/Retail) | Est. Cost (Pro/Wholesale) |
|---|---|---|---|
| Half-Moon Edger | Forged steel, 36-inch ash handle | $45 - $60 | $30 - $40 |
| HDPE Root Barrier | 60-mil, 18-inch depth, 50ft roll | $110 - $140 | $75 - $90 |
| Professional Hedge Shears | Carbon steel bypass, 10-inch blade | $65 - $85 | $45 - $55 |
| Prodiamine Pre-Emergent | 65 WG, 5 lb jug | $120 - $150 | $95 - $110 |
Mastering border grass maintenance shifts your landscape from looking overgrown and chaotic to highly intentional and manicured. By adhering to strict V-trenching protocols, utilizing 60-mil root barriers for aggressive species, and timing your seasonal cutbacks precisely, you eliminate the constant battle of turf invasion and maintain pristine landscape architecture.

