
Landscaping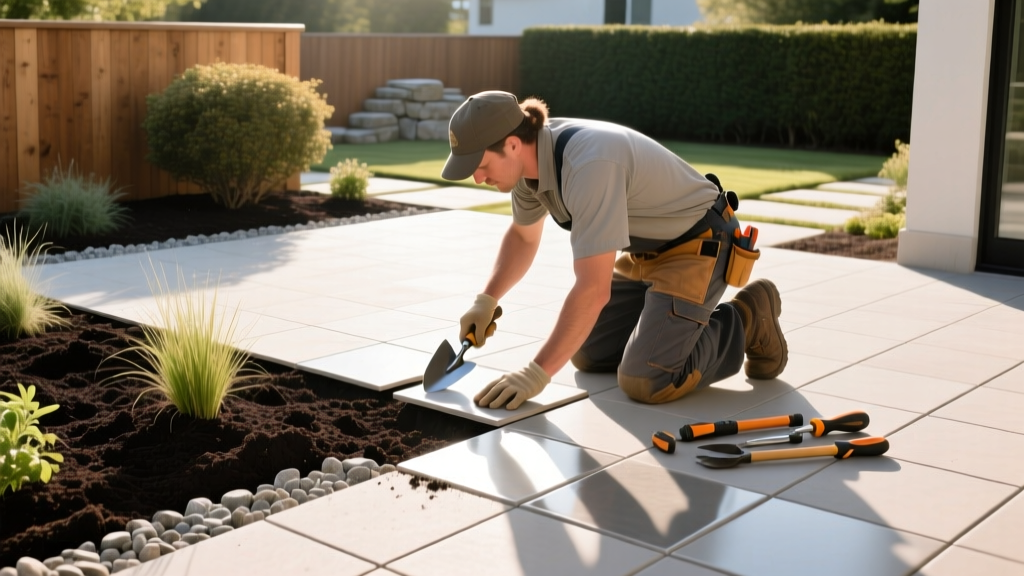
Labor for Installing Tile for Outdoor Patio and Planting Beds
The Intersection of Hardscape Labor and Softscape Establishment
Most landscaping guides treat hardscaping and planting as entirely separate phases of a project. In reality, the heavy excavation, soil compaction, and drainage alterations required for a patio directly dictate the survival and growth rate of adjacent plants. When budgeting the labor for installing tile for outdoor patio environments, homeowners and contractors must account for the biological impact of the construction process on surrounding root zones. Failing to integrate softscape establishment protocols into the hardscape labor scope results in stunted plant growth, chronic drainage issues, and costly landscape replacements within the first two years.
This guide breaks down the true cost of patio tile labor through the lens of soil science and plant establishment, providing exact specifications for protecting root zones, managing runoff, and remediating compacted soil after the masonry work is complete.
Breaking Down the Labor for Installing Tile for Outdoor Patio
In 2026, the national average for professional hardscape labor ranges from $14 to $32 per square foot, depending on site accessibility, base preparation requirements, and the specific tile material (e.g., 20mm porcelain pavers vs. natural stone). However, standard labor quotes rarely include the specialized site prep required to protect adjacent planting beds. Below is a detailed matrix of labor phases, standard costs, and the specific softscape risks associated with each step.
| Labor Phase | Avg. Cost (per sq. ft.) | Softscape & Establishment Risk |
|---|---|---|
| Demolition & Excavation | $3.00 - $5.50 | High risk of lateral root shearing and topsoil stripping. |
| Sub-Base Compaction | $4.50 - $8.00 | Severe soil bulk density increase; destroys macropores up to 18 inches deep. |
| Tile Laying & Setting | $5.00 - $12.00 | Low impact; primarily foot traffic and mortar mixing. |
| Grouting & Sealing | $2.50 - $4.50 | Chemical runoff risk from acrylic sealers and epoxy grouts. |
| Edge Restraint & Drainage | $3.00 - $6.00 | Alters natural water flow; can flood adjacent planting beds if unmanaged. |
To ensure proper plant establishment, expect to add a 15% to 20% premium to the base preparation labor cost. This covers the installation of physical root barriers, specialized hand-tamping near bed edges, and the integration of permeable drainage channels.
The Hardscape-Softscape Conflict: Soil Compaction & Root Zones
The most critical threat to plant establishment during patio construction is soil compaction. Standard plate compactors used to prepare the crushed gravel sub-base for tile patios exert between 3,000 and 5,000 pounds of centrifugal force. According to the University of Minnesota Extension, this level of mechanical force increases soil bulk density to levels that physically restrict root penetration. For clay soils, root growth stalls when bulk density exceeds 1.4 g/cm³; for loamy soils, the threshold is 1.6 g/cm³.
Warning: The 18-Inch Root Protection Rule
Never allow heavy plate compactors or skid steers to operate within 18 inches of an established planting bed or the projected dripline of a newly planted tree. The vibration alone fractures soil aggregates and collapses the macropores necessary for oxygen and water infiltration. Contractors must switch to hand tampers or walk-behind rollers for the outer 24 inches of the patio base.
When roots cannot expand laterally due to a compacted patio sub-base, plants exhibit drought stress, nutrient deficiencies, and increased susceptibility to soil-borne pathogens like Phytophthora. To counter this, the labor scope must include the installation of a rigid, high-density polyethylene (HDPE) root barrier, such as the DeepRoot UB 24-2, along the patio edge before base compaction begins. This barrier prevents the lateral migration of compacting forces and guides roots downward into deeper, uncompacted soil horizons.
Step-by-Step Site Prep: Protecting the Establishment Zone
Integrating plant health into your patio labor requires a specific sequence of operations. Instruct your hardscape crew to follow this protocol to preserve the soil structure required for robust plant establishment:
- Install Silt Fencing and Root Barriers: Before excavation, drive 24-inch HDPE root barriers into the soil along the patio perimeter. Leave 2 inches exposed above grade to prevent soil and mulch from spilling over during construction.
- Excavate with a Track Loader: Use a low-ground-pressure track loader rather than a standard wheeled skid steer to minimize deep soil compaction outside the immediate patio footprint.
- Lay Non-Woven Geotextile Fabric: Line the excavated trench with a heavy-duty, non-woven geotextile fabric (e.g., Mirafi 500X). This separates the subsoil from the aggregate base, preventing the base from sinking into the clay while still allowing vertical water percolation.
- Build an Open-Graded Base: Use 3/4-inch angular crushed stone (ASTM #57) rather than dense-graded aggregate (ASTM #267). Open-graded stone requires less mechanical compaction and allows water to drain freely away from adjacent plant roots.
- Hand-Tamp the Perimeter: For the final 24 inches of the base adjacent to planting beds, use a manual hand tamper or a lightweight vibratory plate to achieve the necessary ICPI (Interlocking Concrete Pavement Institute) compaction standards without transmitting destructive shockwaves into the root zone.
Managing Runoff: Drainage Labor and Plant Health
Tile patios are entirely impervious surfaces. A standard 400-square-foot patio will shed approximately 250 gallons of water during a 1-inch rainfall event. If the patio is sloped toward a new planting bed, the sudden influx of water will drown establishing root systems, leading to rapid anaerobic conditions and root rot.
Labor for installing tile for outdoor patio environments must include a dedicated drainage plan. The most effective solution is a perimeter French drain integrated into the patio's edge restraint system. Expect to pay an additional $18 to $28 per linear foot in labor and materials for a 4-inch perforated PVC pipe wrapped in filter fabric, bedded in washed river rock. This system captures the patio runoff and safely disperses it into a dry well or municipal storm drain, keeping the adjacent planting beds at an optimal moisture level for establishment.
Post-Installation Soil Remediation for Plant Establishment
Even with careful planning, the soil adjacent to a newly installed patio will suffer some degree of compaction and biological disruption. Post-installation remediation is a vital, often overlooked step in the planting establishment guide.
Radial Trenching and Mycorrhizal Inoculation
Once the tile labor is complete and the heavy equipment is off-site, remediate the adjacent soil using radial trenching. Use a 2-inch soil auger to drill holes 12 to 18 inches deep, spaced every 3 feet in a radial pattern extending outward from the patio edge into the planting bed. Backfill these holes with a mixture of expanded shale and a high-quality mycorrhizal inoculant, such as MycoApply Endo. The shale provides permanent macropores for aeration and drainage, while the mycorrhizal fungi form symbiotic relationships with the new plant roots, effectively increasing their absorptive surface area by up to 700%. This targeted remediation accelerates plant establishment and helps them overcome the stress of the hardscape construction phase.
Pro-Tip: Mulch Buffer Zones
Always maintain a 6-inch gap between the patio's edge restraint and the start of your organic mulch layer. Fill this gap with 3/8-inch crushed gravel. This prevents mulch from holding moisture against the patio base (which causes efflorescence on tile) and stops wood-decaying fungi in the mulch from compromising the patio's structural integrity.
Frequently Asked Questions
Can I plant trees directly next to a newly tiled patio?
It is highly discouraged to plant large shade trees within 10 feet of a tile patio. As the tree establishes and its trunk caliper expands, the radial root growth will eventually heave the patio base. If you must plant near the patio, choose slow-growing, deep-rooted ornamental species like Japanese Maples (Acer palmatum) and install a 36-inch deep HDPE root barrier between the tree and the hardscape.
Does the type of tile affect the labor required for plant protection?
Yes. Heavy 20mm porcelain pavers require a thicker, more heavily compacted sub-base than lightweight natural stone tiles set in mortar. The heavier the tile and the thicker the base, the more aggressive the compaction labor, which increases the risk to adjacent plant root zones. Permeable paver systems, which use open-graded bases, generally require less destructive compaction and are friendlier to surrounding soil biology.
How long does it take for adjacent plants to recover from patio construction?
With proper post-installation soil remediation (radial trenching and mycorrhizal inoculation), most shrubs and perennials will re-establish their root systems within one full growing season (6 to 9 months). Without remediation, plants may remain stunted or exhibit chronic drought stress for 2 to 3 years as they slowly attempt to navigate the compacted soil profile.

