
Landscaping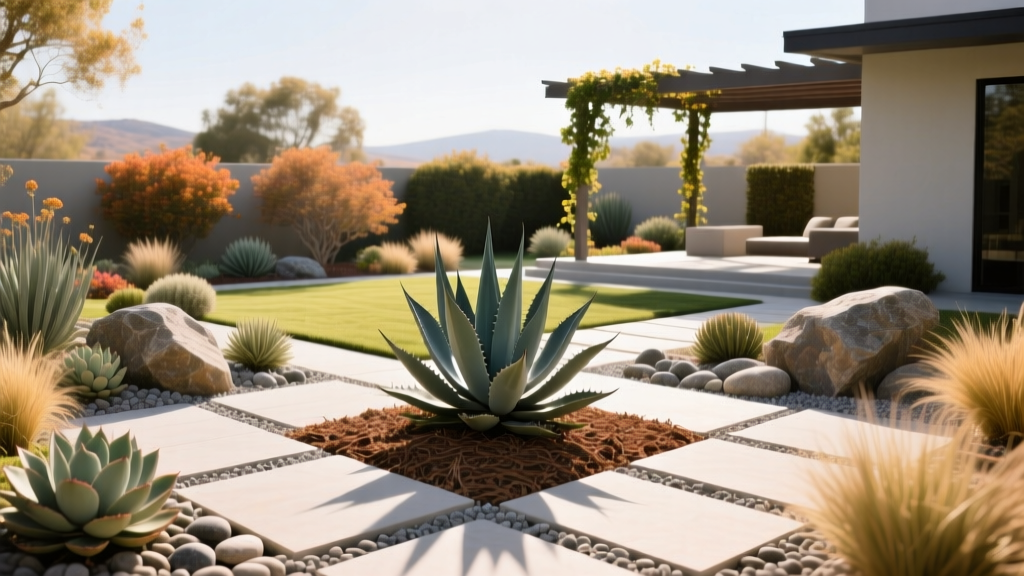
What Xeriscaping Means for Your Landscape: A Practical How-To Guide
The True Definition: What Xeriscaping Actually Means
When homeowners first ask, "What does xeriscaping mean?", they often picture barren front yards filled with white gravel, a single cactus, and a rusty wagon wheel. This is a misconception. Coined in 1981 by the Denver Water Department, the term combines the Greek word xeros (meaning dry) with landscaping. In practice, xeriscaping means designing a landscape that reduces or eliminates the need for supplemental irrigation, cutting outdoor water use by 50% to 75% while maintaining high aesthetic value.
According to the EPA WaterSense program, outdoor water use accounts for nearly 30% of total household water consumption, spiking to 60% in arid regions during summer. Xeriscaping is not "zero-scaping." It is a highly strategic, seven-principle approach to yard design that prioritizes hydro-zoning, soil health, and high-efficiency irrigation. This guide provides a practical, step-by-step framework to convert a traditional turf lawn into a thriving xeriscape.
Phase 1: Site Analysis and Hydro-Zoning
The foundation of any successful xeriscape is hydro-zoning—grouping plants with similar water and sunlight requirements together. This prevents the common failure mode of overwatering drought-tolerant succulents just to keep a nearby fern alive.
Pro Tip: The 3-Zone Strategy
Map your yard into three distinct hydro-zones before buying a single plant:
Zone 1 (Oasis): High-traffic areas near patios or entryways. Use moderate-water plants and container gardens.
Zone 2 (Transition): Mid-yard areas. Use low-water perennials and ornamental grasses watered only during peak summer heat.
Zone 3 (Minimal): Perimeter and utility areas. Use strictly native, drought-adapted plants that survive entirely on natural rainfall once established.
Map your yard into three distinct hydro-zones before buying a single plant:
Zone 1 (Oasis): High-traffic areas near patios or entryways. Use moderate-water plants and container gardens.
Zone 2 (Transition): Mid-yard areas. Use low-water perennials and ornamental grasses watered only during peak summer heat.
Zone 3 (Minimal): Perimeter and utility areas. Use strictly native, drought-adapted plants that survive entirely on natural rainfall once established.
Phase 2: Turf Removal and Soil Preparation
You cannot plant a xeriscape directly over existing Bermuda or Kentucky Bluegrass roots. You must eliminate the turf and prepare the soil bed. Avoid chemical herbicides like glyphosate, which can linger in the soil and harm the mycorrhizal fungi that drought-tolerant plants rely on for deep root growth.
Method A: Sheet Mulching (Recommended)
Sheet mulching builds soil health while smothering grass. Mow the existing turf as short as possible (1 inch). Lay down overlapping sheets of uncoated, plain brown cardboard directly over the grass. Wet the cardboard thoroughly, then cover it with 4 to 6 inches of coarse arborist wood chips. Wait 3 to 4 months for the grass to decompose. The Water Use It Wisely conservation initiative highly recommends this method for its long-term soil benefits.
Method B: Solarization (Fastest)
If you need to plant immediately, use clear 2-mil to 4-mil plastic sheeting. Mow the lawn, water it deeply, and stake the clear plastic tightly over the area, burying the edges in a 6-inch trench. Leave it for 6 to 8 weeks during the hottest summer months. The greenhouse effect will cook the grass and weed seeds at temperatures exceeding 140°F.
Phase 3: Upgrading to High-Efficiency Drip Irrigation
Xeriscaping means delivering water exactly where it is needed. Traditional pop-up spray heads lose up to 40% of their water to wind drift and evaporation. You must cap your spray heads and convert to subsurface or inline drip irrigation.
| Irrigation Type | Application Rate | Efficiency Rating | Best Use Case in Xeriscape |
|---|---|---|---|
| Traditional Spray Heads | 1.5 - 2.0 GPM | 60% - 65% | None (Remove or cap these) |
| MP Rotator Nozzles | 0.4 - 0.6 GPM | 75% - 80% | Zone 1 Oasis areas with dense groundcover |
| Inline Drip (e.g., Netafim Techline) | 0.5 - 0.9 GPH per emitter | 90% - 95% | Zone 2 & 3 perennial beds and shrub root zones |
| Point-Source Drip Emitters | 1.0 - 2.0 GPH per emitter | 90% - 95% | Individual specimen trees, large agaves, and pots |
Action Step: Purchase a pressure regulator (set to 25-30 PSI) and a 100-mesh filter for your drip valve manifold. Drip emitters will clog rapidly without filtration, and high municipal water pressure (often 60-80 PSI) will blow the fittings apart.
Phase 4: Plant Selection and Mulching Strategy
The plants you choose dictate the success of your xeriscape. Avoid the trap of buying "drought-tolerant" plants from big-box stores without checking their mature size or cold hardiness. Furthermore, mulch selection is critical; the wrong mulch will rot the crowns of your succulents.
Top Tier Xeriscape Plant Specifications
- Agave parryi (Parry's Agave): Forms a compact, 2-foot rosette. Extremely cold hardy down to 10°F. Requires zero summer water once established.
- Salvia greggii (Autumn Sage): Provides vital color and pollinator support. Shear back by one-third in late winter to prevent woody, leggy growth. Needs deep watering only once a month in peak summer.
- Muhlenbergia rigens (Deer Grass): A native bunchgrass that reaches 3 feet tall and 4 feet wide. Provides stunning architectural texture and requires no fertilizer.
The Mulch Matrix
Do not use the same mulch across your entire yard. Xeriscaping means matching the mulch to the plant's native habitat.
- For Perennials and Grasses: Apply 2 to 3 inches of shredded hardwood bark. This retains moisture and breaks down to feed soil microbes.
- For Succulents, Cacti, and Mediterranean Plants: Apply 2 inches of 3/8-inch crushed decomposed granite (DG) or pea gravel. Inorganic mulch keeps the plant's crown dry, preventing the fatal fungal rot that occurs when wet wood mulch touches an agave's base.
Common Xeriscaping Mistakes to Avoid
"The number one reason xeriscapes fail in the first year is not a lack of water, but a lack of establishment watering. Drought-tolerant plants still need consistent, deep watering for the first 12 to 18 months to grow the deep taproots required to survive on natural rainfall."
Do not install a xeriscape in the fall and immediately turn off the irrigation. Run your drip system twice a week for 30 minutes during the first spring and summer, then taper off to once a month in year two.
2026 Cost Breakdown: Budgeting a 1,000 Sq. Ft. Conversion
Converting a standard 1,000 square foot front yard from turf to xeriscape requires an upfront investment that typically pays for itself in water savings within 3 to 5 years, especially with local utility rebates. Below is a realistic cost matrix for a professional-grade DIY or contractor-assisted project in 2026.
| Project Phase | Materials & Labor Details | Estimated Cost (1,000 sq ft) |
|---|---|---|
| Turf Removal | Sheet mulching materials (cardboard, labor) or sod cutter rental | $250 - $600 |
| Soil Amendment | 2 cubic yards of premium compost, tilled into top 4 inches | $150 - $300 |
| Irrigation Conversion | Drip tubing, emitters, manifold, filter, and pressure regulator | $400 - $850 |
| Plant Material | 40-50 plants (mix of 1-gallon and 5-gallon sizes) | $1,200 - $2,500 |
| Mulch & Hardscape | 5 tons of decomposed granite, boulders, and edging | $800 - $1,800 |
| Total Estimated Cost | Excluding major hardscape like patios or retaining walls | $2,800 - $6,050 |
By understanding what xeriscaping means in a practical, horticultural sense, you can transform your property into a resilient, low-maintenance landscape. Focus on rigorous hydro-zoning, precise drip irrigation, and correct mulching, and your yard will thrive regardless of municipal water restrictions.

