
Lawn Care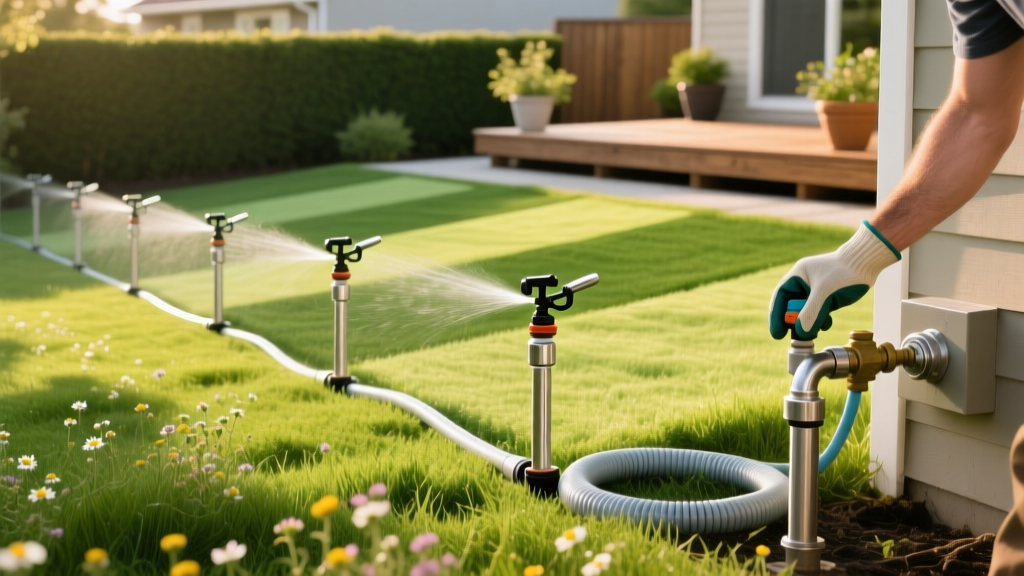
Above Ground Sprinkler System: Layout, Setup, and Zone Planning Guide
Designing an above ground sprinkler system eliminates the need for costly trenching and pipe-bursting risks associated with underground PVC lines. When engineered correctly using high-density polyethylene (HDPE) tubing and low-volume rotary nozzles, an above ground setup can deliver the same 85% to 90% distribution uniformity as a subterranean system at roughly 40% of the initial hardware cost. This guide details the exact hydraulic calculations, component specifications, and routing frameworks required to build a high-efficiency above ground network.
Core Components and Material Specifications
Do not use standard white PVC or vinyl garden hoses for your lateral lines. White PVC degrades rapidly under UV exposure, and vinyl hoses suffer from severe friction loss over distances exceeding 50 feet. Instead, source the following specific materials:
- Mainline and Laterals: Use 3/4-inch or 1-inch NSF-51 rated black polyethylene tubing (often sold as 'poly pipe'). Black poly contains carbon black, which provides essential UV resistance for a 15-to-20-year surface lifespan.
- Fittings: Use barbed plastic insert fittings (not compression fittings) paired with stainless steel crimp clamps or Oetiker ear clamps. Standard worm-gear hose clamps will corrode and snap under constant soil moisture exposure.
- Adapters: Brass hose-bib adapters with a built-in pressure vacuum breaker (PVB) to prevent backflow. Avoid plastic anti-siphon valves for mainline connections, as they crack under winter freeze-thaw cycles.
- Controller: A Weather-Based Smart Controller (e.g., Orbit B-hyve XR or Hunter Hydrawise) that adjusts run times based on local evapotranspiration (ET) data, which the EPA WaterSense program notes can reduce outdoor water use by up to 30%.
Calculating Your GPM and Static Pressure
Before laying a single foot of poly pipe, you must determine your water supply's Gallons Per Minute (GPM) and static pressure (PSI). Guessing these numbers is the primary cause of dry spots and misting in above ground systems.
The 5-Gallon Bucket Flow Test
- Place a standard 5-gallon bucket under your primary outdoor hose bib.
- Turn the spigot on completely and start a stopwatch.
- Stop the watch the moment the bucket is full.
- Calculate: (5 ÷ seconds) × 60 = Maximum Available GPM.
Example: If it takes 15 seconds to fill, (5 ÷ 15) × 60 = 20 GPM. You cannot design a zone that requires more than 80% of this number (16 GPM in this case) to account for pressure fluctuations.
Next, screw a standard water pressure gauge onto the hose bib and turn it on. Ideal static pressure is between 45 and 65 PSI. If your pressure exceeds 70 PSI, you must install a brass pressure regulator (set to 50 PSI) at the source to prevent poly-pipe blowouts and sprinkler-head misting.
Sprinkler Head Selection Matrix
The type of head you mount on your above ground risers dictates your zone layout. Below is a comparison of the most effective head types for surface-level irrigation.
| Head Type | Recommended Model | Flow Rate (GPM) | Max Radius | Best Application | Est. Cost |
|---|---|---|---|---|---|
| Impact (Brass) | Rain Bird 25PJDABR | 2.5 - 4.5 | 35 ft | Large, open rectangular lawns; high wind areas | $35 - $45 |
| Gear-Drive (Riser) | Hunter PGP-Ultra | 1.5 - 3.2 | 38 ft | Curved beds, irregular zones, mixed elevations | $18 - $24 |
| Multi-Stream Rotary | Hunter MP Rotator | 0.4 - 1.0 | 30 ft | Low-GPM homes, clay soils, narrow strips | $12 - $16 |
| Oscillating (Hose-end) | Melnor XT450 | 4.0 - 6.0 | 4,500 sq ft | Temporary watering, seed germination, rentals | $30 - $40 |
Step-by-Step Zone Layout and Pipe Routing
According to turfgrass irrigation guidelines from the University of Minnesota Extension, uniform head-to-head coverage is mandatory for healthy root development. In an above ground system, this means the spray from one head must reach the base of the adjacent head.
- Map the Perimeter: Run your 3/4-inch poly mainline along the outer edges of the lawn, securing it every 4 feet with heavy-duty U-shaped landscape staples. Keep the pipe at least 6 inches away from concrete edges to allow for thermal expansion.
- Calculate Friction Loss: For 3/4-inch poly pipe flowing at 6 GPM, friction loss is approximately 2.3 PSI per 100 feet. If your zone requires 300 feet of pipe, you will lose nearly 7 PSI. If your static pressure is only 45 PSI, this loss will cause the final heads to underperform. In long runs, upgrade the mainline to 1-inch poly to drop friction loss to 0.6 PSI per 100 feet.
- Punch and Connect: Use a specialized poly-pipe punch tool (not a drill or knife) to create clean holes for your 1/2-inch barbed tees. A jagged hole from a utility knife will leak continuously under pressure.
- Install Riser Assemblies: Attach a 12-inch to 18-inch flexible swing pipe or rigid PVC riser to the barbed tee. Mount your sprinkler head to the top of the riser. Flexible swing pipes are highly recommended for above ground systems, as they absorb impacts from lawnmowers without snapping the poly mainline.
- Zone Valving: Install an inline 24V AC irrigation valve (e.g., Hunter PGV-100) at the start of each distinct zone. Mount the valve manifold on a raised wooden platform or cinder blocks to keep the solenoids out of standing water and mud.
Warning: The Misting Effect
If you observe a fine fog or mist blowing off your sprinkler heads rather than heavy droplets, your pressure is too high for the nozzle. This wastes water and creates dry spots downwind. Install a flow-control stem inside the sprinkler head or a 30-PSI pressure regulator at the zone valve to correct this immediately.
If you observe a fine fog or mist blowing off your sprinkler heads rather than heavy droplets, your pressure is too high for the nozzle. This wastes water and creates dry spots downwind. Install a flow-control stem inside the sprinkler head or a 30-PSI pressure regulator at the zone valve to correct this immediately.
Common Failure Modes and Troubleshooting
Above ground systems are exposed to unique environmental stressors. Use this diagnostic framework to resolve the most frequent operational failures.
1. End-of-Line Pressure Drop
Symptom: Heads near the valve pop up fully, but heads at the far end of the zone barely clear the grass.
Fix: You have exceeded the GPM capacity of your pipe diameter. You must either reduce the nozzle sizes on the first half of the zone to push water to the back, or 'loop' the system by connecting the end of the lateral line back to the mainline, creating a continuous circle that balances pressure from both directions.
2. UV and Thermal Degradation
Symptom: The poly pipe becomes brittle, cracks when stepped on, or develops pinhole leaks after two summers.
Fix: You likely purchased low-grade, non-UV-stabilized tubing or white PVC. Replace damaged sections with 100-PSI rated, carbon-black HDPE poly pipe. For sections crossing hot concrete driveways, sleeve the poly pipe inside a 1-inch PVC conduit to shield it from radiant heat.
3. Solenoid Burnout
Symptom: The controller sends the signal, but the valve does not open, and the solenoid feels excessively hot to the touch.
Fix: Check your wire gauge. If your valve is more than 400 feet from the controller, standard 18-gauge wire will cause voltage drop, forcing the solenoid to draw excess amperage and burn out. Upgrade to 14-gauge or 12-gauge direct-burial UF wire for long runs.
Winterization and Maintenance Protocol
Even though your pipes are above ground, they are highly susceptible to freeze damage if water remains trapped inside. In late autumn, execute the following blowout procedure:
- Shut off the main water supply at the house and drain the PVB (Pressure Vacuum Breaker) by opening its test cocks.
- Connect an air compressor (rated for at least 4 CFM) to the system via a quick-connect blowout adapter installed just downstream of the backflow preventer.
- Blow out each zone individually. Never exceed 50 PSI of air pressure in poly pipe systems, as the friction heat from high-velocity air can melt the plastic fittings from the inside.
- Run the compressor until only a fine, vapor-like mist exits the sprinkler heads. Leave all manual drain valves in the open position for the winter.
By adhering to precise hydraulic calculations and utilizing UV-stabilized materials, your above ground sprinkler system will deliver commercial-grade irrigation efficiency without the destructive installation process of underground trenching.

