
Lawn Care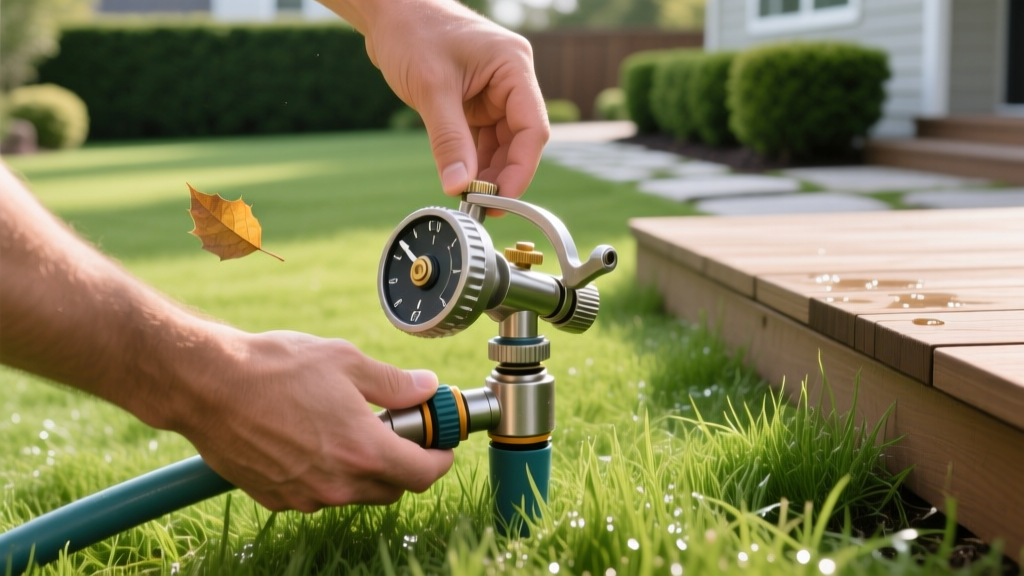
How to Adjust Irrigation Sprinkler Heads: Arc, Radius, and Alignment Fixes
Properly calibrated irrigation is the backbone of a healthy lawn. When sprinkler heads drift out of alignment, spray onto hardscapes, or fail to overlap correctly, you lose water to evaporation and runoff while creating dry patches in your turf. Learning how to adjust irrigation sprinkler heads is not just about turning screws; it requires understanding the mechanical differences between gear-driven rotors, multi-stream nozzles, and fixed spray heads. This guide provides exact, model-specific adjustments to achieve head-to-head coverage and maximize water efficiency.
Understanding Your Sprinkler Head Ecosystem
Before making any adjustments, identify the specific head type on your zone. Mixing adjustment techniques across different models is the most common cause of stripped gears and broken seals.
Gear-Driven Rotors (Hunter PGP Ultra, Rain Bird 5000 Plus)
Rotors are designed for large areas (15 to 45 feet) and use an internal gear mechanism to rotate a single stream of water back and forth. They feature two distinct adjustment points: an arc set screw (usually hidden under a rubber cap or accessed via a top slot) and a central radius screw. The internal gears rely on a ratcheting slip-clutch to prevent damage when the arc is manually adjusted.
Multi-Stream Rotators (Hunter MP Rotator)
These screw onto standard spray bodies but operate like miniature rotors, throwing multiple rotating streams. They have a drastically lower precipitation rate (roughly 0.4 inches per hour compared to 1.5 inches for standard spray). Adjusting them requires a delicate touch, as the arc and radius rings are highly sensitive and easily cross-threaded if forced.
Fixed Spray Heads (Rain Bird 1800 Series, Toro Precision)
Used for smaller zones and tight corners, these heads pop up and spray a fixed fan pattern (e.g., 90, 180, or 360 degrees). The pattern is dictated by the nozzle itself, while the distance is controlled by a small set screw at the top center of the nozzle.
The Essential Adjustment Tool Kit
Using the wrong tool will strip the soft brass or plastic screws on modern irrigation heads. Assemble this specific kit before starting:
- Hunter Plastic Adjustment Wrench: Features a dual-ended design with a hex head for arc adjustment and a flat blade for the radius screw. Essential for PGP and I-20 models.
- Rain Bird Multi-Tool: A specialized plastic tool with a built-in nozzle flush mechanism and a precise flathead for the 32SA and 5000 series radius screws.
- 1/8-inch Flathead Screwdriver: Required for the delicate radius screws on MP Rotators and standard Rain Bird VAN (Variable Arc Nozzle) spray heads.
- Phillips #1 Screwdriver: Occasionally needed for older Toro spray head radius screws.
- Shovel and Hand Trowel: For excavating soil buildup around the head casing to allow full pop-up clearance.
Step-by-Step: Adjusting Arc and Radius on Rotors
Achieving head-to-head coverage means the water from one rotor should physically reach the adjacent rotor. Follow this sequence for standard gear-driven rotors:
- Find the Fixed Left Stop: Turn the rotor head all the way to the right, then slowly rotate it left until it stops and clicks. This is your fixed left starting point. Do not force it past this click.
- Set the Right Arc Stop: Insert the hex end of your adjustment tool into the arc adjustment socket (located on top of the turret). Turn clockwise to increase the arc, or counter-clockwise to decrease it. Adjust until the right stop aligns perfectly with your property boundary or sidewalk edge.
- Verify the Ratchet: Grasp the turret and rotate it left and right. It should move smoothly between your two set stops without binding.
- Adjust the Radius: Locate the center radius screw on top of the nozzle. Insert your flathead tool. Turn clockwise to reduce the throw distance, and counter-clockwise to increase it.
Warning: Never turn the radius screw more than five full turns clockwise. Over-tightening will crush the internal nozzle seal and strip the plastic threading, resulting in a permanent geyser effect that requires a complete nozzle replacement.
Fine-Tuning Fixed Spray Heads and MP Rotators
Spray heads and multi-stream rotators require different calibration logic. Because MP Rotators apply water slowly, adjusting their radius too far down can cause the streams to collapse and lose their wind resistance.
| Head Type | Arc Adjustment Method | Radius Adjustment Method | Common Failure Mode |
|---|---|---|---|
| Standard Spray (VAN) | Grip nozzle collar and twist left/right | Center Phillips/Slotted screw (Clockwise = reduce) | Misting and fogging due to high PSI |
| Hunter MP Rotator | Rotate outer black ring to align arrows | Top slotted screw (Clockwise = reduce up to 25%) | Streams collapsing into a single dribble |
| Rotary Nozzle (Rain Bird R-VAN) | Pull up and rotate nozzle body | Top slotted screw (Clockwise = reduce) | Failure to rotate due to debris in filter |
Correcting Pop-Up Height and Tilt Alignment
A sprinkler head that is tilted or buried will never distribute water evenly, regardless of how perfectly the arc is set. Over time, soil settles, and thatch builds up, effectively lowering the head relative to the turf canopy.
The 4-Inch Rule: For cool-season grasses like Tall Fescue or Kentucky Bluegrass, your pop-up riser must extend at least 4 inches above the soil line. If the grass grows to 3.5 inches, a 3-inch pop-up head will be blocked, creating a massive dry shadow behind the head.
Fixing Tilted Heads: If a head is leaning, do not simply bend the PVC pipe or force the riser, as this will crack the lateral line. Dig a 12-inch trench on the supply side of the head. If the head is connected via rigid PVC, cut the pipe and install a swing joint (a flexible assembly with two or three elbows). If it is already on flexible funny pipe, simply excavate the soil beneath the fitting, push the head upright, and backfill with coarse sand to lock the new plumb position in place.
Troubleshooting Matrix: Common Adjustment Failures
| Symptom | Root Cause | Exact Fix |
|---|---|---|
| Rotor spins 360 degrees and won't stop at the right arc | Internal slip-clutch gear is stripped or debris is jamming the turret | Remove the nozzle and screen. Flush with water. If it still fails, the internal gear cartridge is stripped; replace the entire rotor body. |
| Spray head creates a fine mist that blows away in the wind | Zone pressure exceeds 45 PSI, atomizing the water droplets | Swap standard spray heads for pressure-regulating models (e.g., Rain Bird 1800 SAM-PRS) or install a master pressure regulator at the zone valve. |
| Water pools around the base of the head after the zone shuts off | Low-head drainage; water in the lateral pipes is draining out of the lowest head on the slope | Install heads with built-in check valves (denoted by 'SAM' or 'CV' in the model name) on the lowest elevation heads in the zone. |
Water Efficiency and Environmental Impact
Precise adjustment of your irrigation heads directly correlates to municipal water conservation and lower utility bills. According to the EPA WaterSense program, an improperly adjusted sprinkler system can waste up to 25,000 gallons of water per household annually through hardscape overspray and evaporation. Furthermore, the Alliance for Water Efficiency emphasizes that maintaining head-to-head coverage and eliminating misting are the most cost-effective ways to improve irrigation distribution uniformity (DU). By taking 30 minutes at the start of the season to calibrate every arc and radius screw, you ensure that water is applied only to the root zone, minimizing fungal diseases caused by excess moisture on hardscapes and reducing nutrient runoff into local storm drains.

