
Lawn Care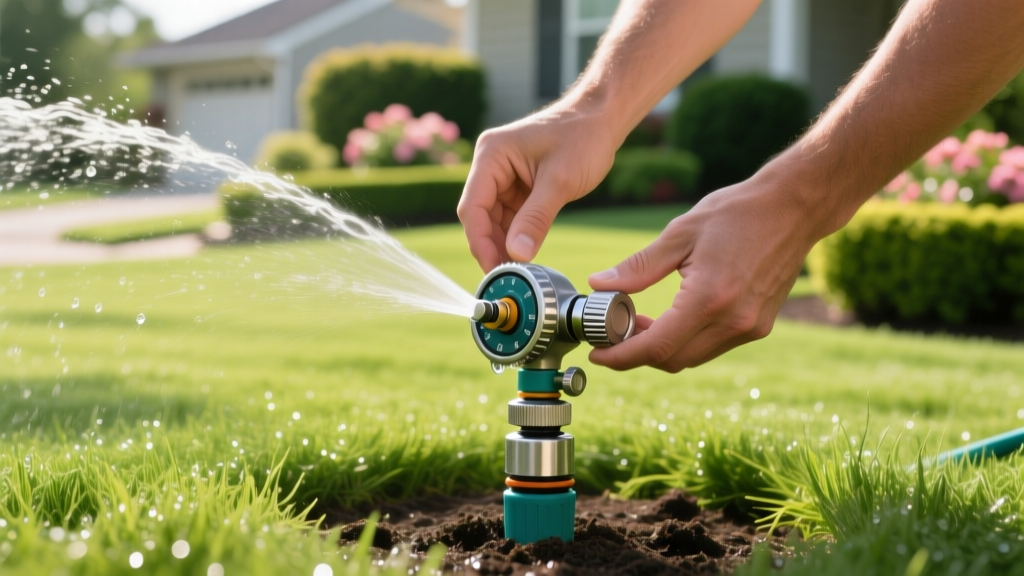
How to Adjust a Rotating Sprinkler Head: Arc, Radius & Flow
Identify Your Rotor Mechanism
Rotating sprinkler heads (rotors) dictate the uniformity of your irrigation zone. When a rotor oversprays onto a driveway or leaves a dry arc in the turf, the issue is rarely water pressure—it is mechanical misalignment. Before manipulating the turret, you must identify the internal mechanism of your specific model, as the adjustment protocols differ drastically between gear-drive and impact rotors.
Pro Tip: Gear-drive rotors (like the Hunter PGP-Ultra or Rain Bird 5000 Plus) use internal nylon planetary gears and are adjusted via a top-mounted turret collar. Impact rotors (like the Rain Bird 2045) use a swinging metal arm driven by water deflection and are adjusted via external metal trip pins and a diffuser pin.
This guide focuses on the modern industry standard: gear-drive rotors. These units require precise calibration of two distinct mechanisms: the arc stop collars and the radius reduction screw. Misadjusting either will compromise your zone's distribution uniformity (DU) and violate EPA WaterSense landscaping guidelines for outdoor water efficiency.
Step-by-Step: Adjusting the Arc on Gear-Drive Rotors
The arc defines the rotational sweep of the nozzle, typically adjustable from 50° to 360°. Adjusting the arc requires aligning the fixed left stop and the adjustable right stop. You will need the manufacturer-specific adjustment tool (usually a plastic key with a flathead on one end and a hex/socket on the other) or a small flat-head screwdriver.
CRITICAL WARNING: Never physically force the turret past the mechanical left or right stops with your hands. Forcing the rotation strips the internal nylon planetary gears. Once stripped, the head will continuously rotate 360° and cannot be repaired; you will need to dig up and replace the entire $18–$25 rotor body.
1. Locate the Fixed Left Stop
Turn the water supply to the zone OFF. Grasp the top turret of the rotor and rotate it clockwise until it stops. This mechanical hard-stop is your fixed left starting point. If the rotor is currently spraying past your desired left boundary (e.g., onto a sidewalk), you must physically unscrew and rotate the entire sprinkler body in the ground to align this left stop with the edge of your turf.
2. Set the Adjustable Right Stop
With the left stop established, rotate the turret counter-clockwise to the point where you want the spray to stop (the right boundary). Insert the flat-head end of your adjustment tool into the arc adjustment socket on top of the rotor. Turn the tool clockwise to increase the arc or counter-clockwise to decrease it. You will feel the internal collar engage. Adjust until the right stop aligns perfectly with your turf edge.
3. Test the Return Sweep
Turn the water on. Allow the rotor to complete two full cycles. If the right stop drifts or the turret fails to return to the exact left stop, the internal collar is slipping. This usually indicates debris in the collar track or a worn collar O-ring, requiring a teardown and cleaning of the turret assembly.
Calibrating the Radius and Flow Reduction
Once the arc is set, you must dial in the throw distance. Most gear-drive rotors feature a top-mounted radius reduction screw located directly above the nozzle.
- To Reduce Throw: Insert a flat-head screwdriver into the radius screw and turn it clockwise. This deflects the water stream downward, reducing the throw radius by up to 25%.
- To Increase Throw: Turn the screw counter-clockwise until it is flush with the turret housing. Do not unscrew it entirely, or water will bypass the nozzle and leak out of the top of the turret.
The Limitation of the Radius Screw
The radius screw is designed for micro-adjustments (10% to 25% reduction). If you need to reduce a 35-foot throw down to 20 feet, relying on the radius screw will severely distort the water stream, creating a heavy 'donut' of water near the head and leaving the mid-range dry. For reductions greater than 25%, you must swap the nozzle for a lower Gallons Per Minute (GPM) rating.
| Nozzle Size | GPM @ 45 PSI | Nominal Radius | Best Use Case |
|---|---|---|---|
| 1.5 | 1.5 GPM | 22 ft | Small strips, narrow side yards |
| 2.0 | 2.0 GPM | 26 ft | Standard residential front yards |
| 3.0 | 3.0 GPM | 32 ft | Large open turf areas |
| 4.0 | 4.0 GPM | 38 ft | Commercial zones, sports fields |
The Hidden Trap: Matching Precipitation Rates (MPR)
The most common mistake homeowners make when adjusting a rotating sprinkler head is fixing a dry spot by turning up the radius screw on a single head without considering the zone's overall precipitation rate. Rotors are designed to operate on a head-to-head coverage basis, meaning the water from one rotor should reach the base of the adjacent rotor.
If you have a zone equipped with 3.0 GPM nozzles throwing 32 feet, and you use the radius screw to reduce one specific head's throw to 24 feet to avoid hitting a fence, you have inadvertently dropped that head's GPM output to roughly 2.2 GPM. Because it is now applying less water over a smaller area, the precipitation rate (inches per hour) of that specific head spikes compared to the rest of the zone. The result? The area immediately around that adjusted head will become waterlogged and prone to fungal diseases like brown patch, while the mid-range remains dry.
The correct protocol for significant radius reduction is to pull the nozzle using a specialized removal tool (or needle-nose pliers) and install a factory-matched lower GPM nozzle (e.g., swapping a 3.0 for a 2.0). This maintains the correct precipitation ratio across the entire zone while naturally shortening the throw distance.
Troubleshooting Common Rotor Failures
Even perfectly adjusted rotors will fail if the physical components are compromised. Use this diagnostic framework to identify mechanical faults before assuming your adjustment technique is flawed.
Symptom: Turret Pops Up But Does Not Rotate
Cause: Debris clogging the 40-mesh filter screen at the base of the riser, or stripped cap gears. If the zone operates on well water or reclaimed water, sediment frequently blocks the screen, starving the internal turbine of the water flow required to turn the gears.
Fix: Turn off the water. Grip the turret and pull straight up to expose the riser. Unscrew the filter screen basket at the base, rinse it with a hose, and reinsert. If the screen is clear but rotation fails, the plastic drive gears inside the top cap are stripped. Purchase a replacement cap assembly ($4–$8) rather than replacing the entire body.
Symptom: Rotor Leaks at the Base of the Riser
Cause: Dried out or torn O-rings on the riser stem, often caused by friction from dirt ingress or the use of petroleum-based lubricants.
Fix: Pull the riser and inspect the two black rubber O-rings. Clean them with a damp cloth and apply a generous coating of 100% silicone plumber's grease. Never use petroleum jelly (Vaseline), as petroleum derivatives will chemically degrade the EPDM rubber, causing it to swell and snap within a single irrigation season.
Symptom: Rotor Fails to Retract into the Body
Cause: The stainless steel retraction spring is either unhooked from the internal retaining clip, or dirt has packed into the seal wiper at the top of the body, creating a vacuum lock.
Fix: Flush the top seal with high-pressure water to clear mud. If the spring is unhooked, the riser must be disassembled to re-seat the spring hook into the base collar—a tedious process that usually justifies replacing the $15 rotor outright.
Mastering how to adjust a rotating sprinkler head goes beyond simply turning a screw; it requires understanding the hydraulic relationship between arc, radius, and nozzle flow. By calibrating your gear-drive rotors to their exact mechanical specifications and respecting the precipitation rates of your zone, you will eliminate dry spots, prevent runoff, and extend the lifespan of your irrigation infrastructure.

