
Lawn Care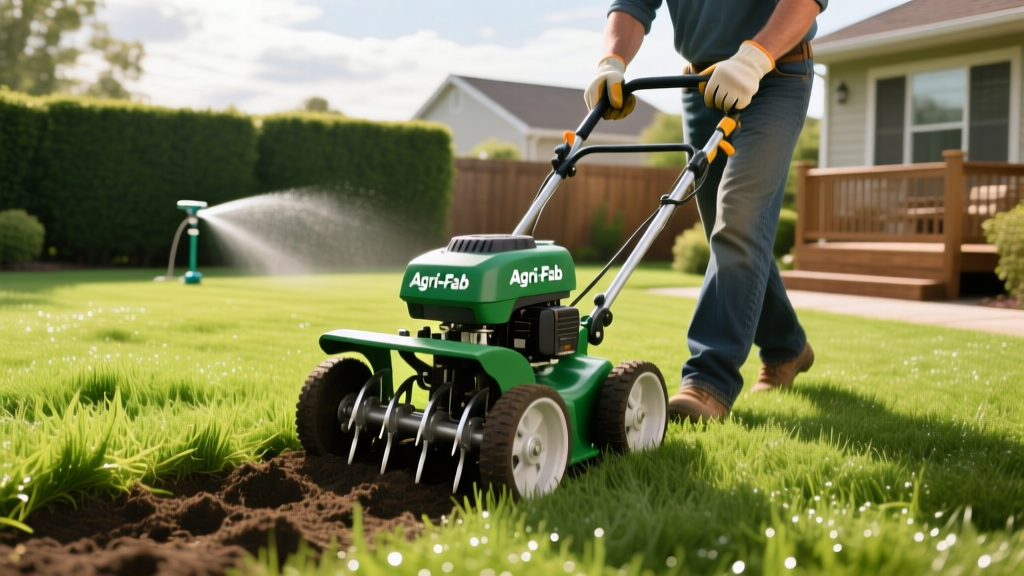
Agri-Fab Aerator Setup and Step-by-Step Lawn Aeration Guide
The Science of Soil Compaction and the Agri-Fab Solution
When soil bulk density exceeds 1.4 g/cm³, turfgrass roots physically cannot penetrate the earth, leading to shallow root systems, water pooling, and severe heat stress. Core aeration resolves this by extracting 2-to-3-inch soil plugs, reducing bulk density and creating direct channels for oxygen, water, and nutrients. Among tow-behind implements, the Agri-Fab 48-Inch Tow Plug Aerator (Model 45-0518) remains an industry standard for residential lawn renovation due to its 32 galvanized steel coring spoons and universal hitch design. However, simply dragging the unit across your yard will not yield professional results. Proper weight calibration, hitch geometry, and timing are critical to achieving the 3-inch plug depth required for genuine soil alleviation.
Phase 1: Pre-Aeration Lawn Preparation
According to turfgrass researchers at Penn State Extension, aerating dry or overly saturated soil will either shatter the coring spoons or create destructive mud smears. Preparation must begin 48 hours before you plan to aerate.
Pre-Aeration Checklist:
- Irrigation: Apply exactly 0.5 inches of water 24 hours prior. Perform the screwdriver test: a standard 6-inch flathead screwdriver should penetrate the soil to a depth of 3 to 4 inches with moderate pressure.
- Mowing: Lower your mower deck to 1.5 inches. Cutting the grass short ensures the coring spoons penetrate the thatch layer and reach the soil surface without bending.
- Utility Marking: Flag all shallow irrigation heads, valve boxes, and invisible dog fence lines. Tow-behind aerators exert immense downward pressure and will crush unmarked PVC sprinkler risers.
Phase 2: Agri-Fab Weight Tray Calibration
The most common failure point when using an Agri-Fab aerator is insufficient weight tray loading, resulting in shallow 1-inch dimples rather than deep core plugs. The Agri-Fab 48-inch model (45-0518) is engineered to hold up to 140 lbs of additional weight, while the 40-inch model (45-0517) holds up to 150 lbs.
| Model | Spoons | Max Weight Capacity | Ideal Weight for Clay Soils | Ideal Weight for Loam/Sand |
|---|---|---|---|---|
| 48-Inch (45-0518) | 32 | 140 lbs | 120 - 140 lbs | 70 - 90 lbs |
| 40-Inch (45-0517) | 30 | 150 lbs | 130 - 150 lbs | 80 - 100 lbs |
Pro Tip: Use Dry Play Sand, Not Cinder Blocks
Never use cinder blocks or concrete chunks in the Agri-Fab weight tray. They shift during turns, creating an unbalanced load that can bend the axle or snap the spoon tines. Fill the tray with dry play sand or bagged topsoil. Sand conforms to the tray, providing a perfectly centered, stable center of gravity.
Never use cinder blocks or concrete chunks in the Agri-Fab weight tray. They shift during turns, creating an unbalanced load that can bend the axle or snap the spoon tines. Fill the tray with dry play sand or bagged topsoil. Sand conforms to the tray, providing a perfectly centered, stable center of gravity.
Phase 3: Step-by-Step Aeration Execution
Proper hitch geometry ensures the spoons enter the ground vertically. If the hitch is too high, the spoons will drag and tear the turf; if too low, they will fail to penetrate.
- Measure Hitch Height: Park your riding mower on a level surface. Measure from the ground to the center of the mower’s rear hitch pin hole. Adjust the Agri-Fab hitch clevis so the aerator’s weight tray sits perfectly parallel to the ground when attached. This is typically 10 to 12 inches from the ground.
- Engage the Weight: Load your dry sand into the tray. Ensure the weight is distributed evenly across the left and right sides of the tray to prevent uneven axle wear.
- Execute Perimeter Passes: Drive along the outer perimeter of your lawn to establish a clean turning zone. Crucial Rule: Never make sharp, zero-radius turns while the spoons are engaged in the soil. This will rip out the turf roots and bend the steel spoons. Always lift the tray (if equipped with a lever) or drive forward 3 feet before initiating a wide turn.
- Cut Perpendicular Patterns: Make your first pass North-to-South, and your second pass East-to-West. Overlapping passes in a cross-hatch pattern doubles the aeration holes per square foot, which is highly recommended for severely compacted high-traffic zones.
Phase 4: Post-Aeration Recovery Protocol
The holes created by the Agri-Fab aerator remain open for roughly 10 to 14 days before natural soil settling closes them. You must capitalize on this window immediately. The Clemson University Home & Garden Information Center recommends pairing aeration with overseeding and fertilization for maximum turf density.
- Leave the Plugs: Do not rake or sweep the extracted soil cores. They contain beneficial microbes and will naturally break down over 2 to 3 weeks, redistributing topsoil into the thatch layer and accelerating thatch decomposition.
- Overseed Within 48 Hours: Drop your grass seed directly over the open aeration holes. The holes provide a protected micro-environment for seed-to-soil contact, dramatically increasing germination rates compared to broadcasting seed over existing turf.
- Apply Starter Fertilizer: Use a high-phosphorus starter fertilizer (such as an 18-24-12 NPK ratio). Phosphorus is immobile in soil; the aeration holes deliver it directly to the root zone where it is required for rapid root development.
- Watering Schedule: Transition to light, frequent watering. Apply 0.1 to 0.2 inches of water twice daily (morning and early afternoon) for the first 14 days to keep the seed and soil plugs consistently moist without washing away the seed.
Troubleshooting Common Agri-Fab Field Issues
Even with careful preparation, field conditions can cause mechanical or agronomic issues. Use this diagnostic guide to correct problems on the fly.
- Symptom: Spoons are pulling 1-inch plugs instead of 3-inch plugs.
Cause: Insufficient downward force or soil is too dry.
Fix: Add 30 lbs of sand to the weight tray. If the tray is already at max capacity, irrigate the lawn with an additional 0.25 inches of water and wait 12 hours. - Symptom: Spoons are clogging with mud and failing to eject cores.
Cause: Soil is oversaturated; clay particles are adhering to the galvanized steel.
Fix: Stop immediately. Allow the lawn to dry for 24 to 48 hours. Clear the spoons manually with a wire brush before resuming. - Symptom: The aerator hitch is dragging on the ground during turns.
Cause: The mower's hitch point is too low, or the aerator's universal joint clevis is pinned in the lowest hole.
Fix: Move the hitch pin to a higher hole on the Agri-Fab clevis bracket to raise the front of the weight tray.
By adhering to these precise weight, moisture, and execution parameters, your Agri-Fab aerator will transform compacted, struggling turf into a deeply rooted, drought-resistant lawn.

