
Lawn Care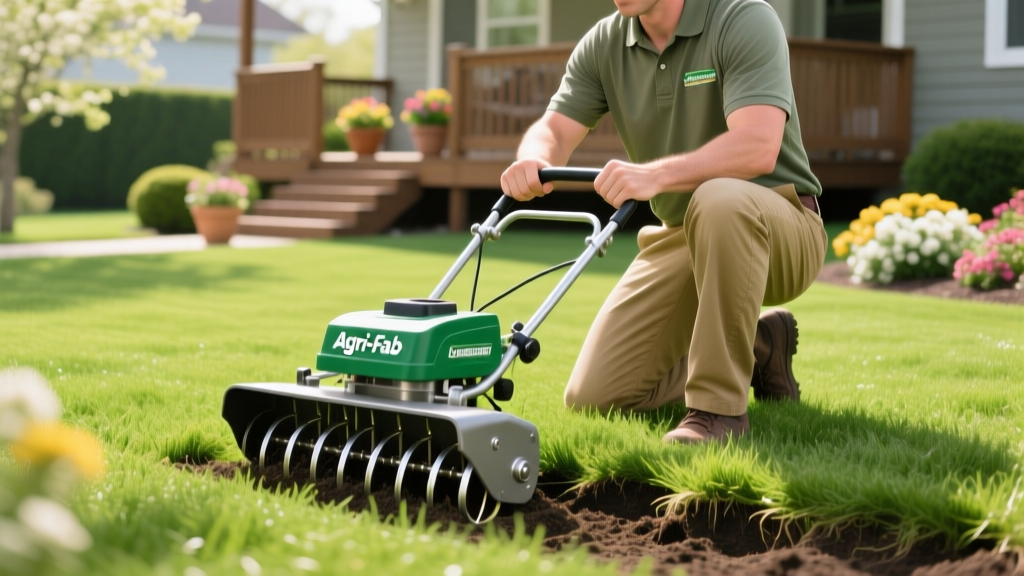
Step-by-Step Guide to Using an Agri-Fab Lawn Aerator
Why Core Aeration Demands Precision Setup
Relieving soil compaction is one of the most impactful cultural practices you can perform on a turfgrass ecosystem. While the University of Minnesota Extension emphasizes that removing 2-to-3-inch soil cores dramatically improves water infiltration and root gas exchange, the execution relies entirely on your equipment setup. The Agri-Fab 40-Inch Plug Aerator (Model 45-0299) remains an industry staple for homeowners due to its 32 galvanized steel coring knives and 150-pound weight capacity. However, simply dragging it across your yard will yield shallow, ineffective results. This step-by-step operational protocol ensures you extract maximum agronomic value from your equipment.
Phase 1: Pre-Aeration Lawn Preparation
Do not hitch your aerator until the turf and soil profile are properly conditioned. Skipping these steps leads to clogged tines and turf tearing.
- Mow Low: Drop your mower deck to 1.5 or 2 inches. Short grass allows the Agri-Fab's tines to penetrate the thatch layer and reach the soil surface without resistance.
- Hydrate the Profile: Apply exactly 1 inch of water 24 to 48 hours before aerating. You want the soil moist, not saturated. Perform the 'screwdriver test': a standard 6-inch flathead screwdriver should slide into the soil with moderate resistance. If it slides in effortlessly, the soil is too wet and the cores will smear inside the tines.
- Map Subsurface Hazards: Flag all shallow sprinkler heads, valve boxes, and buried utility lines. The Agri-Fab's tines penetrate up to 3 inches deep and can easily crush unmarked PVC irrigation lines.
Pro Tip: Mark your sprinkler heads with high-visibility neon flags. Even if you think you know where they are, the visual distortion of towing a 40-inch implement behind a riding mower alters your spatial awareness.
Phase 2: Weight Calibration Matrix
The most common failure mode with tow-behind aerators is insufficient downforce. The Agri-Fab 40-inch tray is engineered to hold up to 150 pounds of additional weight. According to Penn State Extension, achieving a minimum 3-inch core depth requires aggressive weight distribution tailored to your specific soil morphology.
| Soil Type | Target Core Depth | Required Tray Weight | Recommended Material |
|---|---|---|---|
| Heavy Clay | 3.0 - 4.0 inches | 130 - 150 lbs | 5 cinder blocks (approx. 28 lbs each) |
| Clay Loam | 2.5 - 3.0 inches | 100 - 120 lbs | 4 cinder blocks or bagged gravel |
| Sandy Loam | 2.0 - 3.0 inches | 70 - 90 lbs | 2 cinder blocks + 1 bag play sand |
Secure your weight using ratchet straps across the top of the tray. Loose cinder blocks will shift during turns, altering the center of gravity and potentially damaging the aerator's steel chassis.
Phase 3: Hitching and Towing Execution
Proper hitch geometry prevents the front row of tines from gouging the turf while the rear row barely scratches the surface.
- Set the Hitch Height: Measure the distance from the ground to the hitch pin hole on your riding mower's rear bracket. It should be between 11 and 13 inches. If your mower's hitch is too high, the Agri-Fab will tilt backward, lifting the front tines out of the soil.
- Engage the Transport Lever: Before moving the tractor, pull the aerator's transport engagement lever UP. This locks the tine spools in the raised position, protecting your driveway and the tines themselves.
- Execute the First Pass: Drive to the starting edge of your lawn. Push the transport lever DOWN to drop the tines into the soil. Drive forward in a straight line at a slow, steady pace (2 to 3 MPH).
- The Turning Protocol: Never turn the mower while the tines are engaged in the earth. Pull the lever UP to raise the tines, execute your turn, and push the lever DOWN only when the tractor is straight again. Turning with engaged tines will bend the galvanized steel knives and rip massive chunks of turf from the root zone.
- Overlap Pattern: Overlap each subsequent pass by 10 to 15 percent. For highly compacted areas (like pathways or play zones), make a second pass perpendicular to the first, creating a crosshatch pattern.
Warning: Do not tow the Agri-Fab aerator behind an ATV or UTV unless you have fabricated a custom low-profile hitch. Standard ATV receiver hitches sit too high and will cause the aerator to tilt backward, rendering the front tines useless.
Phase 4: Post-Aeration Recovery and Maintenance
The window of opportunity immediately following core aeration is critical for turf recovery and enhancement.
- Leave the Plugs: Do not rake up the extracted soil cores. Allow them to dry for 48 hours, then mow over them. The mower blades will shatter the cores, redistributing valuable soil microorganisms back into the thatch layer to accelerate decomposition.
- Overseed and Fertilize: Within 24 hours of aeration, broadcast your grass seed and apply a starter fertilizer. The open holes provide direct seed-to-soil contact, bypassing the thatch barrier and increasing germination rates by up to 40 percent.
- Tine Maintenance: Once the aerator is back on the pavement, use a wire brush to clear compacted clay from the coring knives. Spray the tines generously with a silicone-based lubricant or fluid film to prevent flash rusting before storage.
Troubleshooting Common Agri-Fab Operational Failures
| Symptom | Probable Cause | Corrective Action |
|---|---|---|
| Tines extract shallow, crumbling cores | Soil is too dry; insufficient weight | Water lawn deeply 48 hours prior; add 40 lbs of weight |
| Cores smear and clog inside the knives | Soil is saturated / muddy | Halt operations; wait 3-4 days for profile to drain |
| Turf tears during turns | Operator turned with tines engaged | Always raise transport lever before altering steering angle |
| Aerator pulls heavily to one side | Uneven weight distribution in tray | Center cinder blocks; strap weights tightly to chassis |
Mastering the Agri-Fab lawn aerator requires treating it as a precision agronomic tool rather than a simple lawn tractor attachment. By strictly adhering to soil moisture parameters, dialing in your weight calibration, and respecting the turning radius protocols, you will transform compacted, struggling turf into a deeply rooted, drought-resistant lawn.

