
Lawn Care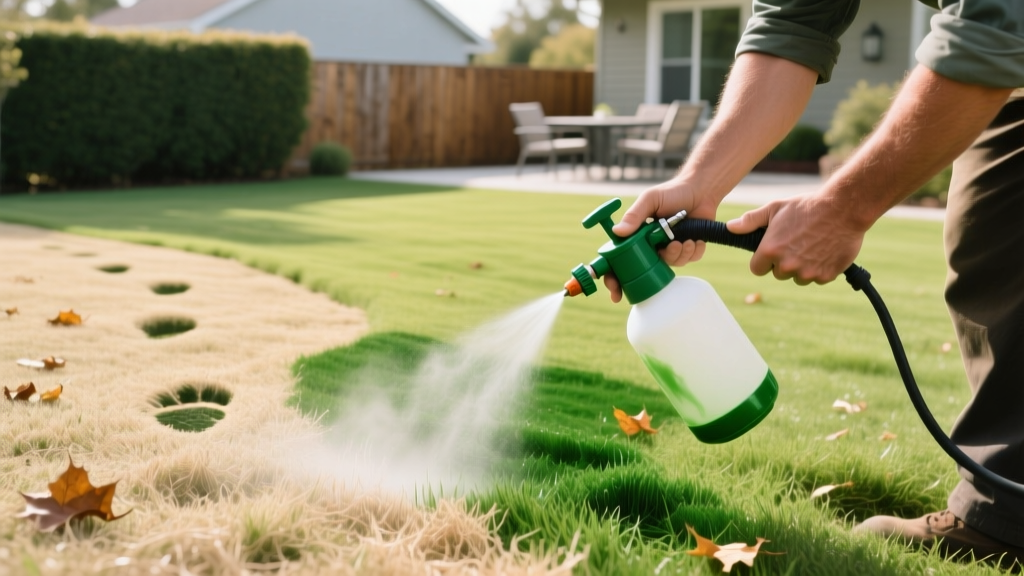
How to Apply Lawn Paint to Dormant Grass: Step-by-Step Guide
The Science and Strategy Behind Turf Colorants
Applying lawn paint—technically known as turf colorant or turf pigment—is a highly effective maintenance procedure for homeowners managing warm-season grasses like Bermuda, Zoysia, and Centipede during winter dormancy. Unlike temporary dyes that wash away after a single rainstorm, modern commercial-grade colorants utilize a polyurethane or acrylic binder system. This binder physically encapsulates the grass blade, locking the pigment to the leaf tissue and providing a natural green appearance that lasts for 60 to 90 days.
According to turfgrass researchers at NC State TurfFiles, colorants offer a sustainable alternative to winter overseeding with ryegrass. Overseeding requires significant water usage, frequent mowing, and can damage the underlying warm-season turf during the spring transition. Turf pigments, conversely, require zero supplemental irrigation and protect the dormant grass blade from UV degradation.
Decision Framework: Colorant vs. Overseeding
Choose lawn paint if: You live in a drought-restricted zone, want to eliminate winter mowing, or are managing a high-traffic lawn where ryegrass would quickly turn to mud.
Choose overseeding if: You need a physically durable, playable surface for winter sports, or prefer the natural smell and cooling effect of living winter grass.
Choose lawn paint if: You live in a drought-restricted zone, want to eliminate winter mowing, or are managing a high-traffic lawn where ryegrass would quickly turn to mud.
Choose overseeding if: You need a physically durable, playable surface for winter sports, or prefer the natural smell and cooling effect of living winter grass.
Essential Equipment and Material Sizing
Success with turf colorants relies heavily on using the right concentration and application hardware. Cone nozzles and hose-end sprayers will result in severe streaking. You must use a pump or backpack sprayer equipped with a flat fan nozzle.
| Product (2026 Market) | Grade | Dilution Ratio | Coverage (per gal) | Avg. Cost |
|---|---|---|---|---|
| Geoponics Endurant Premium | Commercial | 1:1 to 1:3 | 1,500 - 2,500 sq ft | $145.00 / gal |
| EnviroColor Concentrated | Prosumer | 1:1 to 1:4 | 1,000 - 1,500 sq ft | $48.00 / qt |
| Lesco Green Turf Paint | Commercial | 1:1 to 1:2 | 1,200 - 2,000 sq ft | $125.00 / gal |
Note: Pricing reflects average retail and landscape supplier rates as of early 2026. Always check manufacturer direct pages for bulk discounts.
Step 1: Pre-Application Lawn Preparation
The canvas must be perfectly prepped before introducing pigments. Dormant grass blades develop a waxy cuticle that repels water; if you apply colorant over debris or at the wrong height, the pigment will flake off within weeks.
- Scalp and Lower the Mower: Drop your mower deck by one notch (approximately 0.5 inches lower than your final summer height). For Bermuda, aim for a 1-inch cut. This removes the frayed, dead tips of the grass blades, exposing fresh tissue that the binder can grip.
- Remove All Clippings and Debris: Use a leaf blower or a bagging mower to remove every clipping. If you paint over a leaf or a twig and it later blows away, you will be left with a stark brown void in your green lawn.
- Check the Weather Window: You need a minimum of 4 hours of dry, above-freezing weather. Ideal application temperatures are between 50°F and 75°F. Do not apply if rain is forecasted within 24 hours or if heavy morning dew is present.
- Add a Surfactant (Optional but Recommended): Adding a non-ionic surfactant (wetting agent) at a rate of 1 teaspoon per gallon of mixed solution breaks the surface tension of the dormant grass, allowing the pigment to coat the blade evenly rather than beading up.
Step 2: Mixing and Diluting the Turf Colorant
Concentrated turf paint is incredibly thick and heavily pigmented. Improper mixing leads to clogged sprayer tips and uneven color distribution.
The Agitation Protocol
Never pour the thick concentrate directly into an empty sprayer tank. Follow this sequence:
- Fill your sprayer tank halfway with clean water.
- Pour the measured concentrate into the water. (For moderately dormant Zoysia, start with a 1:2 ratio—one part paint to two parts water. For completely brown, deeply dormant Bermuda, use a 1:1 ratio).
- Fill the tank the rest of the way with water.
- Agitate vigorously. If using a backpack sprayer, shake it for 60 seconds. If using a motorized sprayer, run the pump with the return line open for 3 minutes to create a vortex.
Warning: Pigments settle rapidly. You must shake your backpack sprayer for 10 seconds every 5 minutes while walking the lawn. If the liquid sits stagnant in the tank for more than 15 minutes, the heavy particles will sink to the bottom, resulting in clear water spraying first and thick sludge spraying last.
Step 3: Sprayer Calibration and Application Technique
The physical application is where most DIYers fail, resulting in zebra-striping across the yard. According to integrated pest and turf management guidelines from the University of California Agriculture and Natural Resources division, uniform droplet size is critical for cosmetic turf treatments.
Hardware Configuration
Remove the standard adjustable cone nozzle that came with your sprayer. Replace it with a TeeJet 8002 or 8003 Flat Fan nozzle. Flat fan nozzles produce a uniform, tapered spray pattern that allows for seamless overlapping. Set your sprayer pressure to roughly 30 to 40 PSI. Pressures above 50 PSI will atomize the paint into a fine mist that will drift onto your house siding, fences, and neighboring driveways.
The Cross-Hatch Spraying Method
- Perimeter Pass: Spray the edges of the lawn first, keeping the nozzle pointed slightly inward to avoid painting concrete sidewalks.
- First Direction (North-South): Walk at a steady, moderate pace (about 2.5 miles per hour). Keep the nozzle exactly 18 to 24 inches above the grass canopy. Overlap each pass by 50%.
- Second Direction (East-West): Once the entire lawn is covered in one direction, turn 90 degrees and repeat the process. This cross-hatch pattern guarantees that the sides of the grass blades are coated, not just the top surface, preventing a brown under-canopy from showing when the wind blows.
Step 4: Curing, Cleanup, and Post-Application Care
Once the application is complete, the chemical curing process begins. The acrylic binders require time to cross-link and adhere to the cellulose in the grass blade.
- Touch-Dry Time: 1 to 2 hours. Keep pets and children off the lawn during this window.
- Rainfast Time: 12 to 24 hours. If it rains before the 12-hour mark, the pigment will wash into the soil and require a second, lighter touch-up coat.
- Equipment Cleanup: Flush your sprayer tank, hoses, and nozzle with warm soapy water immediately. If the paint dries inside the sprayer lines, it will permanently ruin the seals and clog the nozzle tips.
- Concrete Remediation: If you accidentally oversprayed onto a concrete driveway, act immediately. While wet, it wipes off with a damp rag. If it dries, you will need to scrub the concrete with a stiff-bristle brush and a solution of Trisodium Phosphate (TSP) or a commercial concrete degreaser.
Troubleshooting Common Application Failures
Even with careful planning, environmental variables can affect the final result. Use this diagnostic guide to correct issues.
- Symptom: Severe Streaking (Zebra Striping)
Cause: Walking too fast, failing to overlap by 50%, or spraying with a cone nozzle.
Fix: Wait 48 hours for the first coat to cure, then apply a very light, diluted mist coat (1 part paint to 4 parts water) perpendicular to the streaks to blend them. - Symptom: Color Rubs Off on Shoes and Pets
Cause: The grass was wet with dew during application, or the temperature was below 45°F, preventing the binder from curing.
Fix: Unfortunately, the binder has failed. You must wait for a warm, dry day and apply a fresh, thin topcoat mixed with a surfactant to seal the underlying layer. - Symptom: The Lawn Looks Purple or Blue-Green
Cause: Using a 'spring green' colorant on deeply dormant, brown grass. The yellow/brown undertones of the dead grass mix with the blue undertones of the cheap pigment.
Fix: Always use a colorant labeled specifically for 'dormant' or 'winter' grass. These contain higher levels of yellow oxide and black oxide pigments to mimic the natural olive-green tone of healthy winter turf.
Spring Transition and Fading
As spring arrives and soil temperatures consistently reach 65°F, your warm-season grass will break dormancy and begin pushing new, naturally green growth from the crown. The painted, dead blades will eventually be pushed out and decompose. You do not need to use chemical strippers or harsh raking to remove the lawn paint. Simply resume your normal spring mowing schedule, and the mower will naturally remove the painted tips over the course of 3 to 4 weeks, revealing a seamless transition to your living, summer lawn.

