
Lawn Care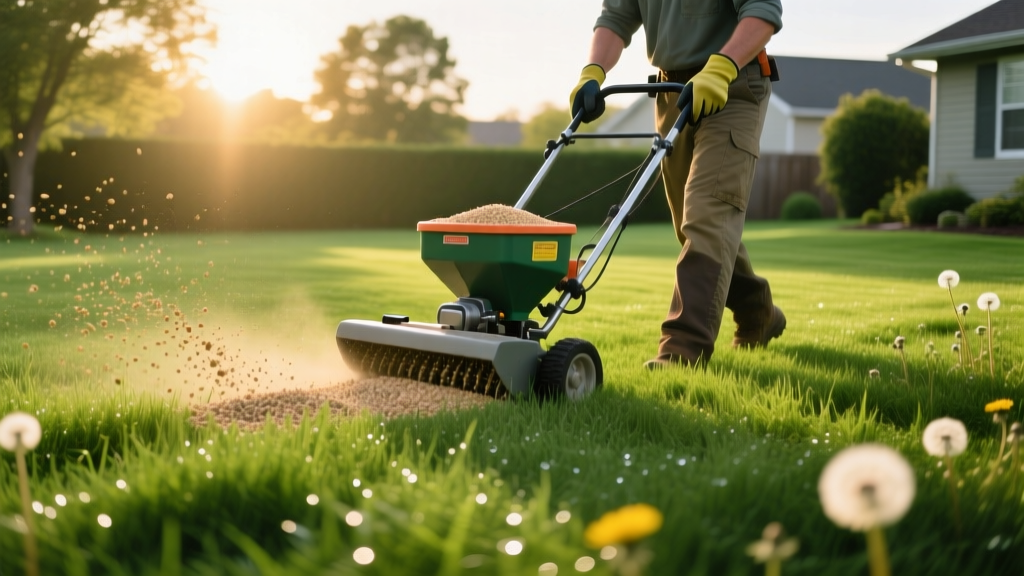
How to Apply Grass Food: A Step-by-Step Lawn Feeding Guide
The term "grass food" is a consumer-friendly label for what agronomists call lawn fertilizer. While marketing campaigns often depict it as a simple miracle powder, applying grass food correctly requires precise calibration, environmental awareness, and an understanding of soil chemistry. Misapplication leads to fertilizer burn, excessive thatch buildup, and nutrient runoff into local waterways. This step-by-step procedure outlines the exact mechanics of feeding established cool-season and warm-season lawns using granular products.
Decoding the NPK Ratio on Grass Food Bags
Every commercial grass food bag displays a three-number NPK ratio representing Nitrogen (N), Phosphorus (P), and Potassium (K). Understanding these macronutrients is the first step in selecting the right product for your specific turf needs.
- Nitrogen (N): The primary driver of vegetative growth and deep green coloration. Look for products where at least 50% of the nitrogen is labeled as "slow-release" or "water-insoluble" (WIN) to prevent rapid flushes of growth and subsequent burn.
- Phosphorus (P): Essential for root development. However, many states now ban phosphorus in lawn fertilizers unless you are establishing a new lawn from seed or sod, or have a soil test proving a deficiency. For established lawns, the middle number should typically be zero (e.g., 30-0-4).
- Potassium (K): Crucial for cellular regulation, drought tolerance, and disease resistance. This is the "immune system" nutrient for your turf.
The 1-Pound Rule: According to the University of Minnesota Extension, you should never apply more than 1 pound of actual nitrogen per 1,000 square feet in a single application. To calculate this, divide 100 by the first number on the bag. For a 32-0-4 grass food, you need 3.12 pounds of product per 1,000 square feet to deliver exactly 1 pound of nitrogen.
Phase 1: Soil Testing and Product Selection
Blindly applying grass food without a recent soil test is a common maintenance failure. Soil pH dictates nutrient availability; if your pH is below 6.0 or above 7.5, the grass roots cannot absorb the nitrogen and potassium you are applying, regardless of the product's quality. Send a core sample to a university extension lab (typically costing $15 to $30) rather than relying on cheap DIY colorimetric kits.
Grass Food Selection Matrix
| Lawn Scenario | Ideal NPK Ratio | Recommended Product Type | Application Timing |
|---|---|---|---|
| New Seed / Sod | 18-24-12 | Starter Fertilizer (High Phosphorus) | Day of seeding/sodding |
| Spring Established Cool-Season | 20-0-5 | Slow-Release Synthetic / Organic Blend | Mid-to-Late Spring (May) |
| Fall Winterizer | 32-0-10 | Fast-Release Urea / Methylene Urea | Late Fall (After last mow) |
| Summer Warm-Season (Bermuda/Zoysia) | 15-0-15 | Coated Sulfur-Coated Urea (SCU) | Early Summer (June) |
Phase 2: Spreader Calibration and Preparation
Rotary (broadcast) spreaders are the standard for residential lawns due to their wide swath width, but they require strict edge-guarding to prevent granules from landing on hardscapes. Drop spreaders offer precision but are too slow for properties over 5,000 square feet.
Calibration Steps for Rotary Spreaders
- Check the Hopper: Ensure the agitator wire inside the hopper moves freely. A stuck agitator causes uneven clumping and starvation lines in your turf.
- Verify the Setting: Check the back of your specific grass food bag for the manufacturer's recommended setting. For example, Scotts Turf Builder typically requires a setting of 3.5 on the Scotts EdgeGuard Mini, while organic options like Milorganite often require a much wider setting, such as 12 or 13, due to the larger, less dense granule size.
- The Driveway Test: Before touching your grass, pour a few pounds of product into the spreader and walk across your concrete driveway. Observe the throw pattern. It should extend 4 to 6 feet to the side. Adjust the flow rate dial if the throw is too narrow.
Phase 3: The Application Walk
Execution is where most DIY lawn care programs fail. Overlapping passes incorrectly causes "striping"—alternating bands of dark green (overfed) and yellow (underfed) grass.
Warning: Avoiding Overlap Burn
When using a rotary spreader with an edge guard engaged, the product only throws to one side. You must keep the edge guard side facing toward the lawn center. When turning around at the end of a pass, close the hopper completely. Turning with an open hopper dumps a concentrated pile of grass food at the perimeter, which will chemically burn the turf within 48 hours.
When using a rotary spreader with an edge guard engaged, the product only throws to one side. You must keep the edge guard side facing toward the lawn center. When turning around at the end of a pass, close the hopper completely. Turning with an open hopper dumps a concentrated pile of grass food at the perimeter, which will chemically burn the turf within 48 hours.
Step-by-Step Walking Pattern:
- The Perimeter Pass: Walk the entire outer boundary of your lawn with the edge guard facing outward toward the fence or garden bed. This creates a buffer zone.
- The Interior Grid: Walk back and forth across the lawn in straight lines. Use a fixed landmark (like a tree or a window on your house) to guide your turnaround points, ensuring your wheel tracks overlap the previous tire track by exactly one tire width.
- The Crosshatch (Optional but Recommended): For premium results, apply half your total calculated product in a North-South pattern, and the second half in an East-West pattern. This eliminates any missed strips.
- Empty the Hopper: Never leave unused grass food in the spreader. The moisture in the air will cause the salts to corrode the metal axle and fuse the plastic shut within a week.
Phase 4: Post-Application Watering and Cleanup
Granular grass food sits inert on the soil surface until moisture dissolves the prill coating and carries the nutrients into the root zone. However, watering incorrectly can wash the product away or promote fungal diseases.
- The 1/4 Inch Rule: You need to apply exactly 0.25 inches of water immediately after application. This is roughly 15 minutes on a standard pop-up rotor irrigation zone. This activates the fertilizer without pushing it below the root zone (leaching).
- Sweep Hardscapes: Use a stiff push broom to sweep any stray granules off driveways, sidewalks, and streets back into the lawn. According to the Environmental Protection Agency (EPA), fertilizer left on impervious surfaces washes directly into storm drains, causing severe algae blooms and eutrophication in local water bodies.
- Mowing Delay: Wait at least 48 hours before mowing to allow the granules to settle into the soil profile and dissolve. Mowing too soon will vacuum up the expensive nutrients into your grass catcher.
DIY Cost Analysis vs. Professional Lawn Services
Understanding the economics of grass food helps homeowners decide whether to maintain a DIY program or hire a licensed applicator. In 2026, premium bagged fertilizers have stabilized in price following previous supply chain disruptions, but labor costs for professional services have risen.
Annual Cost Breakdown (Per 5,000 Sq. Ft. Lawn)
| Expense Category | DIY Grass Food Program | Professional Lawn Service |
|---|---|---|
| Product / Material Costs | $60 - $85 (4 applications) | Included in service fee |
| Equipment (Spreader Amortization) | $15 per year | Included |
| Labor / Application Fee | $0 (Your time) | $250 - $400 annually |
| Weed Control Add-ons | $40 (Spot spray herbicides) | Included in most 5-step plans |
| Total Annual Cost | $115 - $140 | $250 - $400 |
For homeowners willing to invest two hours per month in calibration, application, and cleanup, the DIY grass food route offers substantial financial savings. However, professional services provide access to commercial-grade liquid herbicides and specialized micronutrients (like chelated iron) that are not available in consumer-grade granular bags. Ultimately, the success of either route relies entirely on adherence to the 1-pound nitrogen rule and strict calibration protocols.

